Module_Development_4:_Adding_Frontend_Interactivity
In this third part of the basic module development tutorial, we are going to create a custom backend administration interface for our module package. It will provide a convenient way to add, modify, and delete planets using the database access methods we implemented in the previous part.
Please note that you should adhere to the Papaya CMS Coding Standards, especially if you plan to contribute your modules for the papaya Community.
This tutorial makes use of unit tests which is a highly recommended way to build software. In order to have a papaya CMS version that includes the PHPUnit framework and the PapayaTestCase class, you need to check out papaya CMS from the SVN repository. Instructions on how to obtain it can be found here.
Overview of files and directories
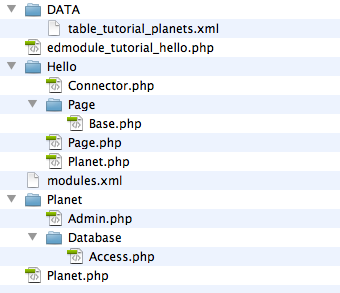
After finishing this tutorial, you will have created the following files and subdirectories in papaya-lib/modules/special/myproject/tutorial:
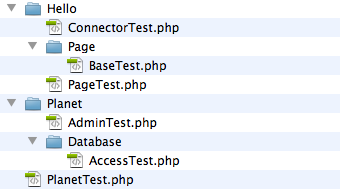
In the testing/tests-unittests/papaya-lib/modules/special/myprojects/tutorial directory, you will have created the following structure: