*New Version 1.0.11 This version introduces several renamed functions to enhance code clarity, readability, and long-term maintainability. Alongside these structural improvements, all function docstrings have been updated with detailed explanations, providing clearer guidance on usage, parameters, and expected outputs.
While these changes improve the developer experience and codebase consistency, they also introduce breaking changes that users need to be aware of.
-
Breaking Backward Compatibility
Code that references the previous function names will no longer work, typically resulting in runtime errors (e.g., AttributeError in Python).
Applications or tools relying on the library may crash or behave unexpectedly unless updated to use the new function names.
-
Required Code Refactoring
Developers must update their code to match the new naming conventions.
This refactoring can be time-consuming, particularly in larger projects or those where the library is deeply integrated.
pip install PygameShader==1.0.11


PygameShader is a wrapper around the Pygame library, written in Python and Cython, designed to add advanced visual effects to multimedia applications, including 2D games, arcade games, and real-time image processing for video and camera feeds.
This library extends Pygame by enabling developers to apply shaders to sprite textures, surfaces, and the entire game display, significantly enhancing the visual experience with minimal performance overhead.
PygameShader does not include internal Sphinx documentation by default.
However, you can access comprehensive documentation in English, French, and Spanish on the project's GitHub page.
Detailed documentation can be found within the sphinx directory of the repository.
The HTML versions of the documentation are located in the following folders:
- French:
Sphinx/_build/html/fr - Spanish:
Sphinx/_build/html/es - English (default):
Sphinx/_build/html
PygameShader supports multiple image formats, including BMP, GIF (non-animated), JPEG, and PNG. However, Pygame may not always be built with support for all formats. At a minimum, BMP is always available.
To check if additional image formats are supported, run:
import pygame
print(pygame.image.get_extended())
If it returns True, then PNG, JPG, and GIF formats are also supported.
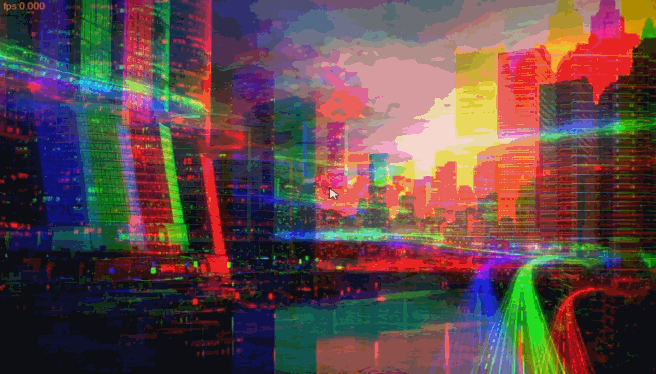
Pygame Shader is optimized for real-time rendering at 60 FPS, particularly for games running at medium resolutions (1024x768). However, performance may vary depending on the complexity of the shader. Certain effects, like median filtering and predator vision, require multiple shaders to create composite effects, making them more computationally demanding. While most shaders will maintain smooth performance at medium resolutions, higher resolutions may impact frame rates—experimenting with different settings is recommended.
If you are using shaders primarily for sprite texturing and special effects, performance should remain extremely fast due to Cython-based optimizations. To maintain a high frame rate, it is advisable to keep sprite texture sizes within reasonable limits, such as 200x200 pixels, to avoid unnecessary processing overhead.
- Shader Effects: Enhance your game's visual appeal with advanced shading techniques.
- Real-time Rendering: Apply effects to the entire game display at high frame rates.
- Optimized for Speed: Efficient Cython implementation ensures smooth performance.
- Sprite & Surface Customization: Modify textures and surfaces dynamically.
Pygame Shader provides powerful tools to improve the overall look and feel of your game, whether by enhancing sprite textures or applying full-screen visual effects.
The project is released under the GNU General Public License Version 3 (GPLv3).
Some scripts have been ported to the GPU using CUPY and CUDA raw kernels, allowing them to run on NVIDIA graphics cards with a compute capability of 3.0 or higher. Note that these shaders are compatible only with NVIDIA chipsets.
To use the GPU shaders, you must have:
- The
CUPYlibrary installed on your system. - The CUDA Toolkit installed. Supported versions include:
v10.2,v11.0,v11.1,v11.2,v11.3,v11.4,v11.5, andv11.6.
For full installation instructions, please refer to the CUPY installation guide.
The GPU shaders are still experimental. Their performance is constrained by PCI Express bandwidth due to the volume of data transferred from the CPU to the GPU, especially during real-time rendering.
For an example of real-time rendering of a pygame.Surface, check out the GPU_demo_ripple.py script in the Demo folder.
You may wonder how these shaders compare to GLSL (GL Shading Language). While GLSL undeniably outperforms CUPY and CUDA in raw graphics performance, CUDA leverages its highly parallelized architecture to accelerate algorithms originally designed for CPU architectures (in Python and Cython).
- GLSL (Shading Language): Primarily used for graphics rendering.
- CUDA: Allows you to run compute shaders without relying on a graphics API and without being tied to a specific language. CUDA programs are compiled into PTX, NVIDIA's equivalent of x86 assembly for the GPU.
For further insights, check out this excellent post on GPU programming.
To import the GPU shaders in your Python code, use:
from PygameShader.shader_gpu import *In the PygameShader Demo directory
(press ESC to quit the demo)
Some demos may require you to move the mouse in order to generate the effects.
C:\>python demo_fire.py
C:\>python demo_transition.py
C:\>python demo_wave.py
if cupy and CUDA are installed correctly on your system you can run the GPU shaders
C:\>python gpu_chromatic.py
C:\>python gpu_zoom.py
C:\>python gpu_wave.py
Check the link for newest version https://pypi.org/project/PygameShader/
- Available python build 3.6, 3.7, 3.8, 3.9, 3.10, 3.11 and source build
- Compatible WINDOWS and LINUX for platform x86, x86_64
pip install PygameShader
- Checking the installed version (Imported module is case sensitive)
>>>from PygameShader.shader import __VERSION__
>>>__VERSION__Download the source code and decompress the Tar or zip file
- Linux
tar -xvf source-1.0.8.tar.gz
cd PygameShader-1.0.8
python3 setup.py bdist_wheel
cd dist
pip3 install PygameShader-xxxxxx - Windows
Decompress the archive and enter PygameShader directory
python setup.py bdist_wheel
cd dist
pip install PygameShader-xxxxxxEach time you are modifying any of the pyx files such as shader.pyx, shader.pxd, init.pxd or any external C code if applicable
- open a terminal window
- Go in the main project directory where (shader.pyx & shader.pxd files are located)
- run :
C:\>python setup_shader.py build_ext --inplace --force
If you have to compile the code with a specific python
version, make sure to reference the right python version
in (python38 setup_shader.py build_ext --inplace)
If the compilation fail, refers to the requirement section and make sure Cython and a C-compiler are correctly install on your system.
- A compiler such visual studio, MSVC, CGYWIN setup correctly on
your system.
- a C compiler for windows (Visual Studio, MinGW etc) install on your system and linked to your Windows environment. Note that some adjustment might be needed once a compiler is install on your system, refer to external documentation or tutorial in order to setup this process.e.g :
https://devblogs.microsoft.com/python/unable-to-find-vcvarsall-bat/
Edit the file config.py and check the variable OPENMP. You can enable or disable multi-processing
# Build the cython code with mutli-processing (OPENMP)
OPENMP : bool = True
Save the change and build the cython code with the following instruction:
C:\PygameShader\PygameShader\python setup_shader.py build_ext --inplace --forceIf the project build successfully, the compilation will end up with the following lines
Generating code
Finished generating code
If you have any compilation error(s) refer to the section Building cython code, make sure
your system has the following program & libraries installed. Check also that the code is not
running in a different thread.
- Python > 3.6
- numpy >= 1.18
- pygame >=2.4.0
- cython >=3.0.2
- setuptools~=54.1.1
- cupy >=9.6.0
- A C compiler for windows (Visual Studio, MinGW etc)
The pip packages (including LINUX architectures i686 and x86_64), are build by default with multiprocessing for
the CPU's shader. If you need to build the package without multiprocessing, you can change the flag OPENMP
in the setup.py file such as :
To build the package without multiprocessing (OPENMP=False)
in the config.py file
# True enable the multiprocessing
OPENMP : bool = True
OPENMP_PROC : str = "-fopenmp"
Then compile the code (e.g : Version 1.0.8, 64-bit python3.7)
C:\PygameShader\python setup.py bdist_wheel
cd dist
pip install PygameShader-1.0.8-cp37-cp37m-win_amd64.whl
The same variable OPENMP exist also in the setup_config.py file when building the Cython code
- Building PygameShader package will automatically check and compile the source code, you do not need to build manually the Cython code.
Yoann Berenguer
Python > 3.6
numpy >= 1.18
pygame >=2.4.0
cython >=3.0.2
setuptools~=54.1.1
*cupy >=9.6.0
(*) Used for GPU shader (not compulsory during installation). In order to use the GPU shaders you would need to have a NVIDIA graphic card, CUDA and CUPY install sucessfully on your platform.
GNU GENERAL PUBLIC LICENSE Version 3
Copyright (c) 2019 Yoann Berenguer
Copyright (C) 2007 Free Software Foundation, Inc. https://fsf.org/ Everyone is permitted to copy and distribute verbatim copies of this license document, but changing it is not allowed.
>>> import PygameShader
>>> from PygameShader.tests.test_shader import run_testsuite
>>> run_testsuite()