The ATtiny13 is a pretty much the cheapest AVR available. However, it only has 64 byte RAM and 4k FLASH storage so it can only run the smallest projects.
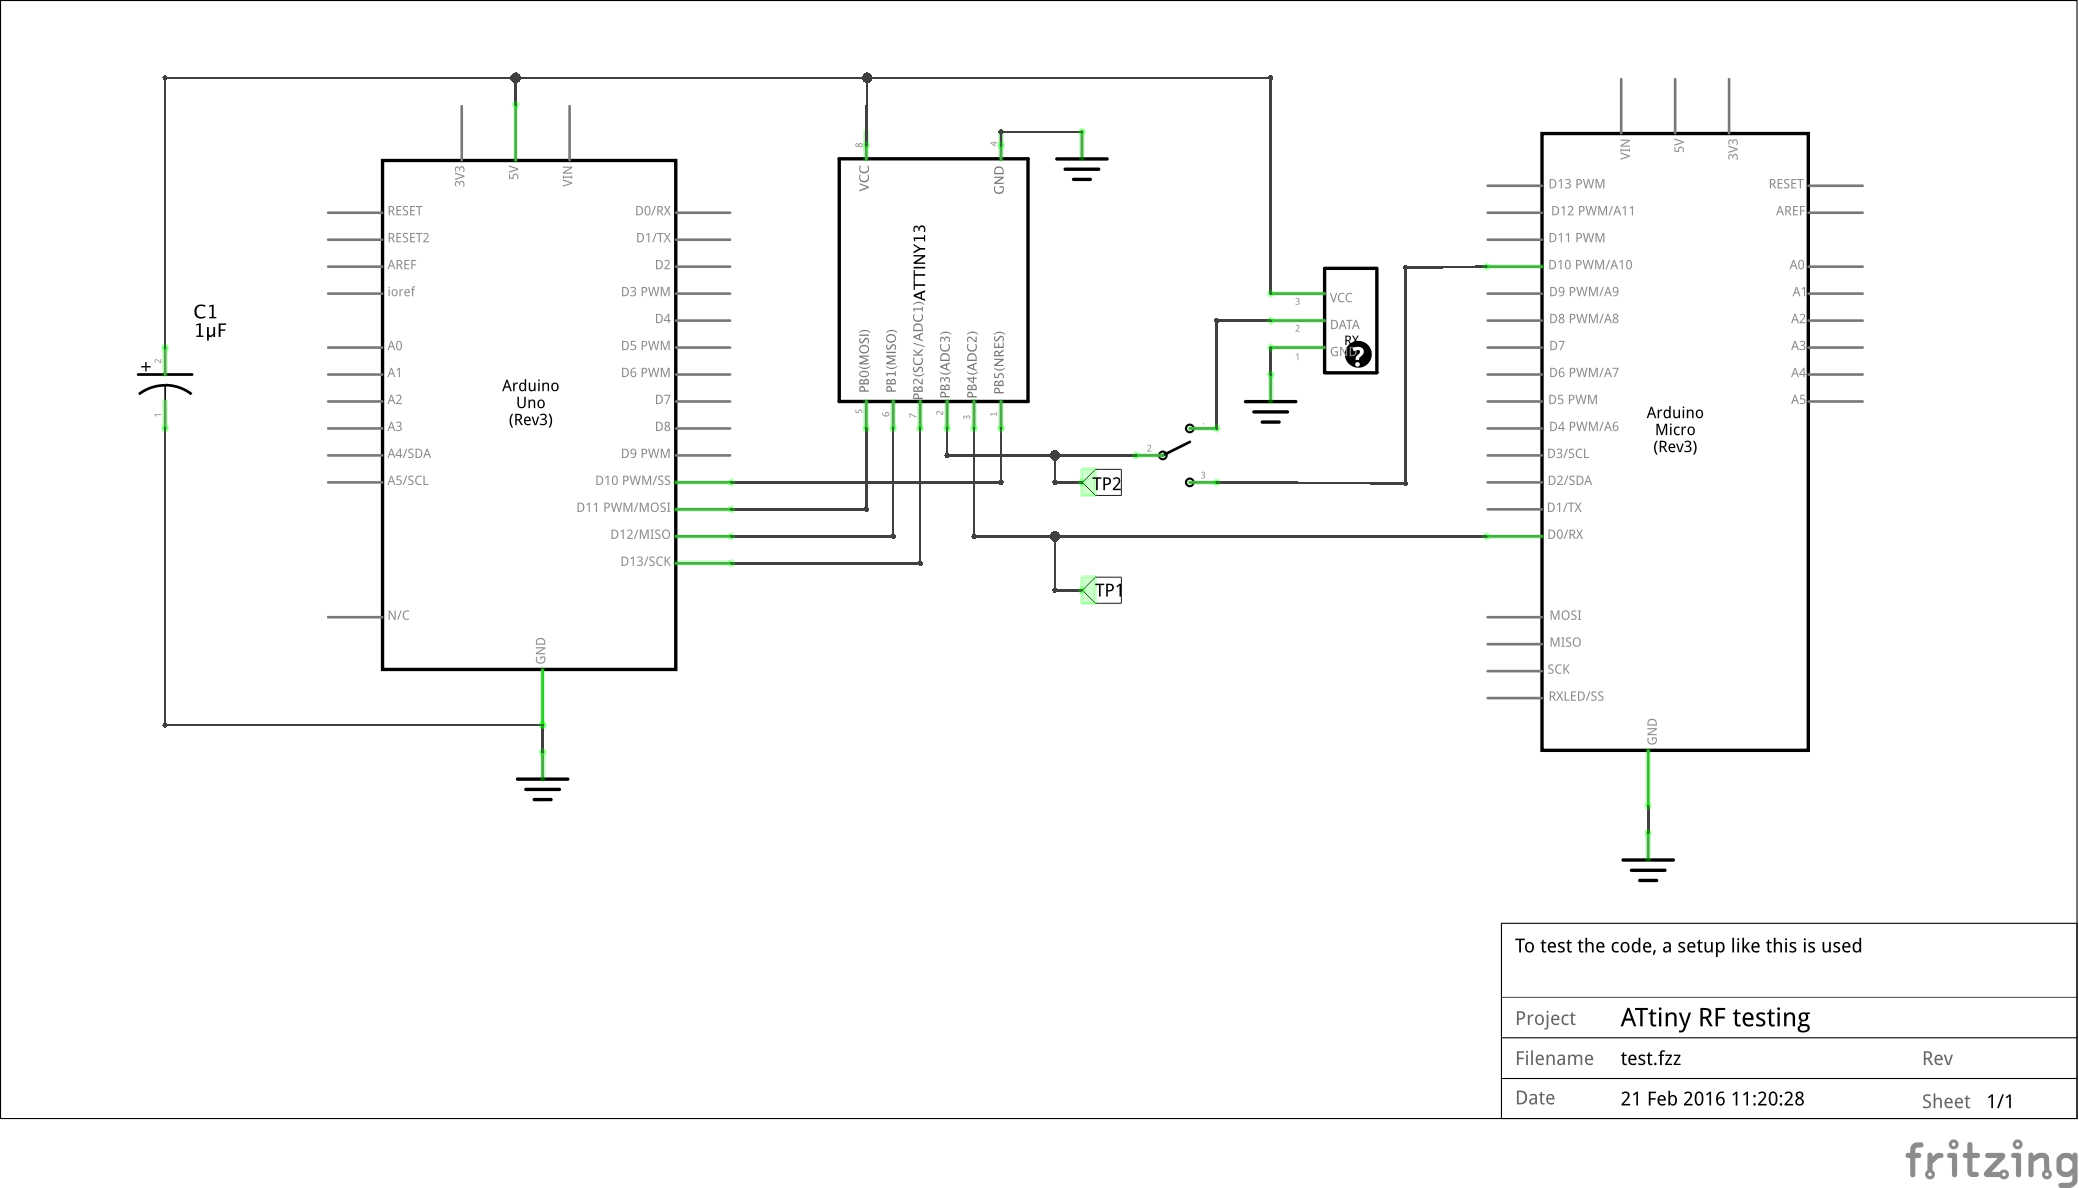
With this code I am trying to implement a dead-simple RF decoder: An 433 MHz RF receiver is connected to the ATtiny which decodes the RF signal and sends the result over a serial connection to another device.
Note: This is work in progress.
In factory settings your ATtiny will run at 1.2MHz instead of 9.6MHz. Use the following command
avrdude -P /dev/tty.usbmodem1411 -b 19200 -c avrisp -p attiny13 -U lfuse:w:0x7a:m
You can read your fuse settings with
avrdude -P /dev/tty.usbmodem1411 -c avrisp -p attiny13 -U lfuse:r:-:h -b 19200
For testing I used an Arduino UNO as an ISP and an Arduino Micro to 'talk' to the running ATtiny.

Since the ATtiny13 has very little RAM, an out-of-the-box solution would not work. recv.cpp is able recognise commands. You can add or change the recognised commands by changing the handleCommand() function. If a command is recognised you can use TxByte(char) to send it over serial. Example:
#define REED_OPEN 0x1014
#define REED_CLOSE 0x1015
#define REMOTE_BUTTON1 0x154115
#define REMOTE_BUTTON2 0x154114

void handleCommand()
{
    #ifdef DEBUG
    SEND_32(command);
    TxByte(length);
    #endif

    switch(command)
    {
      case REED_OPEN     : TxByte('O'); break;
      case REED_CLOSE    : TxByte('C'); break;
      case REMOTE_BUTTON1: TxByte('L'); break;
      case REMOTE_BUTTON2: TxByte('M'); break;

    }
}You need to update the makefile.rules to fit your system. The default configuration works on Mac OS X with an Arduino installation and the Arduino UNO connected to /dev/tty.usbmodem1411. Otherwise, adapt the first eleven lines
Makefile
CC         = <PATH TO avr-gcc>
OBJCOPY    = <PATH TO avr-objcopy>
DUDE       = <PATH TO avrdude>
DUDECONFIG = <PATH TO avrdude.conf>
AVRSIZE    = <PATH TO avr-size>

BOARD = attiny13
BAUD = 19200                 # Default for Arduino ISP
PROGRAMMER = avrisp          # Default for Arduino ISP
PORT = /dev/tty.usbmodem1411 # The tty device of the Arduino UNO
Now you can flash ATtiny using the makefile, i.e. run
make recv.upload. Your ATtiny will now send recognised RF commands over serial at 115200 Baud.
For further details, please refer to the build log
The code for the serial transmission was taken from Ralph Doncaster.