Deprecating this repo in favor of instructions for creating a custom Xubuntu ISO.
My setup scripts to bootstrap a new Xubuntu 20.04 install, making it look and feel a bit more like MacOS.
Installation is broken up into two steps. The first step is run from the live CD/USB after the Xubuntu installer has finished. The second step is run immediately after first boot.
- Boot Xubuntu from a live USB
- Select the "Try Xubuntu without installing" option
- When you see the desktop, launch the "Install Xubuntu" installer
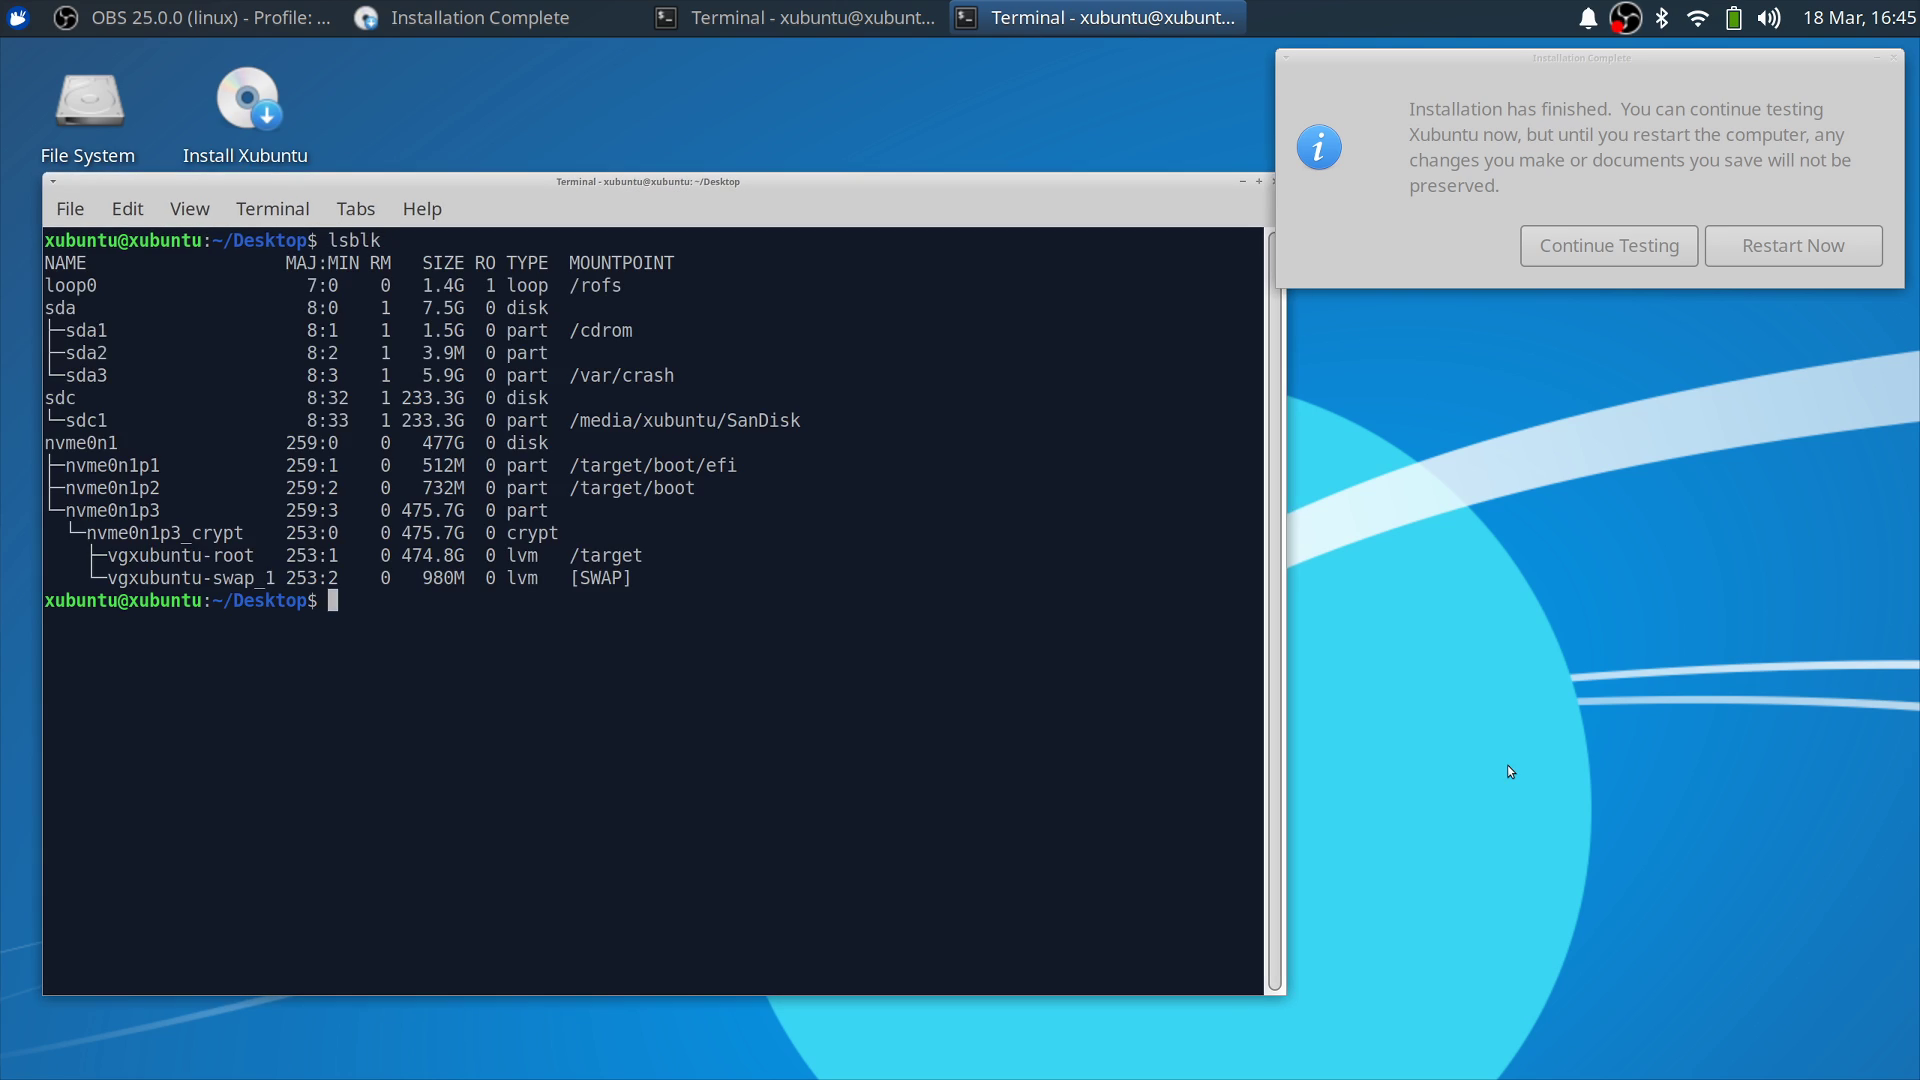
- When the installer completes, it will show an alert box with options "Continue Testing", and "Restart Now"
Don't select either of these options
Instead, move the alert box to the side, and open a terminal window.
As long as the alert box is open, your new Xubuntu installation will still be mounted at /target.
Run lsblk in the terminal to verify this, as shown here:
If you don't see /target/boot and /target/boot/efi mount points, run these commands to mount them:
sudo mount /dev/nvme0n1p2 /target/boot
sudo mount /dev/nvme0n1p1 /target/boot/efi
Now, run this to chroot into your fresh Xubuntu installation from the live disk:
for i in /dev /dev/pts /proc /sys /run; do sudo mount -B $i /target$i; done
sudo cp /etc/resolv.conf /target/etc/
sudo chroot /target
Once you've chroot'd into your Xubuntu installation, run the pre-boot.sh script:
# Run this while still chroot'd into a fresh ubuntu install in the live USB
wget -qO- https://raw.githubusercontent.com/trxcllnt/ubuntu-setup/master/pre-boot.sh | bash
This script will install:
jq- Latest
gitfrom the official PPAppa:git-core/ppa - A few prerequisite system dependencies (git-lfs, curl, zlib, qt-5, exfat-utils, etc.)
- The latest NVIDIA CUDA toolkit and drivers. This ensures you have a working GPU on your first boot.
Once this script is finished, exit your terminal and reboot.
Reboot into your new install. Login so Ubuntu runs all the initialization for your new user.
Then reboot and go back into the live USB.
After rebooting into the live USB, you're ready to install everything else.
System76 has a good article on mounting encrypted partitions, but I'll re-post the commands I use here:
If you setup LUKS encyrption when you installed, decrypt the drive before mounting the partitions:
# 1. Decrypt the encrypted partition
$ sudo cryptsetup luksOpen /dev/nvme0n1p3 cryptdata
$ sudo lvscan
$ sudo vgchange -ay

# 2. Mount the decrypted partition
$ sudo mount /dev/mapper/<name-of-mapped-drive-from-previous-command>-root /mnt
Now mount your /boot and /boot/efi partitions.
# In some configurations, `/boot` will be on the root partition (the one at `/mnt`)
# Check to see if `/mnt/boot` already exists -- if so, you can skip this line:
$ sudo mount /dev/nvme0n1p2 /mnt/boot

# `/boot/efi` is usually on a separate partition if dual-booting with Windows
# If `/mnt/boot/efi` already exists and has an "EFI" folder, skip this line:
$ sudo mount /dev/nvme0n1p1 /mnt/boot/efi

# 3. Chroot into your mounted drive
$ for i in /dev /dev/pts /proc /sys /run; do sudo mount -B $i /mnt$i; done
$ sudo cp /etc/resolv.conf /mnt/etc/
$ sudo chroot /mnt

# Now install all the apps/settings
\# su <your username>
\# wget -qO- https://raw.githubusercontent.com/trxcllnt/ubuntu-setup/master/post-boot.sh | bash
This script will install:
- Older CUDA toolkits and gcc-7/8 for development
- Basic apps and development utilities:
- XFCE-4 themes, plugins, keybindings, and settings:
xfce4-appmenu-pluginnetwork-manager-openconnect-gnomeplank- Sierra GTK theme
- OSX El Capitan Cursors theme
autokey-gtkand a set of MacOS-style key re-binding scripts
After this script is done, reboot into Xubuntu.
Run the following script to fix xfce4 global appmenu plugin:
# Build and install the xfce4-appmenu-plugin from source
source ./scripts/build-and-install-xfce4-appmenu.sh
And now you're all set!