Demo :- Click Here
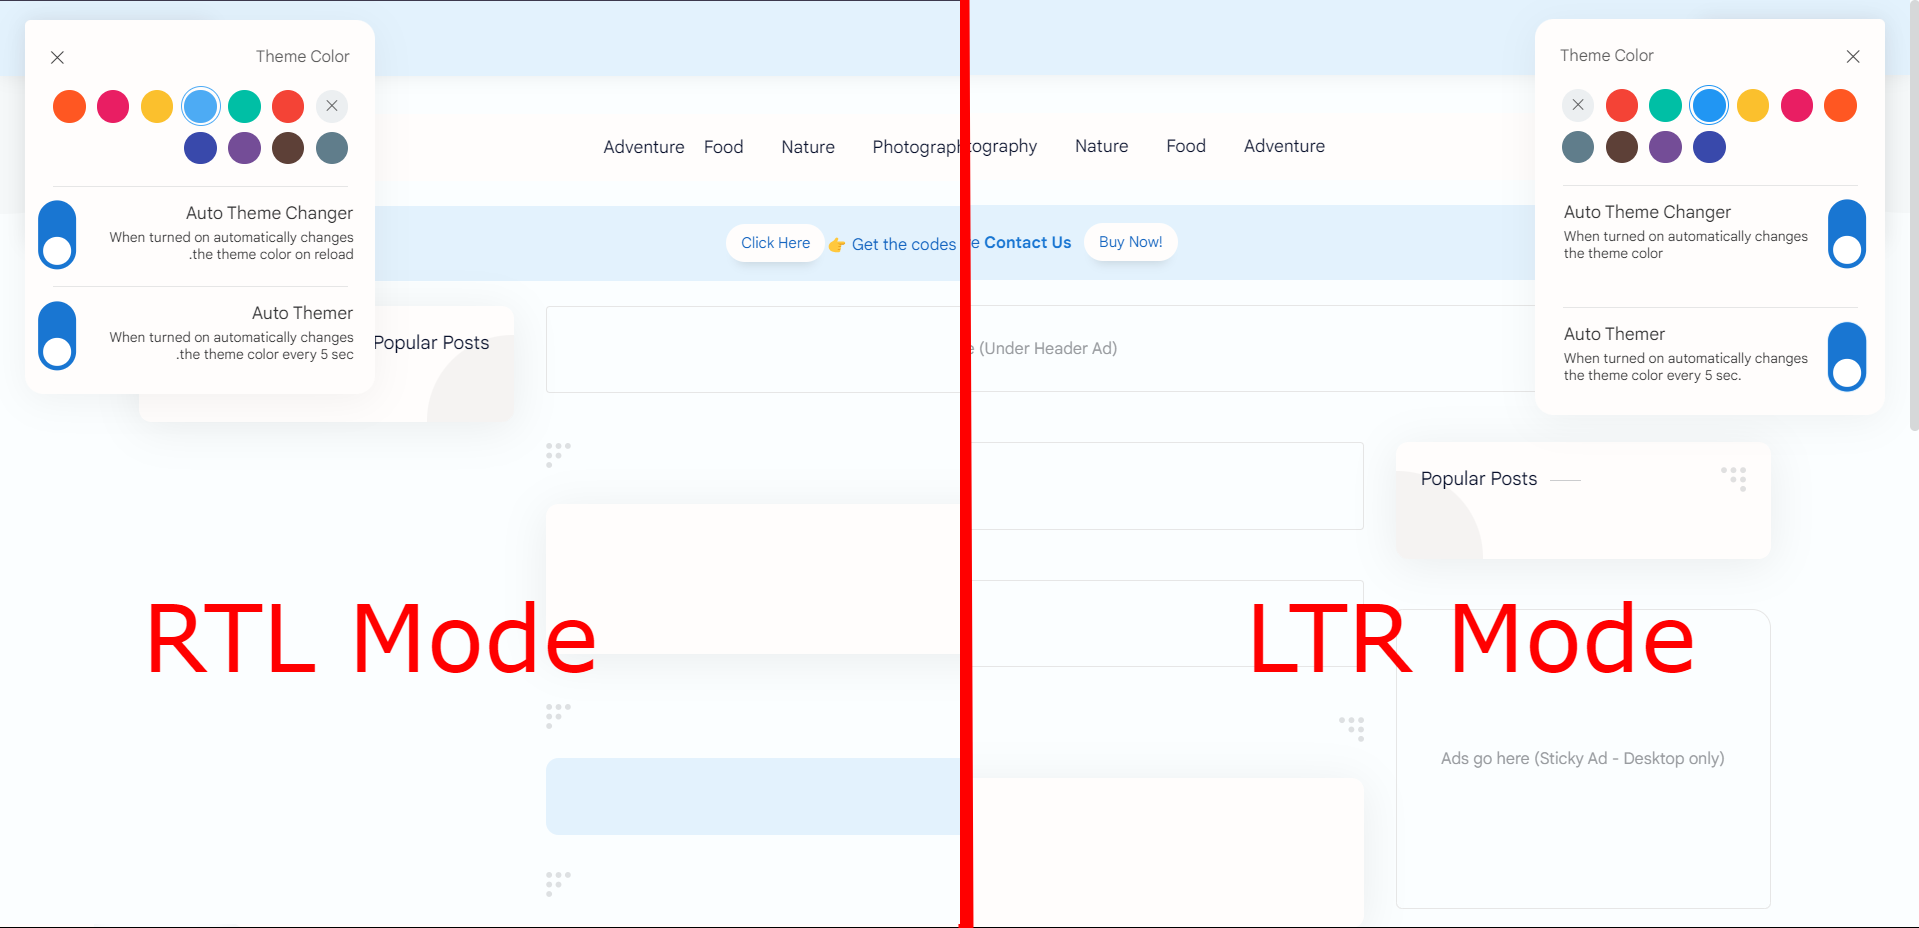
- Auto Theme Changer will change the theme on site load, opening posts, pages, searches, labels, categories, and reloading the site.
- The Auto Theme Changer is turned on by default for every user; to change this behavior, set
defaultToggleStateto False in the config. - Auto Themer will change the site theme every 5 seconds (default value), giving it a disco-like look. Use this as an Easter egg on your site.
- To change the 5-second time frame for Auto Themer, enter your desired time frame in milliseconds in the
autoThemerIntervalfield in the config. - Auto Theme Changer and Auto Themer will be disabled in dark mode since Plus UI lacks support for dark mode theme colors.
- When the user returns to light mode from dark mode, the toggle button will be activated automatically upon the next site load or reload.
- The future version of autoThemeChanger is heavily influenced by the number of people who are currently using the code as well as the next Plus UI upgrade. If the code is not widely used, an update will be issued occasionally. Instead of in a timely manner.
- Added support for RTL mode.
- Made the design more responsive.
- Added support to add custom time period for Auto Themer.
- Added custom logic to adjust the position of the switches automatically.
- Switches can automatically rotate themselves based on the viewport dimension.
- Added support to change the default behavior of the Auto Theme Changer toggle button.
- Optimized the overall javascript and made the theme manager more robust.
- Minor bug fixes.
- Initial release
- Adding the config is now optional because the code automatically loads a default config from a CDN link, but if you want to change the behavior of the
defaultToggleStateand change the time interval ofautoThemerInterval, then use your custom config from the documentation. - If you're going to use the Auto Theme Changer codes with some of my other codes, like Avatar.js, Organic Safelink, ImgShield, and so on, then merge all the configs of each code into a single config and add that to your site. (No longer needed as the structure of the config for the Auto Theme Changer has been changed, and it is now
const ThemeManagerConfiginstead ofconst config.) - If you're using the
v1.0parameter in the CDN link for the CSS and the JS, then change it tov1.2orlatestand add theconfig.js(optional as mentioned in point 1) as shown in the documentation. - If you're using the
latestparameter in the CDN link for the CSS and JS, then add theconfig.js(optional as mentioned in point 1) shown in the second part of the documentation. - If you're using inline CSS styles and JS, then replace the previous code with the newer one and add the
config.js(optional as mentioned in point 1) along with it from the documentation. - There have been some minor changes in the
HTMLas well, but if you don't want to update it, then there is no problem; the previous version will work fine.
-
Just add the CSS using any one of the following methods above the
</head>in your theme.(i) Using inline CSS Style 👇
<style>
.head1,.para1,.para2{margin-left:6px}.head1{font-size:14px;font-family:"Google Sans Text";color:#343435;margin-bottom:-7px;font-weight:unset}.para1{margin-bottom:-11px}.brr{content:"";display:block;border-bottom:1px solid var(--contentL);margin:12px 5px}.brr-marginfix{margin-top:-6px}.cusP{margin-bottom:-20px}@media screen and (min-width:750px){.switch{left:205px;top:-48px}.Rtl .switch{left:-205px}}@media screen and (max-width:361px) and (min-width:322px){.switch{left:220px;top:-45px}.Rtl .switch{left:-220px}}@media screen and (max-width:321px){.switch{left:202px;top:-46px}.Rtl .switch{left:-202px}}@media screen and (max-width:376px) and (min-width:362px){.switch{left:240px;top:-45px}.Rtl .switch{left:-240px}}@media screen and (max-width:415px) and (min-width:395px){.switch{left:280px;top:-45px}.Rtl .switch{left:-280px}}@media screen and (max-width:394px) and (min-width:377px){.switch{left:255px;top:-45px}.Rtl .switch{left:-255px}}@media screen and (max-width:749px) and (min-width:416px){.switch{left:286px;top:-45px}.Rtl .switch{left:-286px}}.switch{position:relative;display:inline-block;width:55px;height:30px;margin-bottom:-2000px}.switch input{opacity:0;width:0;height:0}.slider{position:absolute;cursor:pointer;top:0;left:0;right:0;bottom:0;background-color:#ccc;-webkit-transition:.4s;transition:.4s}.slider:before{position:absolute;content:"";height:22px;width:22px;left:3.5px;bottom:4px;background-color:#fff;-webkit-transition:.4s;transition:.4s}input:checked+.slider{background-color:var(--linkC)}.drK input:checked+.slider{background-color:var(--darkU)}input:focus+.slider{box-shadow:0 0 1px #2196f3}input:checked+.slider:before{-webkit-transform:translateX(26px);-ms-transform:translateX(26px);transform:translateX(26px)}.slider.round{border-radius:34px}.slider.round:before{border-radius:50%}
</style>
Note: We suggest adding CSS using the second method, which is to use an external CSS style cdn link. This way, if any changes are made to the code, you will see the updates on your site right away, but if you intend to customize the widget, use the first method.
(ii) Using an external CSS style cdn link 👇
✨ If you want to get the latest updates as soon as possible, then use the below CDN link.
<link rel="stylesheet" href="https://theamanstark.com/cdn/blogger/plus-ui/autoThemeChanger/latest/autoTheme.min.css" />
✨ If you want to use version 1.2 (currently the latest version) of autoThemeChanger, then use the below cdn link.
<link rel="stylesheet" href="https://theamanstark.com/cdn/blogger/plus-ui/autoThemeChanger/v1.2/autoTheme.min.css" />
-
Now, put the following javascripts above:
</body>in your theme.(i) Add the config, to manage the
autoThemerIntervalanddefaultToggleState👇<script>/*<![CDATA[*/ const ThemeManagerConfig = { autoThemerInterval: 5000, // Time interval for auto themer in milliseconds defaultToggleState: true, // Default toggle state for auto theme changer when the user visits the site for the first time }; /*]]>*/</script>
(ii) Now add the main
autoThemeChangerjavascript using one of the below CDN links. 👇⚡ If you want to get the latest updates as soon as possible, then use the below CDN link.
<script src='https://theamanstark.com/cdn/blogger/plus-ui/autoThemeChanger/latest/autoTheme.min.js'></script>
⚡ If you want to use version 1.2 (currently the latest version) of autoThemeChanger, then use the below cdn link.
<script src='https://theamanstark.com/cdn/blogger/plus-ui/autoThemeChanger/v1.2/autoTheme.min.js'></script>
-
Finally, add the following HTML in the
<div class='cusP'>; check the image below to know the place of addition.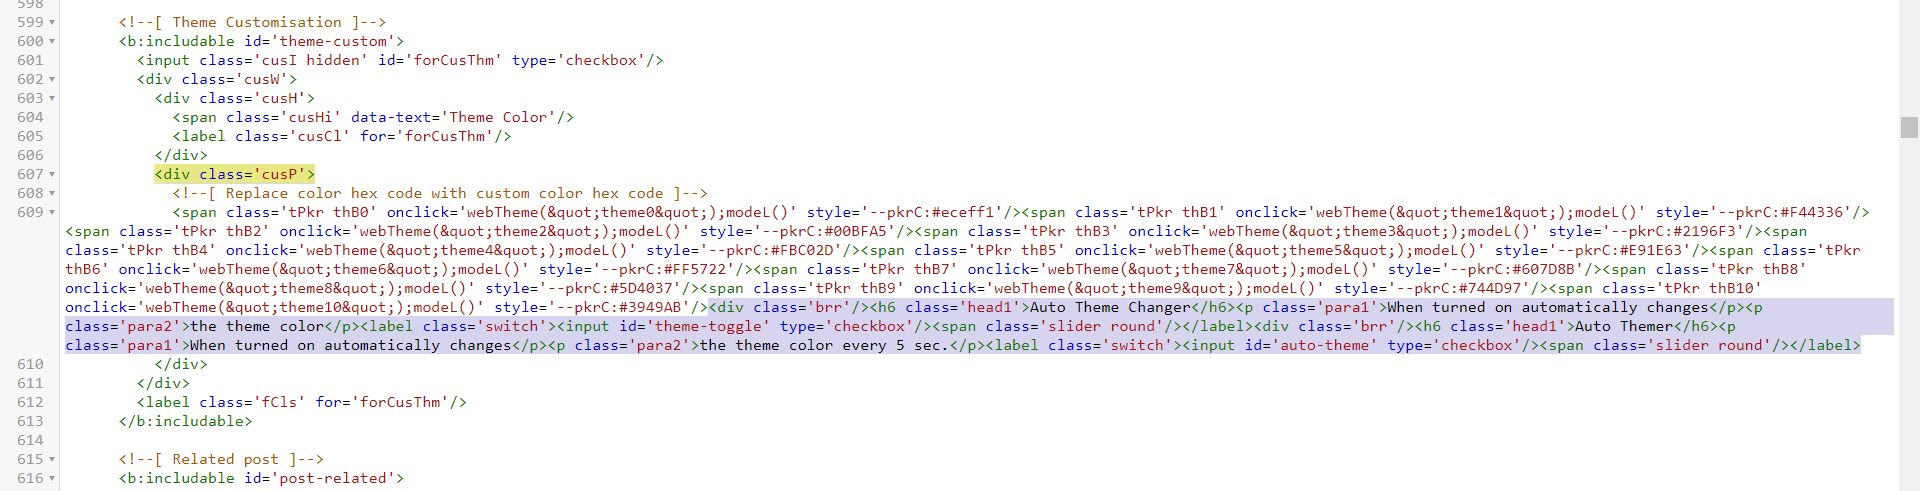
<div class="brr"/><h6 class="head1">Auto Theme Changer</h6><p class="para1">When turned on automatically changes</p><p class="para2">the theme color on reload.</p><label class="switch"><input id="theme-toggle" type="checkbox"/><span class="slider round"/></label><div class="brr brr-marginfix"/><h6 class="head1">Auto Themer</h6><p class="para1">When turned on automatically changes</p><p class="para2">the theme color every 5 sec.</p><label class="switch"><input id="auto-theme" type="checkbox"/><span class="slider round"/></label>
#Note: If you experience any problems with the code, raise the issue on the repo's Issues tab. Change the value of autoThemerInterval in the config to adjust the time-frame of Auto Themer from 5 seconds to a custom number.
Credits: Auto Theme Changer created by Aman Singh.