


Visual Studio Team Services build/release task for running OWASP ZAP automated security tests. Run active scan against a target with security risk thresholds and ability to generate the scan report.
Follow the instructions given below to add and configure OWASP Zed Attack Proxy Task in your build/release pipeline.
- You need to have OWASP Zed Attach Proxy installed (eg. On a Virtual Machine) and exposed so it can be accessed over the internet. The following article Installing & Configuring OWASP ZAP on an Azure Virtual Machine will provide a detailed guide on how to do it.
- Obtain the API Key required to access the ZAP API by following the instructions on the Official Documentation.
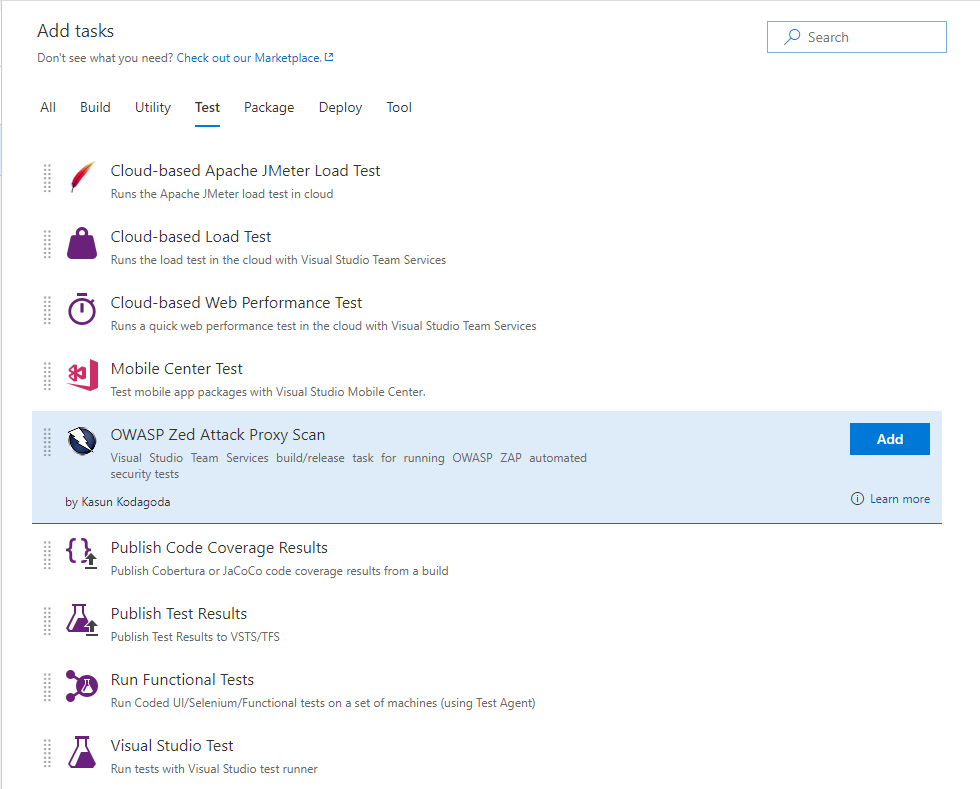
Install the OWASP Zed Attack Proxy Scan Task in to your Visual Studio Team Services account and search for the task in the available tasks. The task will appear in the Test section of the task list. Add it to your build/release task.
OWASP Zed Attack Proxy Scan task has some required configuration options that needed to be provided.
These configurations are found in the ZAP API Configuration section.
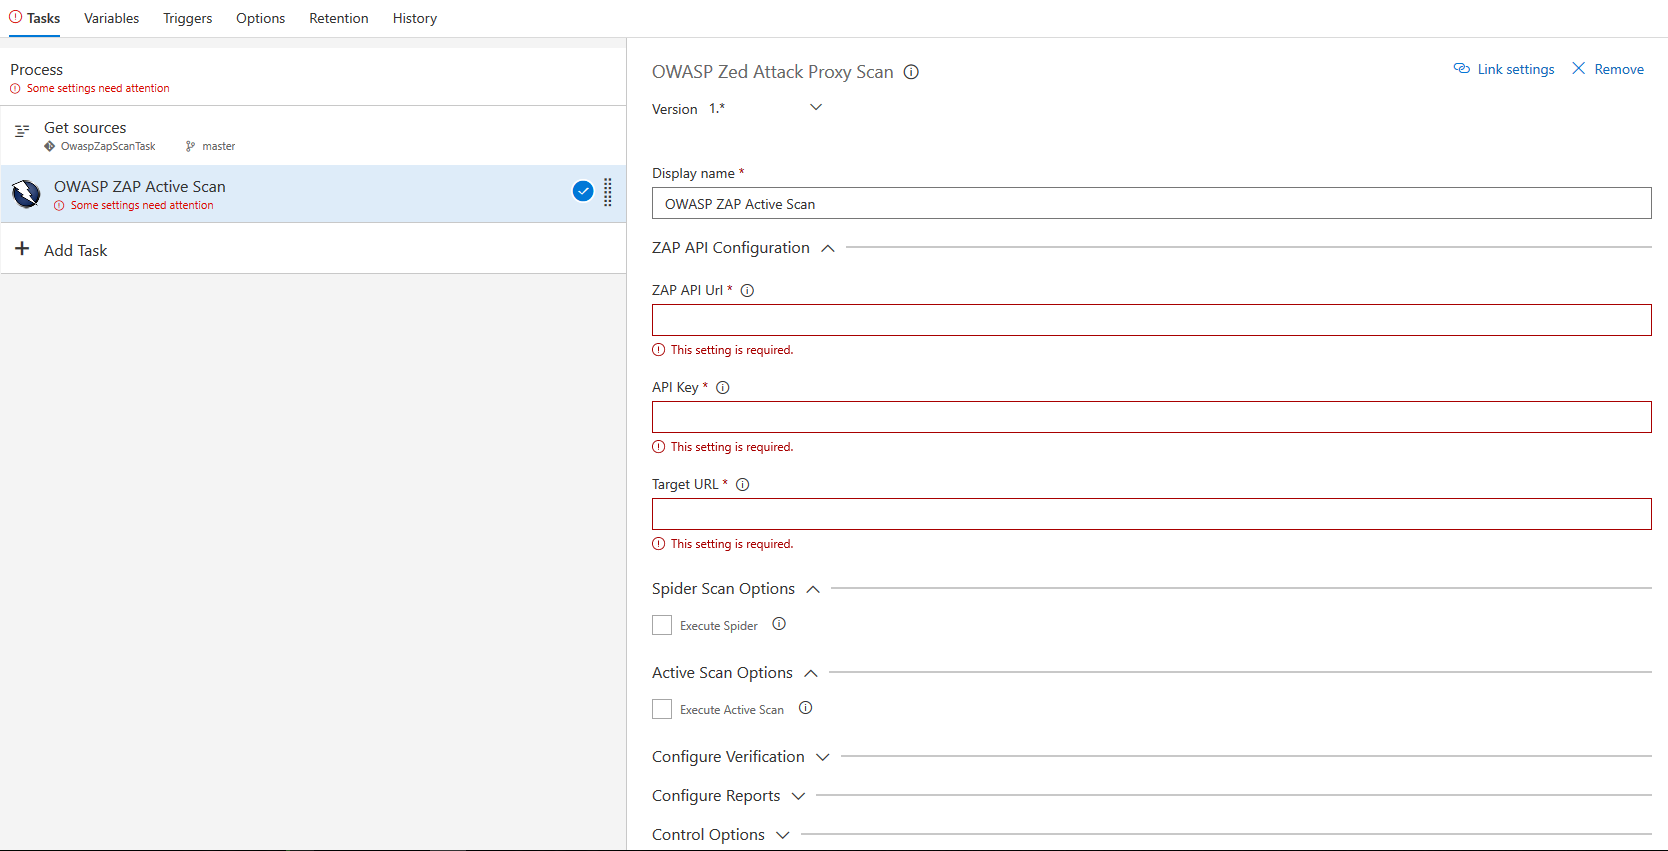
- ZAP API Url : The fully qualified domain name (FQDN) with out the protocol. (Eg. zap.example.com)
- API Key : The API key for ZAP. Details about obtaining the API can be found on the Official Documentation
- Target URL : Target URL where the active scan is performed against.
This configuration section includes the parameters that need to be sent to perform the active scan against the target.
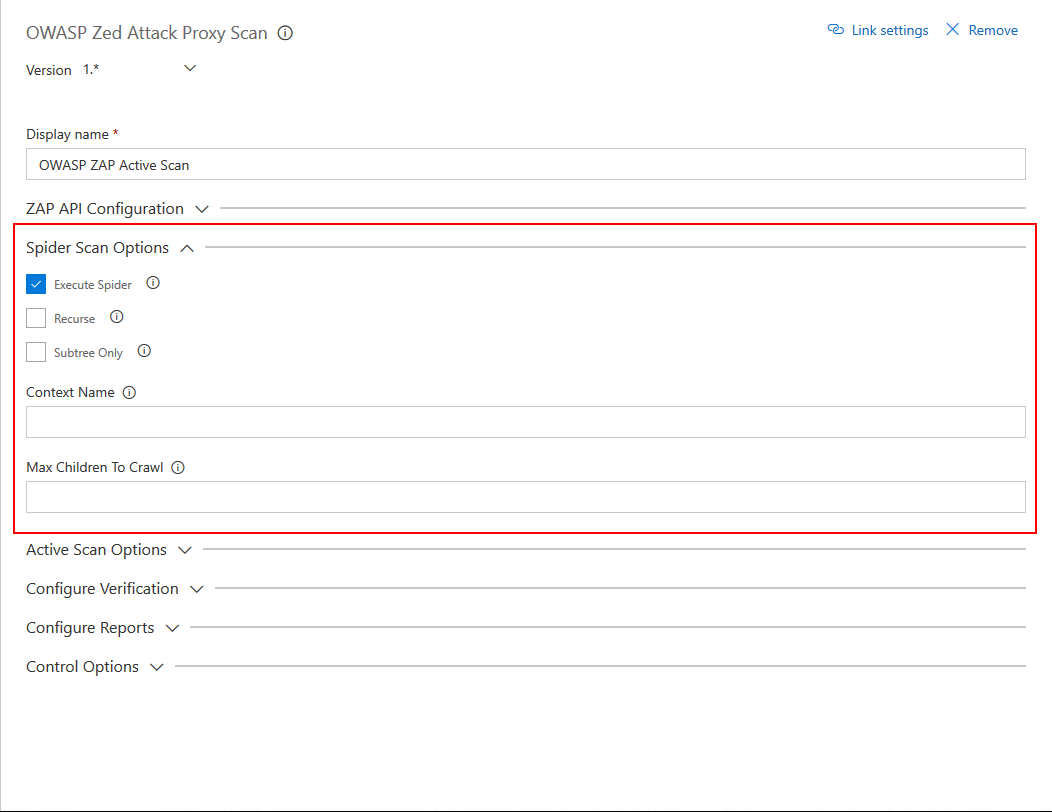
- Execute Spider Scan : Enable to run a spider scan on the target.
- Recurse : (Optional) Enable to use the nodes underneath the one specified target to seed the spider.
- Subtree Only : (Optional) Enable to restrict the spider under the target url subtree.
- Context Name : (Optional) Set to constrain the scan to a Context.
- Max Children To Crawl : (Optional) Set to limit the number of children scanned.
This configuration section includes the parameters that need to be sent to perform the active scan against the target.
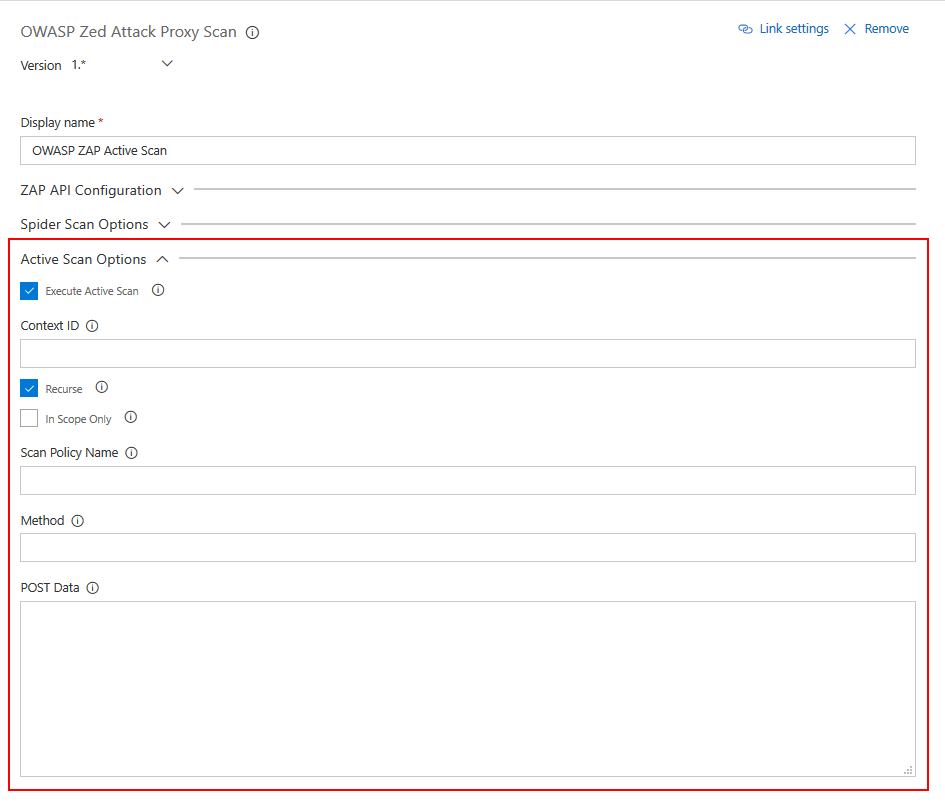
- Execute Active Scan : Enable to run a active scan on the target.
- Context ID : (Optional) Context identifier of the Scan context.
- Recurse : (Optional) Set recurse option to scan URLs under the given target URL.
- In Scope Only : (Optional) Set In Scope only to true to constrain the scan to URLs that are in scope (ignored if a Context is specified).
- Scan Policy Name : (Optional) Scan Policy Name allows to specify the scan policy (if none is given it uses the default scan policy).
- Method : (Optional) Allow you to select a given request in conjunction with the given URL.
- POST Data : (Optional) Allow you to select a given request in conjunction with the given URL.
This configuration section includes the parameters that need to be sent to perform the active scan against the target.
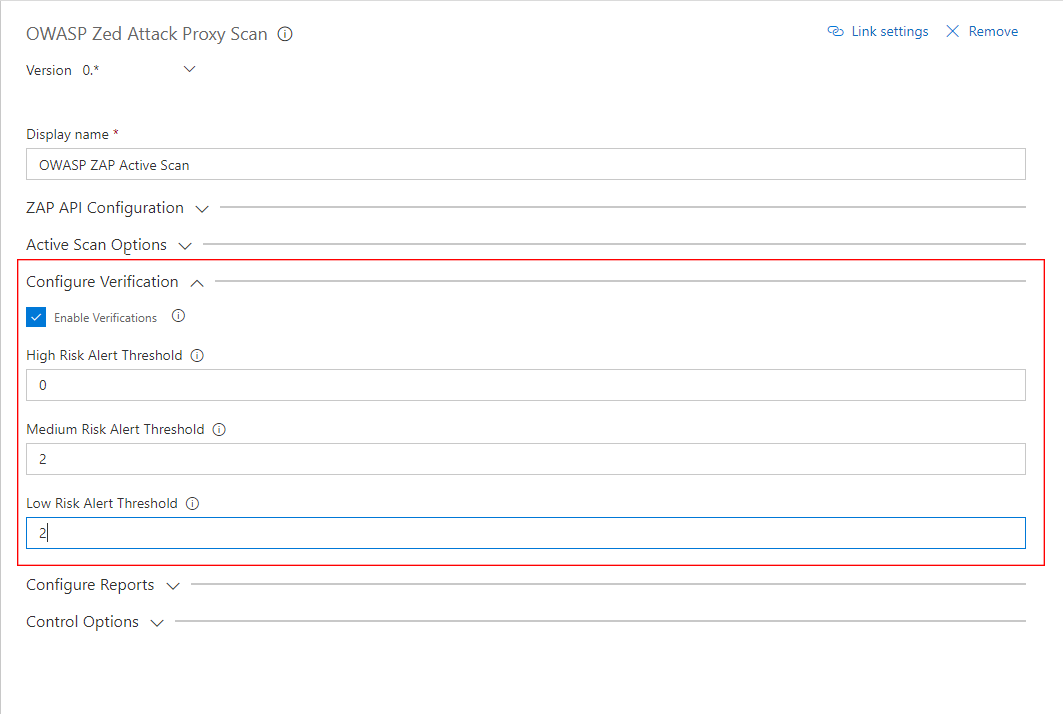
- Enable Verifications : Enable to add thresholds for security risk types and fail the build if the threshold is exceeded.
- High Risk Alert Threshold : Number of Maximum allowed High Risk Alerts. If the number of high risk alerts equals or exceeds, the build will fail.
- Medium Risk Alert Threshold : Number of Maximum allowed High Medium Alerts. If the number of high risk alerts equals or exceeds, the build will fail.
- Low Risk Alert Threshold : Number of Maximum allowed Low Risk Alerts. If the number of high risk alerts equals or exceeds, the build will fail.
This configuration section includes the parameters that need to be sent to perform the active scan against the target.
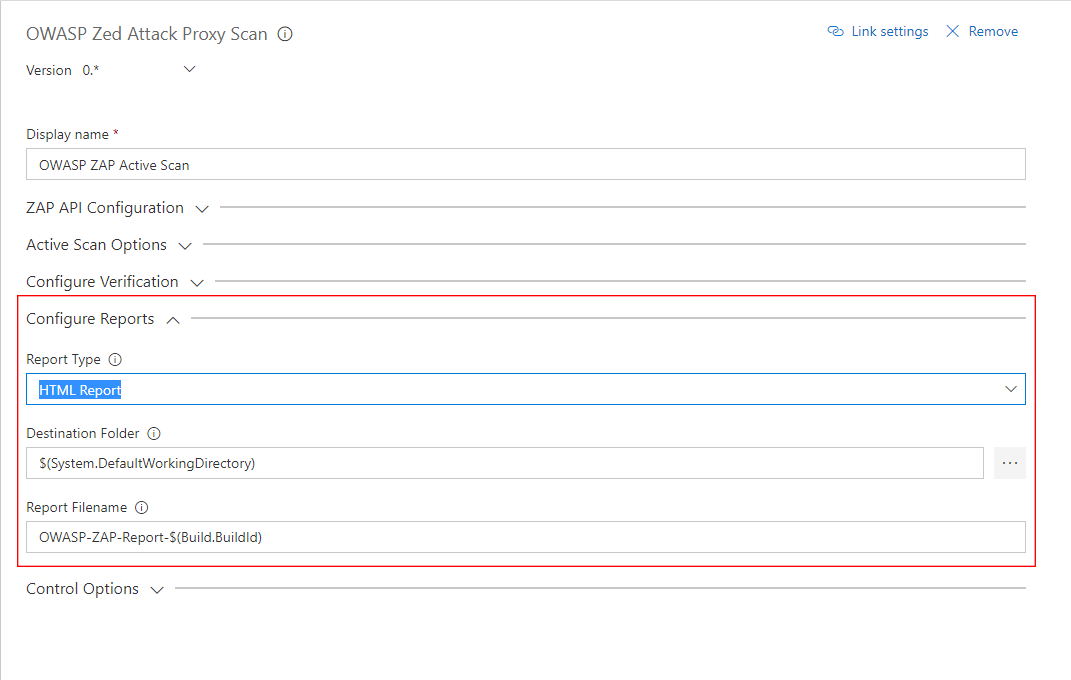
- Report Type : Select the type of report you want generated. Available types are HTML, XML & Markdown.
- Destination Folder : The destination folder that the report file is created. You can use variables. Eg. $(agent.builddirectory).
- Report Filename : Name of the report file, without the extension. Extension is determined by the Report Type. Eg. OWASP-ZAP-Report-2017-00-00.
- Check currently listed Issues to make sure its not already listed.
- If not Open a New Issue for the Bug. Include a detailed description including a proper title that is meaningful and a clear description with as much relevant details regarding the issue as possible.
- Open a New Pull Request with the fix.
- We are using a strict commit guideline with the OWASP Zed Attack Proxy Scan Task project. Please read the details in the Commit Guideline before you make commits.
- Add your suggestions to the Gitter Chat for the project.
- After getting a discussion going, Create a new Issue related to the feature in the Issues section. Add detailed description with a title for the issue.
- Follow the Commit Guideline mentioned bellow when committing.
- Create a Pull Request when you are done with the feature.
- All of your questions are welcome. Post them in the Gitter chat for the project.
A strict commit guidelines are followed so that its easy to do release with semantic versioning. Semantic Release package is used to do this. Commitizen is used with Commitizen Conventional Changelog to add proper commit messages. Git hooks created using ghooks are inplace to enforce the commit format used in the project. Each commit message consists of a header, a body and a footer. The header has a special format that includes a type, a scope and a subject. The commit message format is bellow.
<type>(<scope>): <subject>
<BLANK LINE>
<body>
<BLANK LINE>
<footer>
Header is mandatory and the scope is optional, But its encouraged to add a scope. Footer is also optional. To perform a commit follow these steps
# Add the files you want to commit
$ git add <FILES_TO_COMMIT>

# Use the configured ghook
$ npm run commit
Read More to learn about Commitizen and its conventions.
A special thanks to all the Contributors of the OWASP Zed Attack Proxy Scan Task Project. Your valuable contributions are most welcome. :)