-
Notifications
You must be signed in to change notification settings - Fork 108
Gradle Task UI
Last updated and checked to work with version 3.0.0 of the tools
[Part I](Gradle Import Wizard) of this tutorial covered the Gradle Import Wizard.
In the next section, we'll walk you through the UI for creating and launching Gradle launch configurations. Gradle launch configurations are provided as extensions to the standard Eclipse launching framework. This means that if you are already familiar with the Eclipse launch UI, most of this will be familiar to you.
To "launch" a list of Gradle tasks, we must create a launch configuration. The standard way to do that is by using the "Run As" context menu. This menu is accessed by right clicking on a Gradle project or one of its nested resources in the Package Explorer.
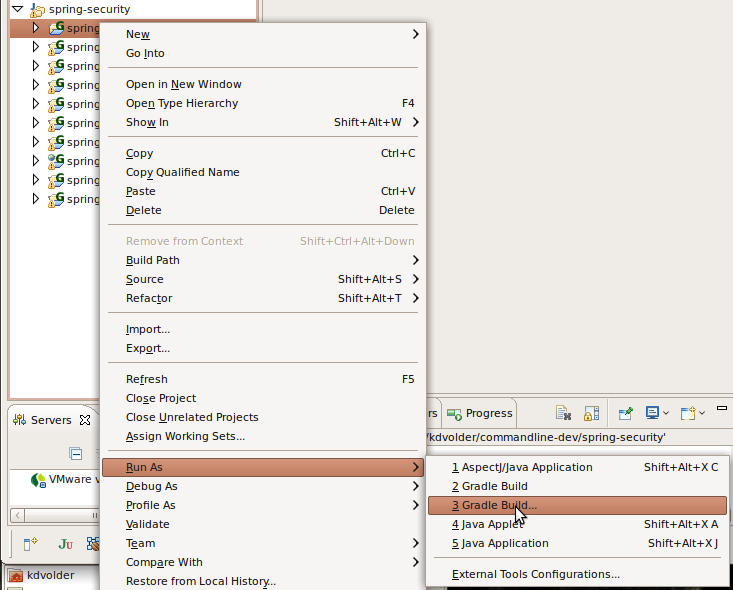
The following menu items will be shown (others may also be shown depending on what exactly you right-clicked on).
-
Run As >> Gradle Build ...(with dots at the end)
This opens a Gradle launch configuration associated with the current project in the Tabbed launch configuration editor. This allows you to examine and edit the configuration before launching it.
If no launch configuration exists yet (for the selected project) an empty one will be created automatically. If more than one configuration is found, you will be asked to choose one. -
Run As >> Gradle Build(no dots at the end)
This attempts to directly launch a Gradle launch configuration associated with your project. Typically you would use this if you already have a launch configuration defined and want to just launch it without examining or editing it. If a launch configuration doesn't exist yet, however, one will be created and opened in the editor. If more than one configuration already exists for the selected project, then a dialog will popup to ask you to choose one. -
External Tools Configurations: This opens the generic Eclipse "External Tools Configurations" editor, allowing you to create / edit / save etc. launch configurations of different types, including Gradle launch configurations.
Since this is our first time launching anything for the spring-security project, no
launch configuration exists yet. We right click on the project
(or any resource in the project) and select
Run As >> Gradle Build.... An editor as shown in the screenshot below opens up.
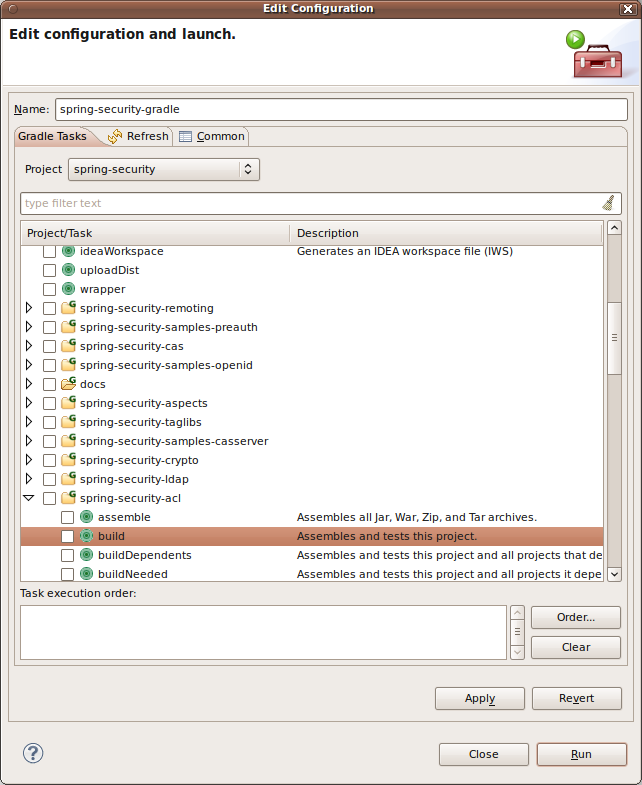
If you have ever used ant launch configurations in Eclipse, the UI should look familiar since we followed its design. The main difference is that for Gradle the "list" of available tasks is a tree rather than just a list. Leaf nodes in the tree are tasks that can be executed. Internal tree nodes represent sub-projects.
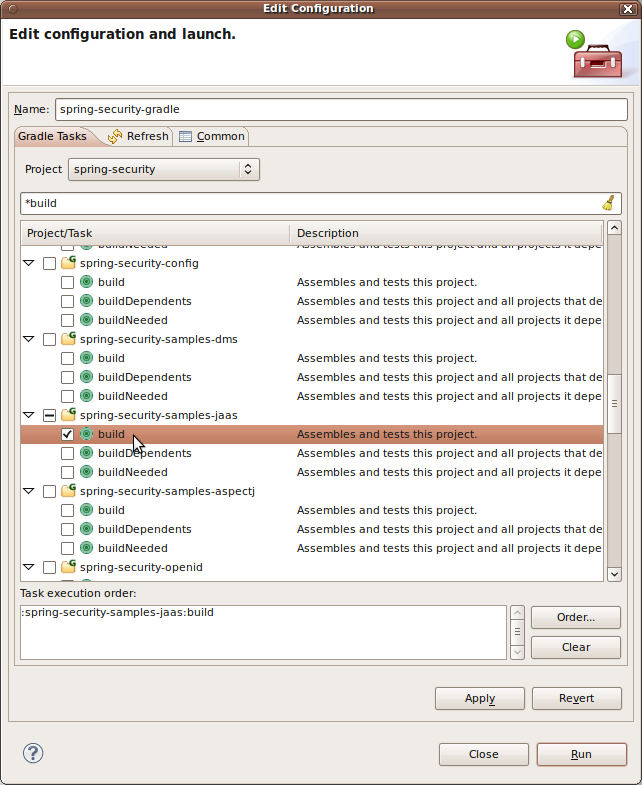
The task tree can be quite large, especially for a project that has many subprojects. To help in finding a task in a large tree you can use the "filter text" Box above the tree. Type in any text, and only the tasks with a name starting with this text will be shown. You can add a "*" to the front of your search pattern to search for substrings instead of prefixes instead. The screenshot below shows how we filtered the tree to only show "build" related tasks. We then selected the "build" task in the 'jaas' sample project.
If multiple tasks are selected, the ordering of the tasks is often important. For example, if we selected both ":clean" and ":build" in the jaas sample project, we probably want to make sure that the ":clean" task gets executed before the ":build" task.
The bottom portion of the "Tasks" Tab shows and controls task execution order. To change the execution order click the "Order..." Button.
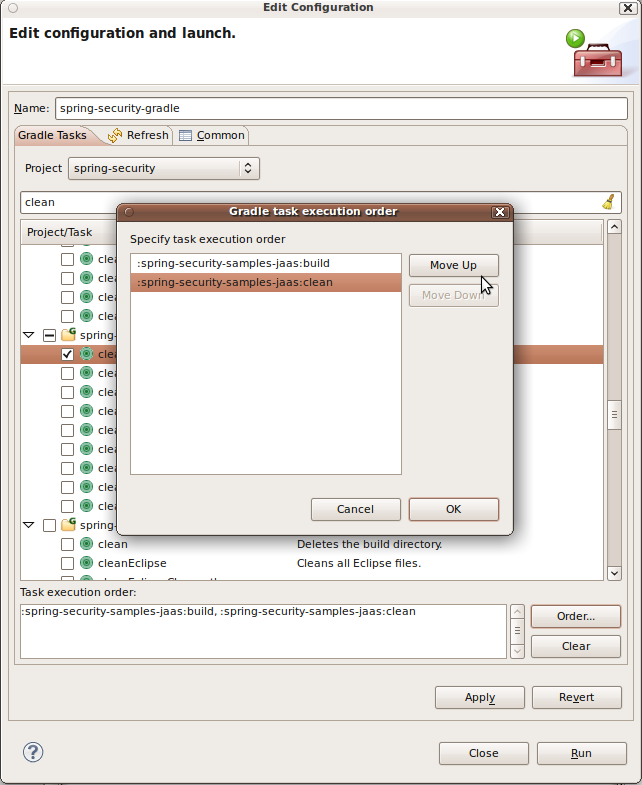
Finally, after reordering the tasks as desired, click on the "Run" Button to save any changes you have made and launch the configuration. Alternatively you can use the "Apply" Button to save the configuration without launching; or the "Close" Button to close it without launching or saving.
After clicking "Run" the selected tasks will be executed and the resulting output is displayed in the Eclipse console view.
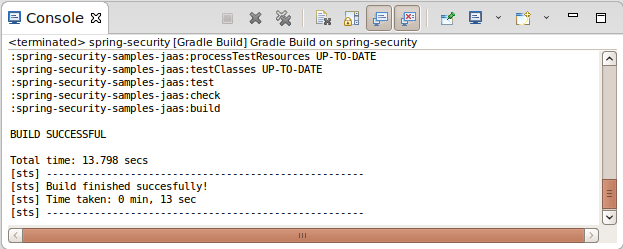
Typically, executing a set of Gradle tasks will cause changes to the resources in your workspace. Eclipse, by default, will not become aware of these changes. To make Eclipse aware that underlying resources in the file system have changed you need to "refresh" the workspace, or at least the portion of the workspace that you think may have changed. You can do this manually by using the context menu of any resource in the workspace. However, it is probably more convenient to automate this.
In the future the Gradle Task API aims to provide explicit information to the IDE about potential workspace changes. Presently, however, this is not the case and it is your responsibility to either manually refresh the resources or specify which resources should be refreshed automatically. The Gradle launch configuration editor provides a standard Eclipse "Refresh" tab to specify an automatic refresh strategy.
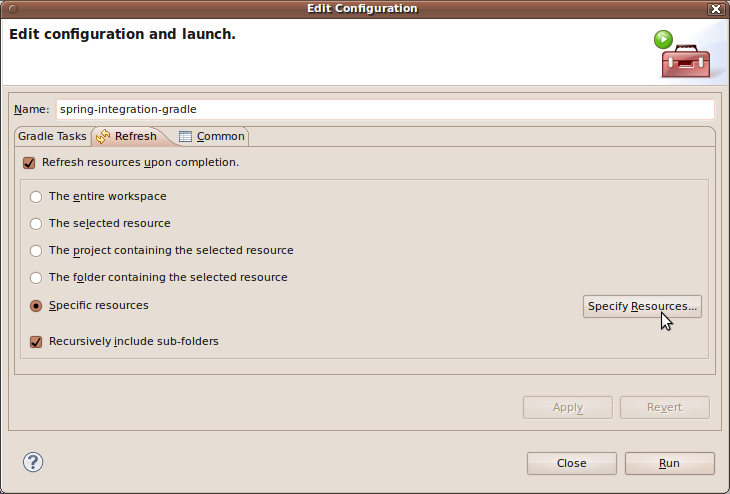
To enable automatic refresh, check the "Refresh resources upon completion" Checkbox and pick one of the provided strategies.
After having created a launch configuration, you may want to launch that same configuration again, either with or without changes. There are a number of different ways that you can do this. Besides using the already discussed context menus, you can also use the External Tools Toolbar button

You can either click on the toolbar button itself or use its pull-down menu. The pull down menu gives you access to a list of recent launches (automatically maintained) and a list of favorites (explicitly managed by you).
Clicking the button (instead of the pulldown) is a shortcut to relaunch the most recent entry in the history.
The standard Eclipse launch configuration editor is flexible but quite complex and a little cumbersome to use if you just wanted to quickly execute a single task.
To address this problem, the "Gradle Tasks" view added in STS 2.9.0.M1 provides a more convenient way to quickly launch just a single task. To open the *"Gradle Tasks View", use the "Windows >> Show View" menu.
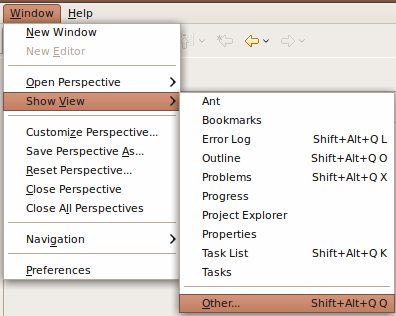
You will find the tasks view in the "Gradle" category.
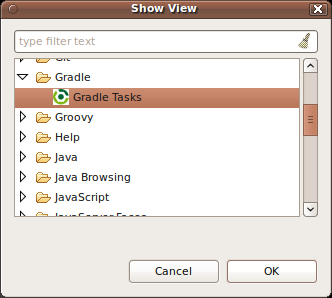
The view allows you to select a Gradle project and shows the tasks available for that project. Double-clicking a task in the view will launch that task.
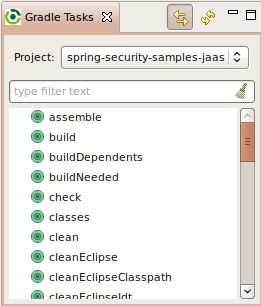
The task view provides two buttons in its toolbar, from left to right:
-
Link with Selection Button: when pushed in, this makes the tasks view automatically select the corresponding project whenever you select something in another view.
-
Refresh button: click this to request the list of tasks to be refreshed (for example after you added new task definitions to
build.gradle.
The tasks view provides a search box. Enter a string in this box to see only the tasks starting with that string. You can also add a "*" in front to search for substrings instead.
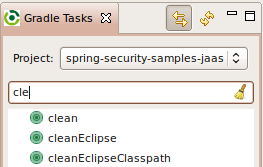
Behind the scenes the tasks view uses the same launching mechanism as described earlier. A launch configuration to launch your selected task will be created automatically if one does not already exist. If it exists, the existing configuration will be reused. That means you will be able to use the tools described earlier (launch configuration editor, launch history and shortcuts to edit and re-launch these configurations as well).