Deploy tgbot to heroku in one key, you can use it as your telegram private notifier.
1.注册 Heroku 帐号
Heroku 提供免费账号,部分介绍如下:
512 MB RAM per dyno
Free apps sleep automatically after 30 mins of inactivity to conserve your dyno hours
Free apps wake automatically when a web request is received
https://devcenter.heroku.com/articles/limits
https://devcenter.heroku.com/articles/free-dyno-hours#usage
注册地址:https://signup.heroku.com/ (注册和部署过程可能需要梯子)
本方法为快速部署。
一、在heroku上的部署
1、登陆https://dashboard.heroku.com/login
2、登陆好后,点击

3、执行以下三个步骤,见下图:
(1)输入App name.例如mygblog
(2)Choose a region:选择一个.例如United States
(3)点击:Deploy app。
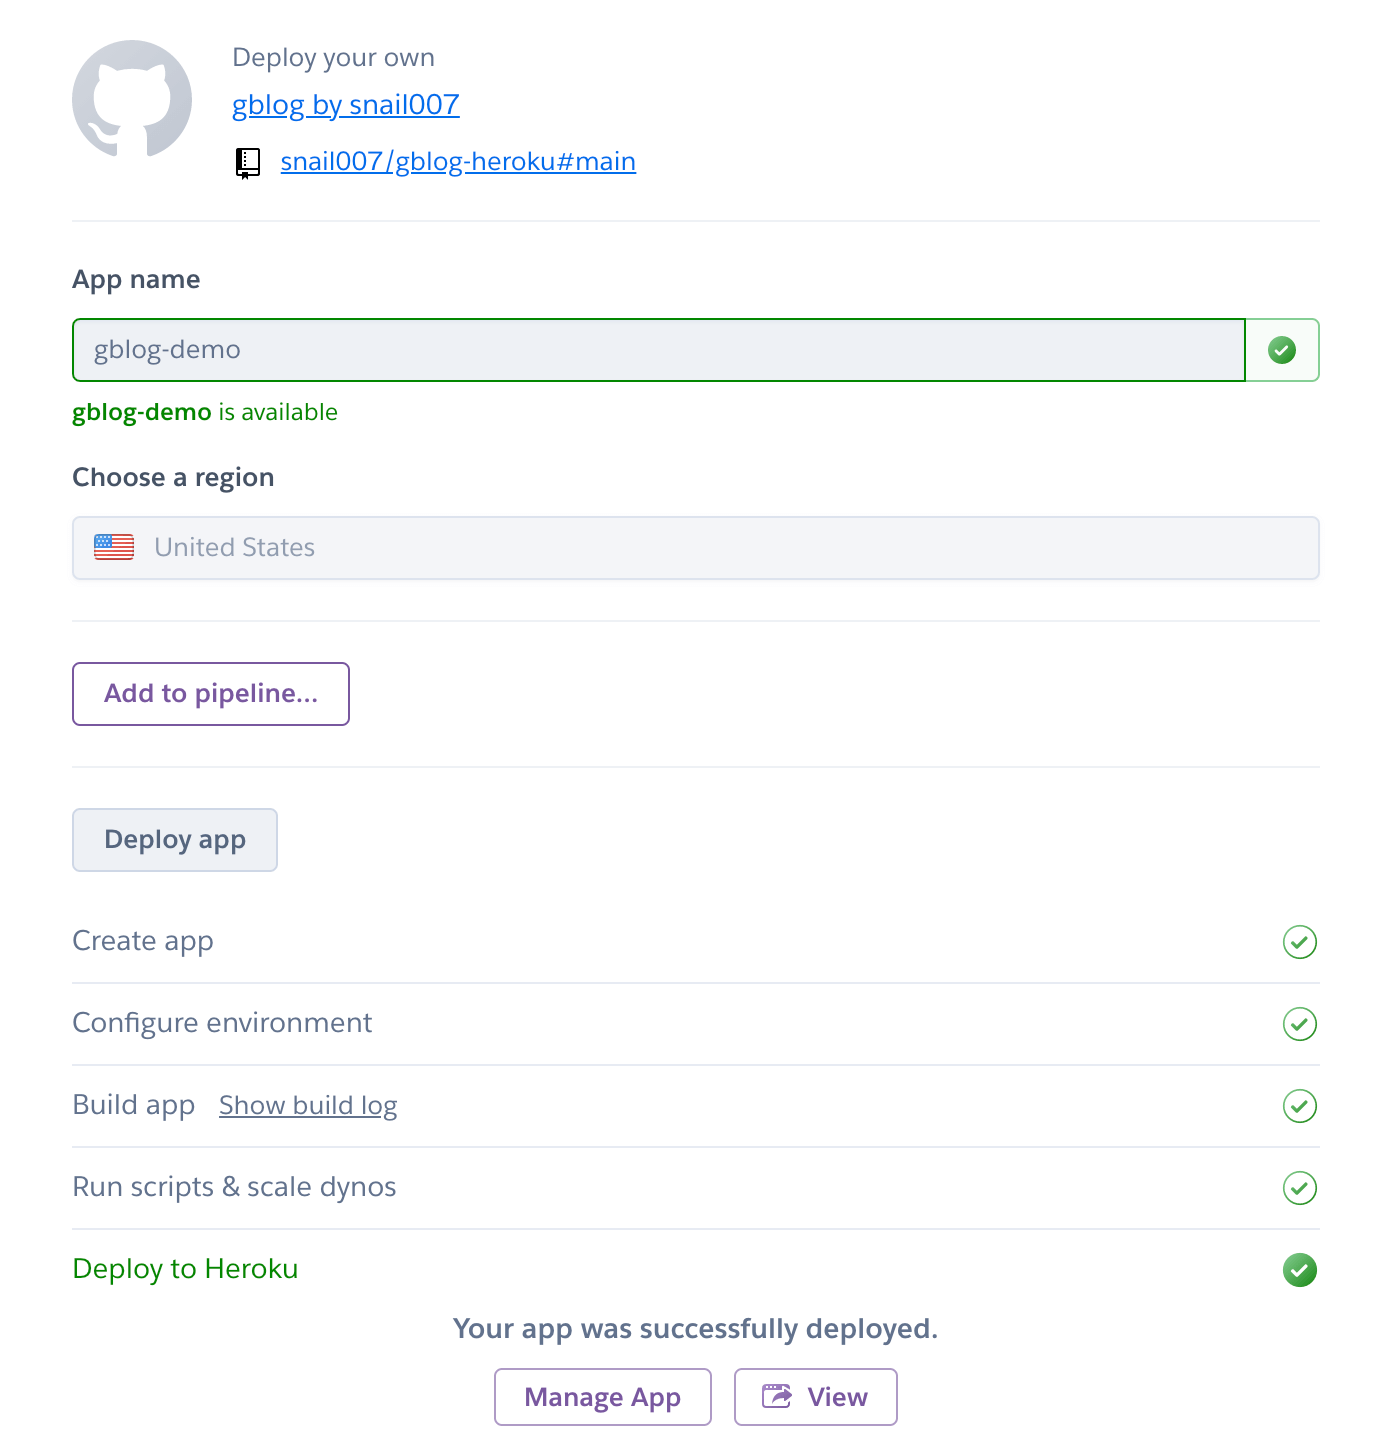
4、等待一会就会完成,这就完成了机器人接口部署。
点击Manage App,可以设置博客空间,比如下面的修改路径。
默认调用接口不需要认证,为了安全,可以设置一个系统变量,设置认证信息,可以在heroku的Setting里面的Config Vars配置一个变量:TG_AUTH=foo,然后重启你的app即可。


比如你的heroku地址是:https://foo.herokuapp.com/
接口请求路径就是:https://foo.herokuapp.com/send
请求方式:post,get均可以
请求参数:
msg: 要发送的文本消息。
uid: 消息接受人的用户ID,telegram里面加机器人@JsonDumpBot聊天可以获取你的用户ID。
token: telegram机器人的token,telegram里面加@BotFather可以创建你的机器人并获取token。
auth: 上面设置的TG_AUTH,如果没有设置,可以不传递这个参数。
只需要发送enctype="multipart/form-data"的普通表单即可,文件的field名称随便写, 其它msg,uid,token,auth字段,放在表单里面或url的参数里面均可以。
如果想要uid可以收到机器人消息,这个uid必须先加机器人,和机器人开始聊天,机器人才能给这个uid发送消息。