![]()
![]()

Status: Beta - This library is currently in beta. Please report any issues or feedback to help us improve.
JavaScript Browser application library for ultimate Web app image (load, pre-load, caching, grouping) control, as well as detailed RAM and GPU memory usage control and monitoring.
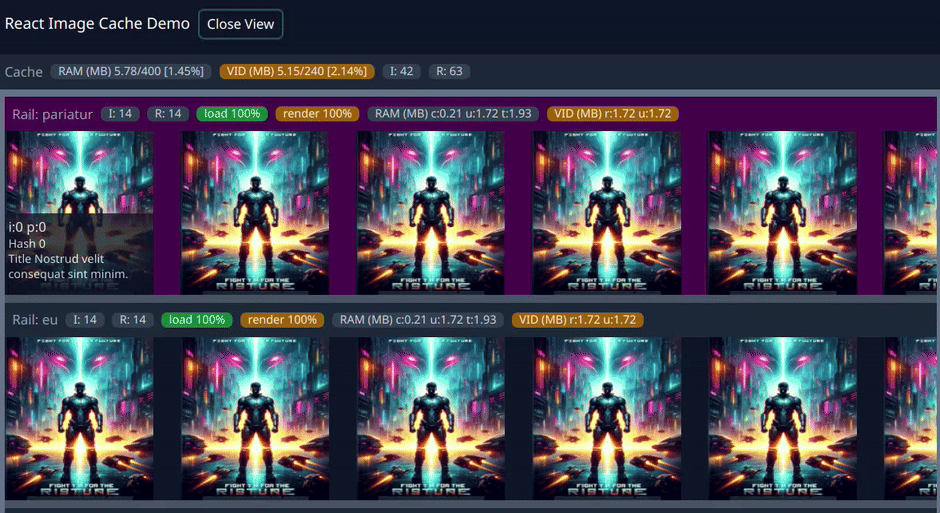
You can find a demo of the library here.


- Origin
- Use Case
- Features
- RAM Usage Monitoring
- GPU Memory Usage Monitoring
- Installation
- Usage
- License
- Acknowledgments
We're all too familiar with the concept of client-side caching. We do it all the time when it comes to server data requests to ensure the same requests from your app are cached in JavaScript/Browser to optimize network traffic load and the responsiveness of your application. Everybody wins: the user (no wait time), the cloud (cutting costs of compute), the user's network load, their machine resources, etc. There are lots of libraries addressing this very issue.
But have you ever wondered what happens when your app requests an image from a server? From my research and experience, the browser caches the image data, but we have no access to it, no control over it, we don't know if the image data was evicted from the cache or how much memory was consumed, no way to monitor it, no way to manage it. If the browser decides to evict the image data from the cache, it will be re-requested from the server, which means UI has to wait for the data again, and the whole process repeats itself. This is not good for the user experience, not good for network traffic, not good for the server, not good for the browser, and not good for the user's machine resources.
And this is where this library comes in.
Two main use cases for this library: Memory Usage and Performance (FPS).
Any web-based application with heavy use of image assets, such as an Image Gallery/Catalog, Product Showcase, or Image Editing, intended to run on a wide range of platforms limited by hardware specifications and/or available resources such as RAM, GPU cache/memory, and CPU. This library provides a way to manage the memory usage of the images loaded by the application and ensure that the application does not consume too much memory and slow down the system while caching images in JS memory and GPU memory.
Rendering multiple images at once can lead to performance issues (FPS drop). The more images and the higher the image resolution, the bigger the impact. This is because the browser has to push a lot of image data to the GPU memory, and the GPU has to render it on the screen. This library provides a way to pre-render images before they are ready to be displayed on the screen, such that it staggers GPU operations between frames, ensuring that the application runs smoothly and efficiently with minimal FPS drop. Amount of time required for pre-rendering images is determined by the image size and hardware rank configuration option. The lower the rank, the slower the pre-rendering process, same goes for larger images takes longer to pre-render. This library does all the heavy lifting for you, so you don't have to worry about it.
image-cache-pro library provides the following features:
- Image pre-loading
- Image pre-rendering
- Image caching
- Image RAM usage monitoring
- Image GPU memory usage monitoring
- Image RAM eviction control
- Image GPU memory eviction control
- Image RAM persistence control
- Image GPU memory persistence control
- Event-driven architecture
- Hardware specifications configuration
image-cache-pro library provides a way to monitor the RAM usage of the images loaded by the application. This is useful to ensure that the application does not consume too much memory and slow down the system.
Image data usage consists of two data footprints:
- Compressed image data footprint: Image data as it was received from the server, depending on image type compression (e.g., JPEG, PNG, WEBP, etc.). This is what the browser downloads and stores in RAM as is.
- Uncompressed image data footprint: Image data after it has been decompressed by the browser to display its bitmap representation on the screen. An RGB or RGBA bitmap representation of the image (grayscale, color, alpha channel, etc.).
Both of these data are stored in the RAM, and this library provides a way to monitor both of these data footprints to give you a complete picture of the memory usage of the images loaded by the application.
image-cache-pro library provides a way to monitor the GPU memory usage of the images loaded by the application. This is useful to ensure that the application does not consume too much memory and slow down the system. Different browsers handle this bit differently, where most desktop browsers will create bitmap data of the image corresponding to actual pixels rendered on the screen and store it in the GPU memory, while other browsers will store the entire uncompressed image data in the GPU memory and render it on the screen using GPU scaling approach. This distinction is important to understand when it comes to GPU memory usage monitoring and is defined by the gpuFullMode configuration option. Where:
gpuFullMode: true- will monitor the entire uncompressed image data footprint in the GPU memory.gpuFullMode: false- will monitor only the rendered bitmap size data footprint in the GPU memory.
This distinction is important to understand when it comes to GPU memory usage and having an understanding of the actual memory usage of the images loaded by the application. Example:
While rendering a 4k image (RGBA) as 100x100 pixels on the screen, the GPU memory usage will be different depending on the browser, and with the gpuFullMode configuration option, we can distinguish a GPU memory footprint:
- In
gpuFullMode: true, the GPU memory usage will be the same as the uncompressed image data footprint size, which means the GPU memory usage will contain the entire uncompressed image data, which in MB is 3840x2160x4 bytes = 33.18 MB.- This is because the entire image data is stored in the GPU memory and rendered on the screen using GPU scaling approach.
- In
gpuFullMode: false, the GPU memory usage will be the same as the rendered RGBA bitmap size data, which means the GPU memory usage will be the same as the 100x100 RGBA image size, which in MB is 100x100x4 bytes = 0.39 MB.
<npm, pnpm, yarn> install image-cache-proCreate a main cache controller instance and configure it with the desired settings.
Is the main cache controller instance that manages the memory usage of the images loaded by the application and ensures that the application does not consume too much memory and slow down the system. Its recommended to create a single instance of the controller for the entire application, however, you can create multiple instances if you must.
import { Controller } from 'image-cache-pro'

const controller = new Controller({
  // Configuration options
  // ...
  RAM: 500, // units of memory for RAM usage
  GPU: 300, // units of memory for GPU usage
  units: 'MB', // 'KB', 'MB', 'GB' units of memory for RAM and GPU
  loaders: 4, // number of concurrent image loaders - max 6
})

// add event listeners if you must
controller.on('update', (event: ControllerEvent<'update'>) => {
  console.log('Controller update event:', event)
})

controller.on('ram-overflow', (event: ControllerEvent<'ram-overflow'>) => {
  console.log('Controller RAM overflow event:', event) // take action to prevent RAM overflow
})

controller.on('video-overflow', (event: ControllerEvent<'video-overflow'>) => {
  console.log('Controller GPU overflow event:', event) // take action to prevent GPU overflow
})Then anywhere in your application, create an image Bucket to handle images in groups. Think of Buckets as a way to group images that you want to load, cache, monitor, and control, say for each page or each section of your application.
You can create unlimited buckets, but it's recommended to create a single bucket for each page or section of your application.
Bucket will automatically load and render images in the background, and you can monitor the progress of the images being pre-rendered by listening to the rendered event.
import { Bucket } from 'image-cache-pro'

const bucket = new Bucket({
  // Configuration options
  // ...
  controller, // pass the controller instance
  lock: true, // lock the bucket to prevent eviction of images in you need the data to persist in the cache
  name: 'Recent Images', // name of the bucket - optional, good for debugging
})

// wait for all bucket requests to be pre-rendered do you can trigger smooth rendering of the images on the screen
bucket.on('rendered', (event: BucketEvent<'rendered'>) => {
  console.log('All bucket requests are pre-rendered:', event)
  // ex: myGallery.fadeIn();
})

// you can clear (release) bucket content by calling clear method
myGallery.on('exit', event => {
  bucket.clear()
  console.log('Bucket cleared:', event)
})Now you're ready to define your images using RenderRequest method, which is a way to request an image to be loaded, cached, monitored.
Note: You must set request image
sizeto let the library know how to handle the image data, because you can have same image requested multiple times with different sizes, which will be handled differently by the library.
const urls = [...]; // array of image urls

urls.forEach(url => {
  const request = new RenderRequest({
    // Configuration options
    // ...
    bucket, // pass the bucket instance
    url, // image url
    size: { width: 100, height: 100 }, // image size - required
  });

// typically there is no need to monitor request, but you can if you must
  request.on('rendered', (event: RenderRequestEvent<'rendered'>) => {
    console.log('Image Pre-rendered and ready to be used:', event);
  });
});
All done! Now you have a complete control over the images loaded by your application.
There are many events you can listen to and many methods you can call to control the images loaded by your application.
export type ControllerEventTypes =
  | 'ram-overflow' // RAM overflow event
  | 'video-overflow' // GPU overflow event
  | 'update' // controller update event
  | 'image-added' // image added to the cache
  | 'image-removed' // image removed from the cache
  | 'clear' // cache clear event
  | 'render-request-added' // image render request added
| 'render-request-removed' // image render request removedexport type BucketEventTypes =
| 'progress' // image load progress fro entire bucket
| 'loadend' // image load end for entire bucket
| 'error' // image load error
| 'rendered' // when all images are pre-rendered
| 'clear' // when bucket is cleared
| 'loading' // when bucket is loading images
| 'request-rendered' // when image render request is pre-rendered
| 'request-loadend' // when image render request is loaded
| 'render-progress' // image render progress
| 'update' // bucket update - general eventexport type RenderRequestEventTypes =
| 'rendered' // image pre-rendered
| 'clear' // image request cleared
| 'loadend' // image request loaded
| 'rendering' // image request rendering
| 'loadstart' // image request load start
| 'progress' // image request load progress
| 'error' // image request load error
| 'render' // image request render startNetwork instance can be accessed by calling controller.network and you can listen to network events as well.
const loaderEvent: LoaderEventTypes[] = [
  'loadstart',
  'progress',
  'abort',
  'error',
  'timeout',
  'loadend',
]
Memory instance can be accessed by calling controller.ram/gpu and you can listen to memory events as well.
export type MemoryEventTypes =
  | 'overflow'
  | 'clear'
  | 'bytes-added'
  | 'bytes-removed'
  | 'cleared'
| 'update'MIT
Thanks to Oregan Networks for sponsoring this project! 🎉🎉🎉
Enjoy! 🎉🎉🎉