This Template allows you to quickly and easily develop a web application using MERN stack.
It helps you if you read through this README to get the most our of what this template has to offer. I appreciate any issue reports or recommendations for further development.
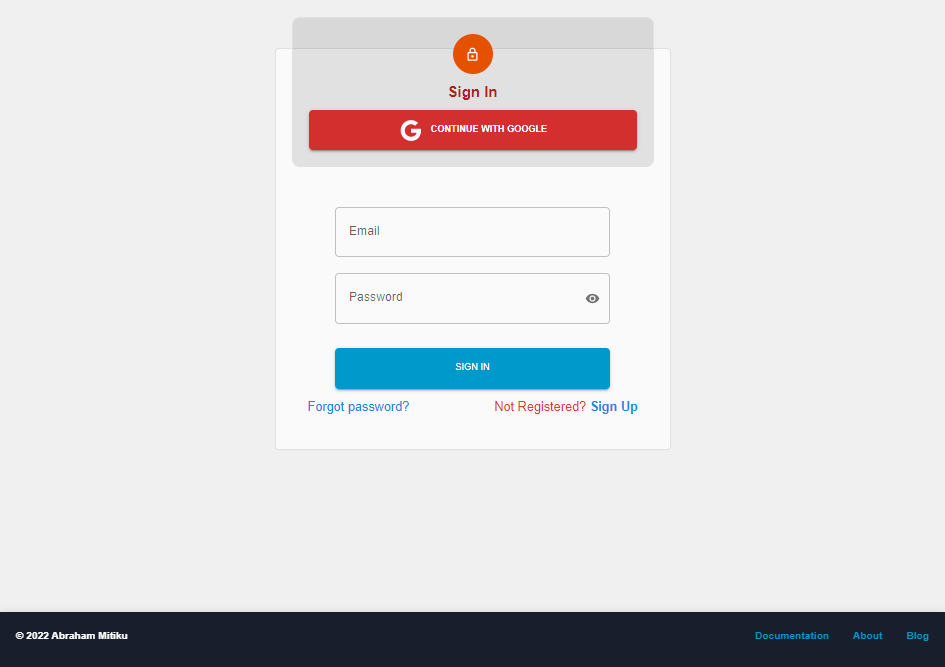
Screenshot
These instructions will guide you on how to use and integrate with your design or next app idea. For Front-End implementation guides, you can find necessary informations in clients directory.
✅ Signup & Sign-in with Google OAuth and Local Account.
✅ New account verification via email address.
✅ Reset password verification via email address.
✅ Profile Management, picture upload, ...(CRUD operations).
✅ React Routes authentications.
✅ REST API with (passport, jsonwebtoken) for authentication.
✅ Scheduling Job tasks.
❗ npm + (node) latest version nodejs
❗ React 16.8++ ReactJs
❗ React Router V6 react-router-dom
❗ Material UI MUI
❗ MongoDB setup MongoDB Atlas
❕ @SendGrid API setup SendGridAPI
❕ Google oAuth setup Google Console
✔️ Node.js
✔️ Express.js
✔️ React.js
✔️ Material-UI
✔️ Redux
✔️ MongodDB
- Backend setup
In the current/main directory folder run this command, Which will install all dependencies for [Backend]
> npm install --saveAdd Environmental variable .env file! and add accordingly
PORT= ? // port number for [backend development] e.g 4000
DATABASE_URI= ? // database URI
ACCESS_KEY= ? // secret access_key for jwt authentication
REFRESH_KEY= ? // secret refresh_key for jwt authentication
ORIGIN_ACCESS_HOST= ? FrontEnd Host Link e.g https://example.com || http://localhost:3000
SITE_HOST= ? Backend Host Link e.g e.g https://api.example.com || http://localhost:4000
NEW_ACCOUNT_VERIFY_ROUTE= ? // New account verification link e.g auth/verify-email/1
RESET_PASSWORD_VERIFY_ROUTE=? // Reset password verification link e.g auth/verify-email/0
SENDGRID_API_KEY= ? // SENDGRID API KEY
SECRET_SITE_EMAIL= ? // your sendgrid connected -> email address e.g [email protected]
SECRET_SITE_EMAIL_PASSWORD= ? // your sendgrid connected -> password
To Generate TOKENS using CRYPTO write & run this below in your terminal.
> node
> require('crypto').randomBytes(64).toString('hex')- Frontend setup
In the current/main directory folder run this command, Which will install all dependencies for [Frontend]
> cd client
> npm install --save✔️ Below is Implementation of Backend For Front-End implementations you can visit to Client directory folder Frontend README
| Folder | Description |
|---|---|
client |
Front end implementation directory |
config |
Configuration folder for back end |
controllers |
Where business logic applied (data manipulations) |
email-templates |
Ejs/html files that will be rendered and send to emails |
middleware |
Intercepts every request which requires authorization |
models |
Mongodb database schemas |
routes |
API endpoints |
schedules |
Scheduling tasks for data manipulations (CRUD) operations |
Here initiation of important libraries will be implement here. You can Add any libraries for initiation here. For example: initializing Database (mongodb)
// create initMongdob file in config director and then inside, create initMongDb function - which accepts mongoose object
// One Parameter - Accepts (mongoose object)
// after exporting ... you require and  add mongoose object from server.js file
const initMongoDb = (mongoose) =>{
    mongoose.connect(process.env.DATABASE_URI,{
        useNewUrlParser: true,
        useUnifiedTopology: true
    })
    .then(() => console.log("Connected to mongoDB"))
    .catch(err => console.log(err.message))
};
// export and call this function from server.js file
module.exports = initMongoDb;

// Then later in server.js file
// import mongoose library
// import initMongodb function
const mongoose = require('mongoose');
const initMongoDb = require('./config/initMongoDb');

// call initMongodb function
initMongoDb(mongoose);
// so, every initializing will goes like this.
Models - Database Schemas will be designed in this folder For example: to create new model
// create a file in models folder.. e.g User.js
// import mongoose library
// and implement your model schema for User document
// simple example
const mongoose = require('mongoose');

const UserSchema = mongoose.Schema({
    email: String,
    password: String,
},{timestamps:true});
// then export this module
module.exports = mongoose.model('User', UserSchema);
// later on, these models will be imported in controllers director folder.
Controllers - Here where we manipulate user data, ... business logics For example: to create new controller
// create a file in controllers folder.. e.g  Account.controller.js
// first thing is import database from models directory folder
const User = require('../models/User');
// here you can import any libraries or models you think useful
// create a controller functions [eg. creatAccount]
const createAccount = (req, res)=>{
   // steps to do
   // 1. implement your logic here
   // 2. then export it
   // 3. import it on your routes -> api directory folder
}
// then export this module
module.exports = {createAccount}
// later on, these controllers will be imported in routes director filder
Routes - which contains [ api directory folder && index.js file] api folder - contains all api end-point js files index.js file - imports all api's and lined with a single api route. For example: api folders
// contains [many api routes and one index.js file]
// index.js file -  import api routes and arrange them accordingly
// many api route files - each describes their own api routes
// e.g lets create account api route in api directory [account.js]
// and create index.js file

// [account.js]
// import necessary modules/libraries here
// imports controller from account.controller
const express = requre('express');
// we have created [createAccount function before] in account.controller.js file
const {createAccount} == require('../../controllers/Account.controller');
const router = express.Router();

// now create endpoints for account route
router.post('/create-account', createAccount);
// implement many as you need an api endpoint for account route.
// the export it
module.exports = router
// later on will be imported in index.js file in [same director]

// [index.js]
const router = require('express').Router();
const accountRoutes = require('./account');

// account route
router.use('/account', accountRoutes); // same as https://****/user/account/***
// add many routes eg[ profile, ..etc]
// export this file
module.exports = router;
// later on wil be imported and used with [router folder] index.js file
// which all will be as a single line endpoint [user/]

// in [routes folder] index.js file
// import root or collected api routes
const router = require('express').Router();
const apiRoutes = require('./api');
// api routes
router.use('/user', apiRoutes);
// export this router
// later on, will be imported and called from server.js file

// in server.js file
const routes = require('./routes');
app.use(routes);
// done..
Middleware - Intercepts in every requests for required authorization routes. For example: create checkAuthorized.js file in middleware folder
// import any necessary library for authorization purporse.
// in this case, we use passport
const passport = require('passport');
// create passport authenticate
const checkAuthorized = passport.authenticate('jwt', { session: false });
// export it
module.exports = checkAuthorized;
// later on, will be used in routes -> api -> api's file
// e.g create api file in one of api endpoint files => [profile.js]
const express = require('express');
const checkAuthorized = require('../../middleware/checkAuthorized');
const {readProfile} = require('../../controllers/Profile.controller');
const router = express.Router();
// here will will add checkAuthorized between api endoint and controller function
router.get('/auth/read-profile', checkAuthorized, readProfile.auth.byId);
//
module.exports = router;
//email-templates - This is an ejs file templates which can be rendered and send to a user email address. create ejs file and to render:
// after/before creating an email template make sure:
// you created a path and set view [ejs] in server.js file
// you can use any templates here
// In [server.js] file add
app.set('view engine', 'ejs'); // you can use any templates
// then
// in any controllers file
// import necessary libraries
// for this case
const ejs = require('ejs'); // ejs template for nodejs
const path = require('path'); // path of email template
// import your initialized mailing system.
const sendMail = require('../config/initMailer'); // for this case, we used, sendgrid api
// render your ejs file as this code below
let ejsTemplate = 'your template name';
let to = '[email protected]';
let from = 'your sendgrid api email';
let subject = 'testing ejs file template';
let text= 'it works good';
let dataToRender = {
username: 'sampleuser',
linkToRedirect: 'https://exmaple.com/verify/...',
image: 'https://imagelinksifnecessary.com'
}
ejs.renderFile(path.join(__dirname, `path/to/email-template/${ejsTemplate}`),
// here you can use any data's or information you want to render
// this data later on be displayed on users email address
// make sure to use same varables name in your ejs/anytemplate file
dataToRender
)
.then(async(result) => {
let emailTemplate = result;
await sendMail(from, to, subject, text, emailTemplate);
})
.catch(err => {
console.log('unable to render email template!')
});
//Scheduling - are job tasks which can be used for data manipulation in some time intervals. For example: create a schedule job file in - schedules directory folder
// first you are required to use job tasks libraries for this purpose
// In this case, We used Agenda.js
// initialize and create Agenda in config folder like we do
// export and import initAgenda file it in server.js file
// You can use any job tasking libraries.

// Next step,
// before creating job tasks make sure to call jobs tasks in controllers
const removeAccount = async(req,res)=>{
    //schedule your job task here first, then
}
// create job task file in schedules folder
// import, initAgenda/or job tasks initializer function from config
// import any useful controllers for data manipulations


// DEFINE ALL JOB TASKS

// add many tasks as you need here, then

// create a function for intercepting in every request
const AccountJobs = app =>{
    app.use("/account-jobs", (req, res) => {
    res.send("Database job added to queue!");
  });
}
// export accountjobs and import it in server.js
// Later on,
const AccountJobs = require('./schedules/AccountJobs');
AccountJobs(app);
//Let me know if you find any issue or difficulties.
👨 Abraham Mitiku
Give this a ⭐