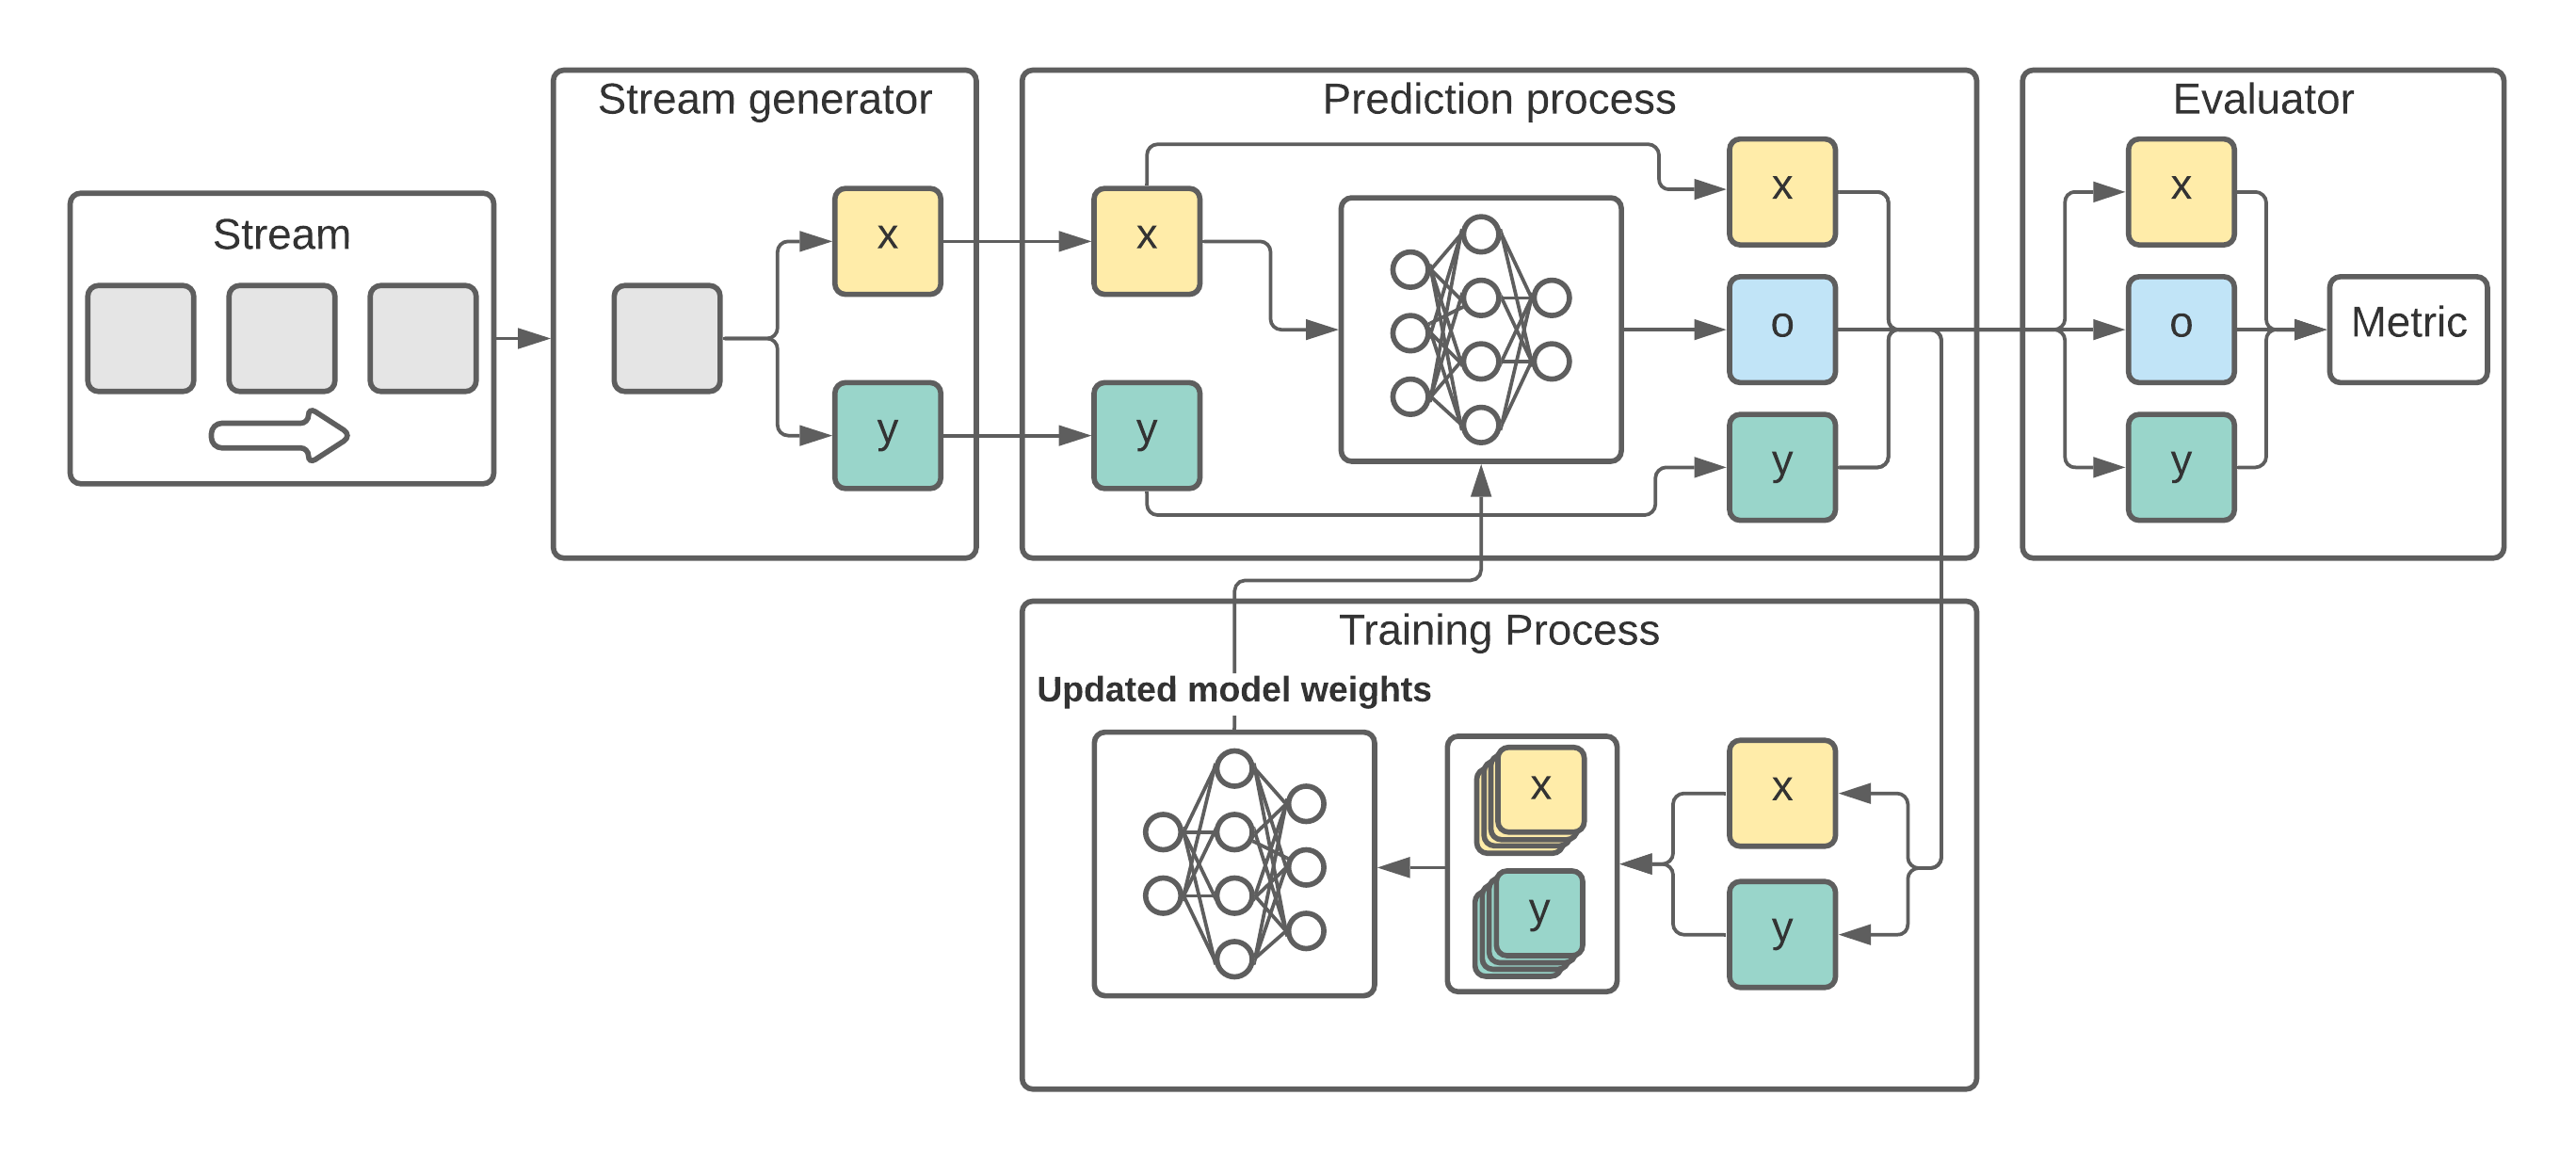
ADLStream is a novel asynchronous dual-pipeline deep learning framework for data stream mining. This system has two separated layers for training and testing that work simultaneously in order to provide quick predictions and perform frequent updates of the model. The dual-layer architecture allows to alleviate the computational cost problem of complex deep learning models, such as convolutional neural networks, for the data streaming context, in which speed is essential.
Complete documentation and API of ADLStream can be found in adlstream.readthedocs.io.
- ADLStream - Asynchronous dual-pipeline deep learning framework for online data stream mining.
Ideally, ADLStream should be run in a two GPU computer. However, it is not compulsory and ADLStream can be also run in CPU.
ADLStream uses Tensorflow. If you are interested in running ADLStream in GPU, the tensorflow>=2.1.0 GPU specifications are querired.
If you don't want to use GPU go to Installing ADLStream.
- Computer with at least 2 NVIDIA® GPU card with CUDA® Compute Capability 3.5 or higher
The following NVIDIA® software must be installed on your system:
- NVIDIA® GPU drivers —CUDA 10.0 requires 418.x or higher.
- CUDA® Toolkit —TensorFlow supports CUDA 10.1 (TensorFlow >= 2.1.0)
- CUPTI ships with the CUDA Toolkit.
- cuDNN SDK (>= 7.6)
- (Optional) TensorRT 6.0 to improve latency and throughput for inference on some models.
You can install ADLStream and its dependencies from PyPI with:
pip install ADLStreamWe strongly recommend that you install ADLStream in a dedicated virtualenv, to avoid conflicting with your system packages.
To use ADLStream:
import ADLStreamThese instructions explain how to use ADLStream framework with a simple example.
In this example we will use a LSTM model for time series forecasting in streaming.
Fist of all we will need to create the stream.
Stream objects can be created using the classes from ADLStream.data.stream. We can choose different options depending on the source of our stream (from a csv file, a Kafka cluster, etc).
In this example, we will use the FakeStream, which implements a sine wave.
import ADLStream

stream = ADLStream.data.stream.FakeStream(
    num_features=6, stream_length=1000, stream_period=100
)
More precisely, this stream will return a maximun of 1000 instances. The stream sends one message every 100 milliseconds (0.1 seconds).
Once we have our source stream, we need to create our stream generator.
A StreamGenerator is an object that will preprocess the stream and convert the messages into input (x) and target (y) data of the deep learning model.
There are different options to choose under ADLStream.data and, if needed, we can create our custom StreamGenerator by inheriting BaseStreamGenerator.
As our problem is time series forecasting, we will use the MovingWindowStreamGenerator, which performs the moving-window preprocessing method.
stream_generator = ADLStream.data.MovingWindowStreamGenerator(
    stream=stream, past_history=12, forecasting_horizon=3, shift=1
)
For the example we have set the past history to 12 and the model will predict the next 3 elements.
In order to evaluate the performance of the model, we need to create a validator object.
There exist different alternative for data-stream validation, some of the most common one can be found under ADLStream.evaluation.
Furthermore, custom evaluators can be easily implemented by inheriting BaseEvaluator.
In this case, we are going to create a PrequentialEvaluator which implements the idea that more recent examples are more important using a decaying factor.
evaluator = ADLStream.evaluation.PrequentialEvaluator(
    chunk_size=10,
    metric="MAE",
    fadding_factor=0.98,
    results_file="ADLStream.csv",
    dataset_name="Fake Data",
    show_plot=True,
    plot_file="test.jpg",
)
As can be seen, we are using the mean absolute error (MAE) metrics. Other options can be found in ADLStream.evaluation.metrics.
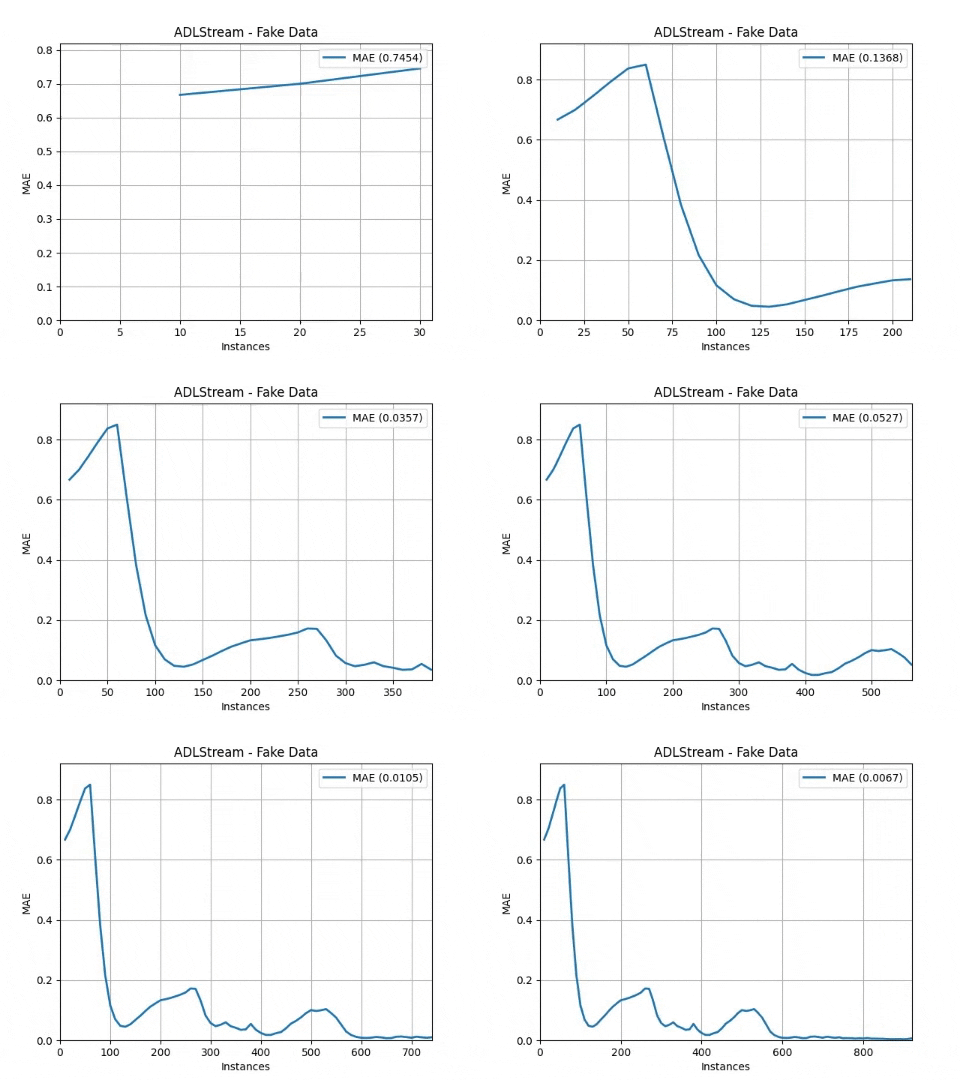
The evaluator will save the progress of the error metric in results_file and will also plot the progress and saved the image in plot_file.
Finally we will create our ADLStream object specifying the model to use.
The required model arguments are the architecture, the loss and the optimizer. In addition, we can provides a dict with the model parameters to customize its architecture.
All the available model architecture and its parameters can be found in ADLStream.models.
For the example we are using a deep learning model with 3 stacked LSTM layers of 16, 32 and 64 units followed by a fully connected block of two layers with 16 and 8 neurons.
model_architecture = "lstm"
model_loss = "mae"
model_optimizer = "adam"
model_parameters = {
    "recurrent_units": [16, 32, 64],
    "recurrent_dropout": 0,
    "return_sequences": False,
    "dense_layers": [16, 8],
    "dense_dropout": 0,
}

adls = ADLStream.ADLStream(
    stream_generator=stream_generator,
    evaluator=evaluator,
    batch_size=60,
    num_batches_fed=20,
    model_architecture=model_architecture,
    model_loss=model_loss,
    model_optimizer=model_optimizer,
    model_parameters=model_parameters,
    log_file="ADLStream.log",
)Once we came the ADLStream object created, we can initiate it by calling its run function.
adls.run()The processes will start and the progress will be plot obtaining a result similar to this one
Complete API reference can be found here.
Here it is the original paper that you can cite to reference ADLStream
Any other study using ADLStream framework will be listed here.
Read CONTRIBUTING.md. We appreciate all kinds of help.
This project is licensed under the MIT License - see the LICENSE.md file for details


