
A Cloud Foundry service broker to dump and restore databases on demand.
Currently supported databases are:
- mysql
- postgresql
- mongodb
- redis
More details in the specifications at https://docs.google.com/document/d/1Y5vwWjvaUIwHI76XU63cAS8xEOJvN69-cNoCQRqLPqU/edit .
See also the backlog with label "service-db-dumper".
- Cloud Foundry (>=192) with service broker api 2.6 at least
- A s3 service to store dumps (e.g: p-riakcs, s3-cf-service-broker or aws s3 given with cups)
- A database service to store models (e.g: p-mysql, cleardb)
- Download latest release.zip in releases
LATEST_RELEASE_URL=$(curl -s https://api.github.com/repos/orange-cloudfoundry/db-dumper-service/releases/latest | grep browser_download_url | head -n 1 | cut -d '"' -f 4)
echo "Downloading $LATEST_RELEASE_URL"
curl -O -L $LATEST_RELEASE_URL- Unzip the latest downloaded file
- Create a s3 service instance in your cloud foundry instance (e.g for p-riakcs:
cf cs p-riakcs developer riak-db-dumper-service) - Create a database service instance in your cloud foundry instance (e.g for p-mysql:
cf cs p-mysql 100mb mysql-db-dumper-service) - Update the manifest (
manifest.yml) file in the unzipped folder (Note: If you don't want to use uaa to protect access to dashboards, remove uaa profile fromspring_profiles_active) - Add cloudfoundry API user following
cf_admin_userandcf_admin_passwordvar in manifest (This required for db-dumper to lookup databases by their service name using CC API. Acloudcontroller.readpermission is required on all spaces with db instances to dump. Alternatively,cloudcontroller.adminpermission could be granted to this user to access any service instance in any space) - Push to your Cloud Foundry (in the manifest.yml folder:
cf push) - Register and enable the service broker with:
$ cf create-service-broker db-dumper-service broker-user-from-manifest broker-password-from-manifest https://db-dumper-service.your.domain
$ cf enable-service-access db-dumper-service
You need to create a new uaa client if you want to use UAA to authenticate user in the dashboard, here the steps you need to do:
- use uaa-cli and run:
uaac client add db-dumper-service --name "db-dumper-service" --scope "openid,cloud_controller_service_permissions.read" --authorities "openid" -s "mysupersecretkey" --signup_redirect_url "http://your.db-dumper-service.url"(Note:--signup_redirect_urlis optional but highly recommended for security) - Update your
manifest.yml(see:uaa_url,security_oauth2_client_clientIdandsecurity_oauth2_client_clientSecretkeys)
Note:
- Default user to access to dashboard is user/password
- By default when you activate profile it use a filesystem filer, to use a S3 filer instead activate the profile
s3(e.g.spring_profiles_default=local,s3) and set the uri of your s3 inconfig/spring-cloud.propertiesfile (change the value ofspring.cloud.mys3).
- Clone this project
- Run the script
bin/install-binariesto download all required binaries - You need to activate the spring profile
localto do this set an env varspring_profiles_default=local, you can either use with uaa profile to:spring_profiles_default=local,uaa(in this case you will need to set the envuaa_urlwith the url of your uaa) - Run the application
- Clone this project
- You will need to have binaries for driver you want to use
- These env vars need to be set (set only driver you want to use):
mysql_dump_bin_path(Path to mysqldump binary),mysql_restore_bin_path(Path to mysql binary),postgres_dump_bin_path(Path to pg_dump binary),postgres_restore_bin_path(Path to psql binary),mongodb_dump_bin_path(Path to mongodump binary),mongodb_restore_bin_path(Path to mongorestore binary),redis_rutil_bin_path(Path to rutil binary) - You need to activate the spring profile
localto do this set an env varspring_profiles_default=local, you can either use with uaa profile to:spring_profiles_default=local,uaa(in this case you will need to set the envuaa_urlwith the url of your uaa) - Run the application
Note:
- The service broker will run tasks asynchronously.
- The user token is needed when you want to dump or/and restore a database by its service name to check if your user is able to access to this service (We are waiting for token delegation implementation to remove the need for a mandatory user token)
You may use the cli plugin associated to this broker:
- Download the latest release of the db-dumper-cli-plugin here: https://github.com/Orange-OpenSource/db-dumper-cli-plugin/releases (e.g.:
curl -L "https://github.com/Orange-OpenSource/db-dumper-cli-plugin/releases/download/v1.4.1/db-dumper_linux_amd64" -o db-dumper-plugin chmod +x db-dumper-plugin- Install it to your cli with this command:
cf install-plugin "path/of/db-dumper-plugin" -f
Note: You can use this service without cli plugin, it was made only to have a more convenient way to use it than using broker arbitrary parameters.
This command will create a dump for you:
cf cs db-dumper-service experimental service-name -c '{"db":"mysql://user:[email protected]:port/database-name"}'
Sometime, you would like to tag a particular dump, for this you can pass a list of tags during dumps creation. For this you will need to pass this particular json:
{
  "metadata":
    {
      "tags": [
        "mytag1",
        "mytag2"
        //...
      ]
    }
}
Example
cf cs db-dumper-service experimental service-name -c '{"db":"mysql://user:[email protected]:port/database-name", "metadata": {"tags": ["v1"]}}'
For example you have a p-mysql service instance named my-mysql-db, you can create a dump with these parameters:
cf cs db-dumper-service experimental service-name -c '{"db":"my-mysql-db", "cf_user_token": "token retrieve from cf oauth-token", "org": "org of the service", "space": "space of the service"}'
cf update-service test -c '{"action": "restore", "db": "mysql://user:[email protected]:port/database-second-name"}'
For example you have a p-mysql service instance named my-mysql-restore-db, you can restore a dump with these parameters:
cf update-service test -c '{"action": "restore", "db":"my-mysql-restore-db", "cf_user_token": "token retrieve from cf oauth-token", "org": "org of the service", "space": "space of the service"}'
When you bind to your service instance you could find dumps created by your service instance as credentials, here what it's look like in credentials:
{
  "database_type": "mysql",
  "database_ref": "uri or service name passed",
  "dumps": [
    {
      "dump_id": "1",
      "download_url": "http://generated-user:[email protected]/1",
      "show_url": "http://url.of.db.dumper/1",
      "filename": "file.sql.gzip",
      "created_at": "01-01-1970 00:00",
      "size": 20, // filesize in bytes
      "deleted": false,
      "tags": [
        "tag1"
      ]
    }
  ]
}By default, you can see only dumps corresponding to your service instance,
but if you would like to see all dumps created by any service instance linked to this database, you can pass a see_all_dumps parameter to true during binding.
Example:
cf bind-service myapp test -c '{"see_all_dumps": true}'
You can decide to only look at dumps created with a particular tags, to do so you will also need to pass a find_by_tags parameter during binding which contains one or multiple tags.
Example:
cf bind-service myapp test -c '{"find_by_tags": ["mytag"]}'
If you want to create a new dump you can use this command:
cf update-service test -c '{"action": "dump"}'
This is equivalent to delete the service, your dumps will be deleted after 5 days to prevent mistake (set by dump_delete_expiration_days in manifest):
cf ds db-dumper-service experimental service-name
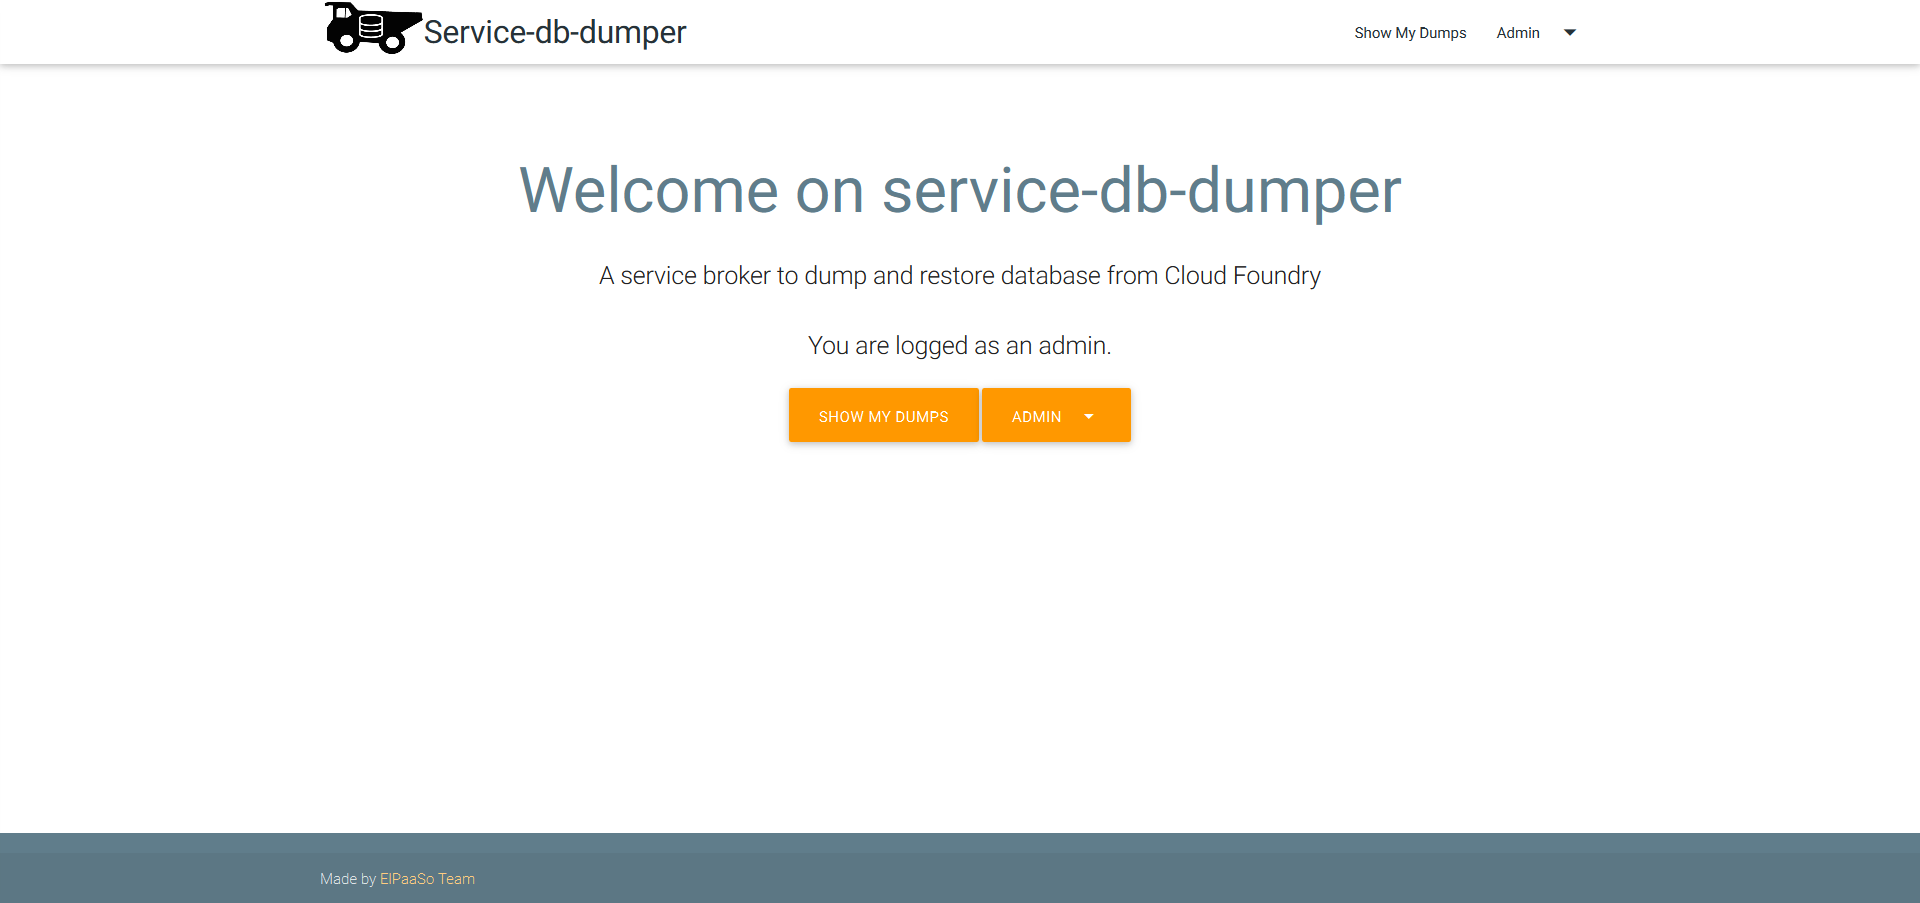
Users can see their dumps by using the dashboard URL accessible in each service instance, which has format: https://db-dumper-service.my.domain/manage
Preview:

Admins have access to a backoffice UI available at https://db-dumper-service.my.domain/manage/admin (protected by basic auth with user and password set in the manifest, see admin_username and admin_password)
Preview:
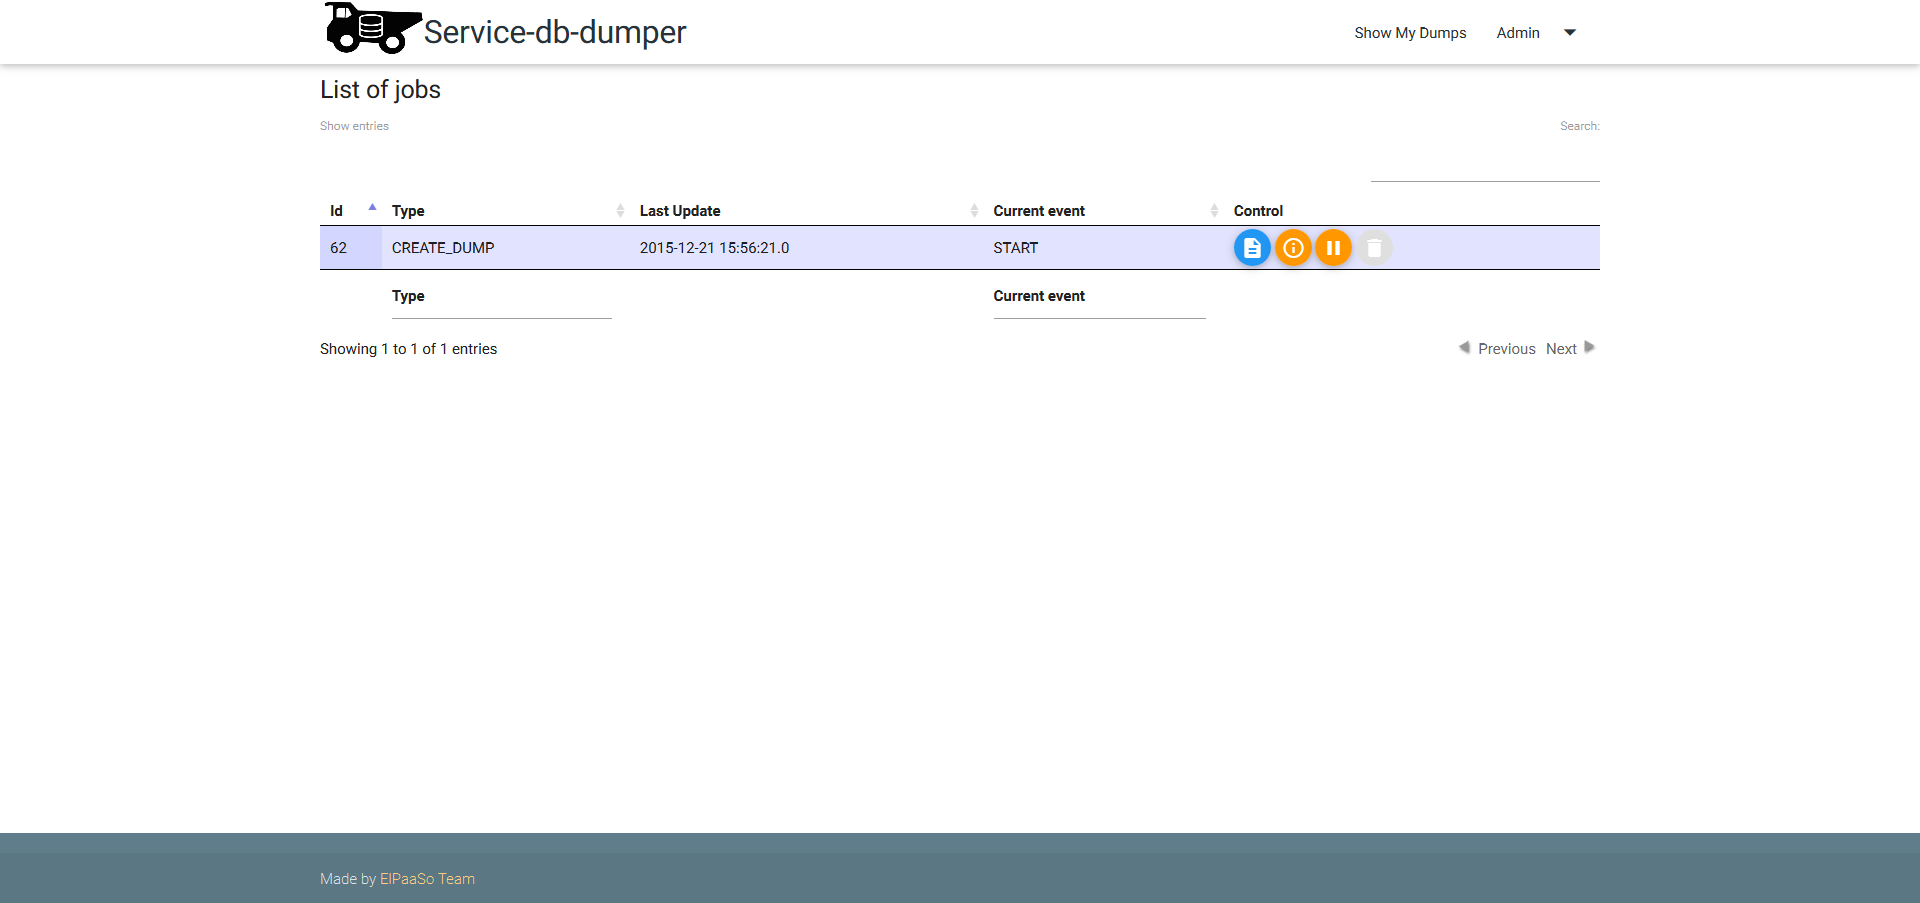
Sometimes, async jobs need to be managed, admins can use the job backoffice UI at https://db-dumper-service.my.domain/admin/control/jobs
Preview:
In order to run all tests you need to clone this project
- Install maven
- run
mvn clean testinside the project
To run integration tests on a non linux system you will have to install and run each database type you want to test:
- MySQL (or mariadb which is preferred one): https://downloads.mariadb.org/mariadb/repositories/#mirror=urbach
- PostgreSQL: http://www.postgresql.org/download/
- MongoDB:
- To run database: https://www.mongodb.org/downloads#production
- To dump and restore, prefer to install those binaries (Waiting the PR related to be merged): https://github.com/ArthurHlt/mongo-tools
- Redis:
- To run database: http://redis.io/download
- To dump and restore: https://github.com/pampa/rutil
You will need to set java properties or env vars (replace '.' by '_' ) to specify dump and restore binaries path for each database type:
| Properties | Example Location |
|---|---|
| mysql.dump.bin.path | /usr/local/bin/mysqldump |
| mysql.restore.bin.path | /usr/local/Cellar/mariadb/10.1.8/bin/mysql |
| postgres.dump.bin.path | /usr/local/bin/pg_dump |
| postgres.restore.bin.path | /usr/local/bin/psql |
| mongodb.dump.bin.path | /usr/local/bin/mongodump |
| mongodb.restore.bin.path | /usr/local/bin/mongorestore |
| redis.rutil.bin.path | /Users/arthurhalet/go/bin/rutil |
TIP: If you are on linux 64 based OS you will do not need to do this, simply run the script bin/install-binaries
If you want to test on a real Cloud Foundry you will need to set these properties or env var (replace '.' by '_' ):
| Properties | Default value | Description |
|---|---|---|
| cloud.controller.url | N/A | API url of your cloud foundry |
| cf.admin.user | N/A | Username to connect to cloud foundry |
| cf.admin.password | N/A | Password to connect to cloud foundry |
| int.cf.admin.org | N/A | Org to target to put services |
| int.cf.admin.space | N/A | Space to target to put services |
| int.cf.service.name.mysql | cleardb | Mysql service name from marketplace |
| int.cf.service.plan.mysql | spark (free plan) | Mysql service plan from marketplace |
| int.cf.service.name.postgresql | elephantsql | postgresql service name from marketplace |
| int.cf.service.plan.postgresql | turtle (free plan) | postgresql service plan from marketplace |
| int.cf.service.name.mongodb | mongolab | mongodb service name from marketplace |
| int.cf.service.plan.mongodb | sandbox (free plan) | mongodb service plan from marketplace |
| int.cf.service.name.redis | rediscloud | redis service name from marketplace |
| int.cf.service.plan.redis | 30mb (free plan) | redis service plan from marketplace |
Set two env var:
DYNO=trueS3_URL=s3://accessKeyId:[email protected]/mybucket(Change the value with your own s3 url)
| Properties | Default value | Description |
|---|---|---|
| int.mysql.server | mysql://root@localhost/dbdumpertestsource | URI of your mysql server, you can have to change dbdumpertestsource by a real database created on your mysql server |
| int.postgres.server | postgres://postgres@localhost/dbdumpertestsource | URI of your mysql server, you can have to change dbdumpertestsource by a real database created on your postgresql server |
| int.redis.server | redis://localhost | URI of your redis server |
| int.mongodb.server | mongodb://localhost/dbdumpertestsource | URI of your mongodb server |
| http.proxyHost | N/A | host of your http proxy (if you have one) |
| http.proxyPort | N/A | port of your http proxy (if you have one) |
| http.proxyUsername | N/A | username of your http proxy (if you have one) |
| http.proxyPassword | N/A | password of your http proxy (if you have one) |
| skip.ssl.verification | false | Set to true if you want to skip ssl verification when connecting to cloud foundry or s3 bucket |
- Install maven
- run
mvn clean integration-testinside the project