14th Feb Event documentation on Introduction Microsoft Bot Framework with .Net
The Following are some helpful links for learning more about Bot Framework
- Home Page : https://dev.botframework.com/
- Documentation : https://docs.microsoft.com/en-us/Bot-Framework/index
- Programming the Microsoft Bot Framework : https://aka.ms/botbook/
- Azure : https://azure.microsoft.com/
- LUIS nlp ai : https://www.luis.ai/
- Cognitive Services : https://azure.microsoft.com/en-us/services/cognitive-services/
- VentureBeat Bots: http://venturebeat.com/category/bots/
- Facebook Chatbot group: http://bit.ly/1rCWzkS
- Chatbots Magazine: https://chatbotsmagazine.com/
- Twitter: #botframework, #chatbots, and #convcomm
- Consult ppt file for general instruction.
- Simple Mathematical bot sample is added with flowchart in ppt.
-
Log in to Azure
-
Click the New button found on the upper left-hand corner of the Azure portal, then select AI + Cognitive Services > Web App bot.
-
A new blade will open with information about the Web App Bot. Click the Create button to start the bot creation process.
-
In the Bot Service blade, provide the requested information about your bot as specified in the table below the image.

| Setting | Suggested value | Description |
|---|---|---|
| Bot name | Your bot's display name | The display name for the bot that appears in channels and directories. This name can be changed at anytime. |
| Subscription | Your subscription | Select the Azure subscription you want to use. |
| Resource Group | myResourceGroup | You can create a new resource group or choose from an existing one. |
| Location | The default location | Select the geographic location for your resource group. Your location choice can be any location listed, though it's often best to choose a location closest to your customer. The location cannot be changed once the bot is created. |
| Pricing tier | F0 | Select a pricing tier. You may update the pricing tier at any time. For more information, see Bot Service pricing. |
| App name | A unique name | The unique URL name of the bot. For example, if you name your bot myawesomebot, then your bot's URL will be http://myawesomebot.azurewebsites.net. The name must use alphanumeric and underscore characters only. There is a 35 character limit to this field. The App name cannot be changed once the bot is created. |
| Bot template | Basic | Choose either C# or Node.js and select the Basic template for this quickstart, then click Select. The Basic template creates an echo bot. Learn more about the templates. |
| App service plan/Location | Your app service plan | Select an app service plan location. Your location choice can be any location listed, though it's often best to choose a location closest to your customer. (Not available for Functions Bot.) |
| Azure Storage | Your Azure storage account | You can create a new data storage account or use an existing one. By default, the bot will use Table Storage. |
| Application Insights | On | Decide if you want to turn Application Insights On or Off. If you select On, you must also specify a regional location. Your location choice can be any location listed, though it's often best to choose a location closest to your customer. |
| Microsoft App ID and password | Auto create App ID and password | Use this option if you need to manually enter a Microsoft App ID and password. Otherwise, a new Microsoft App ID and password will be created for you in the bot creation process. |
- Click Create to create the service and deploy the bot to the cloud. This process may take several minutes.
The Bot Builder SDK for .NET currently supports C#. Visual Studio for Mac is not supported.
- Install Visual Studio 2017 for Windows.
- In Visual Studio, update all extensions to their latest versions.
- Download the Bot Application, Bot Controller, and Bot Dialog .zip files. Install the project template by copying Bot Application.zip to your Visual Studio 2017 project templates directory. Install the item templates by copying Bot Controller.zip and Bot Dialog.zip to your Visual Studio 2017 item templates directory.
The Visual Studio 2017 project templates directory is typically located at
%USERPROFILE%\Documents\Visual Studio 2017\Templates\ProjectTemplates\Visual C#\and the item templates directory is at%USERPROFILE%\Documents\Visual Studio 2017\Templates\ItemTemplates\Visual C#\
-
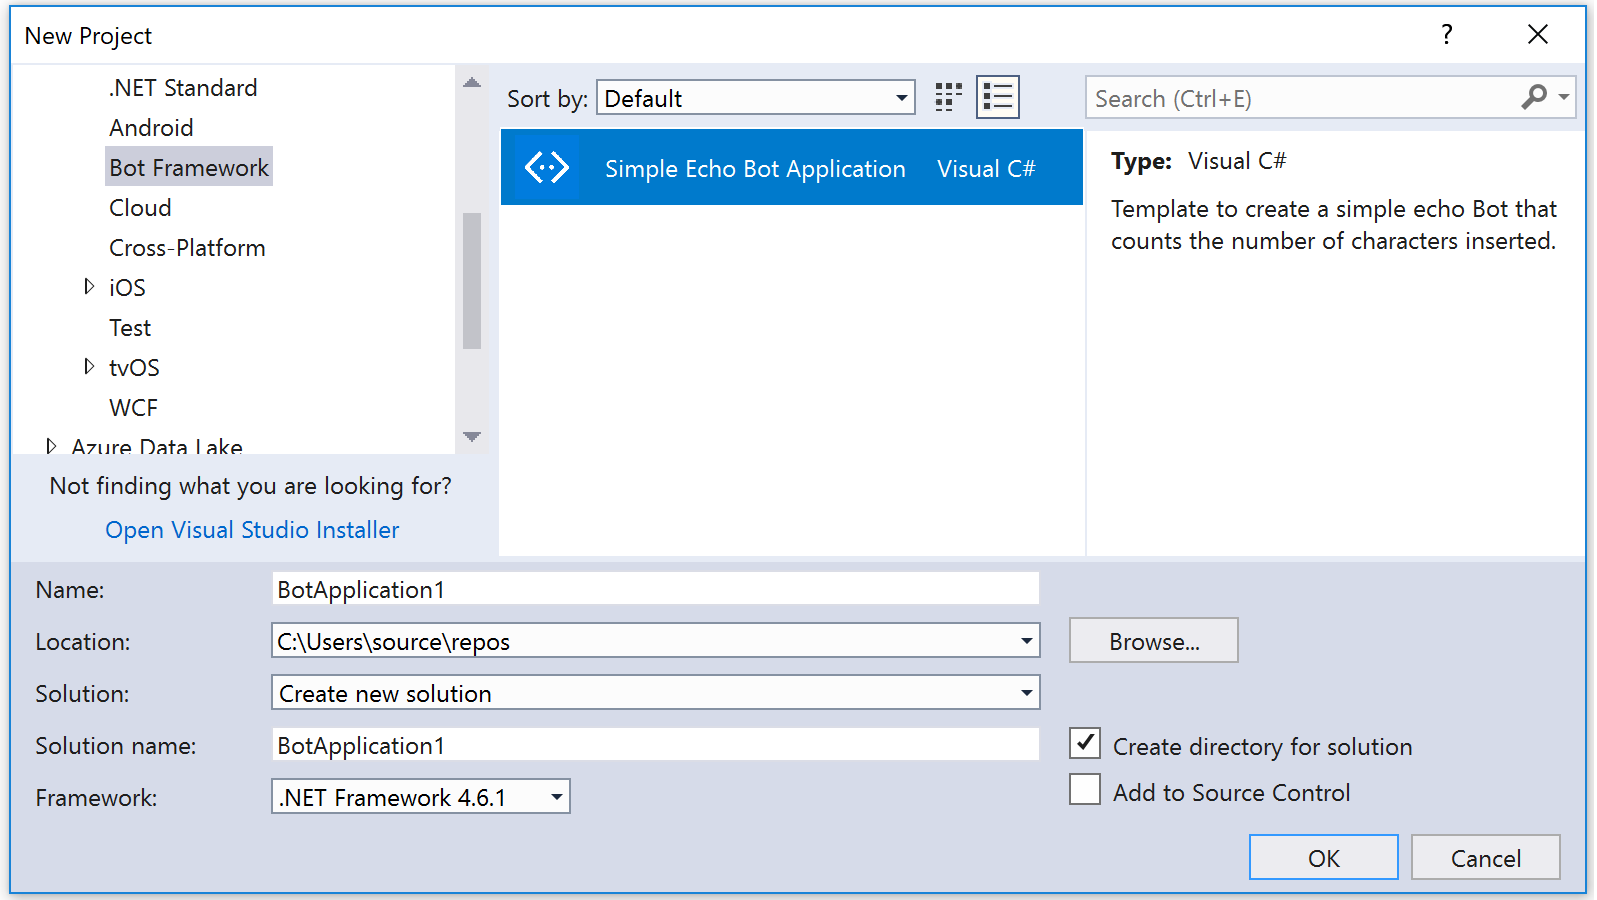
Open Visual Studio and create a new C# project. Choose the Bot Application template for your new project.
-
By using the Bot Application template, you're creating a project that already contains all of the components that are required to build a simple bot, including a reference to the Bot Builder SDK for .NET,
Microsoft.Bot.Builder. Verify that your project references the latest version of the SDK- Right-click on the project and select Manage NuGet Packages.
- In the Browse tab, type "Microsoft.Bot.Builder".
- Locate the
Microsoft.Bot.Builderpackage in the list of search results, and click the Update button for that package. - Follow the prompts to accept the changes and update the package.
-
Thanks to the Bot Application template, your project contains all of the code that's necessary to create the bot in this tutorial. You won't actually need to write any additional code. However, before we move on to testing your bot, take a quick look at some of the code that the Bot Application template provided.
First, the Post method within Controllers\MessagesController.cs receives the message from the user and invokes the root dialog.
[BotAuthentication]
public class MessagesController : ApiController
{
    /// <summary>
    /// POST: api/Messages
    /// Receive a message from a user and reply to it
    /// </summary>
    public async Task<HttpResponseMessage> Post([FromBody]Activity activity)
    {
        if (activity.Type == ActivityTypes.Message)
        {
            await Conversation.SendAsync(activity, () => new Dialogs.RootDialog());
        }
        else
        {
            HandleSystemMessage(activity);
        }
        var response = Request.CreateResponse(HttpStatusCode.OK);
        return response;
    }
    ...
}
The root dialog processes the message and generates a response. The MessageReceivedAsync method within Dialogs\RootDialog.cs sends a reply that echos back the user's message, prefixed with the text 'You sent' and ending in the text 'which was ## characters', where ## represents the number of characters in the user's message.
[Serializable]
public class RootDialog : IDialog<object>
{
    public Task StartAsync(IDialogContext context)
    {
        context.Wait(MessageReceivedAsync);
        return Task.CompletedTask;
    }

    private async Task MessageReceivedAsync(IDialogContext context, IAwaitable<object> result)
    {
        var activity = await result as Activity;

        // calculate something for us to return
        int length = (activity.Text ?? string.Empty).Length;

        // return our reply to the user
        await context.PostAsync($"You sent {activity.Text} which was {length} characters");

        context.Wait(MessageReceivedAsync);
    }
}
Next, test your bot by using the Bot Framework Emulator to see it in action. The emulator is a desktop application that lets you test and debug your bot on localhost or running remotely through a tunnel.
First, you'll need to download and install the emulator. Click here to download the emulator. After the download completes, launch the executable and complete the installation process.
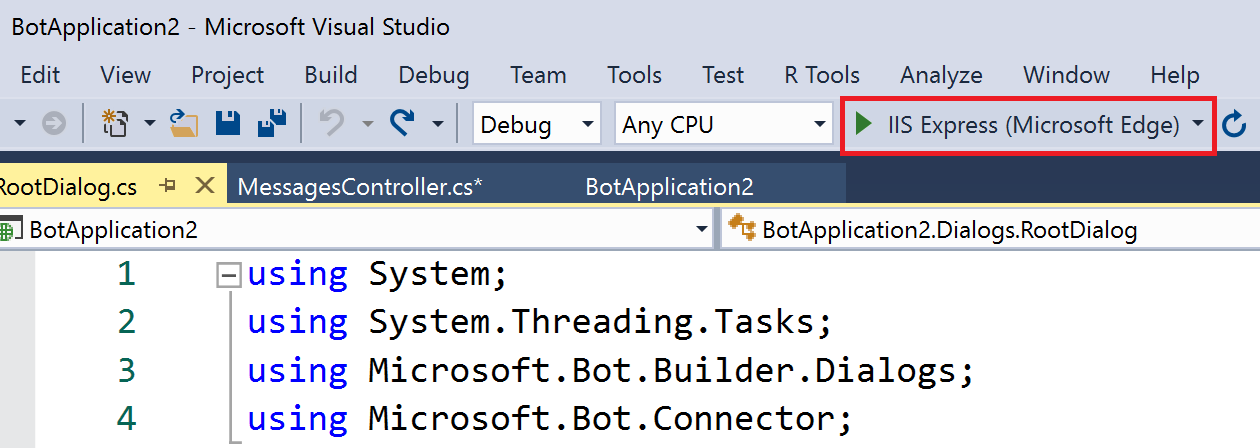
After installing the emulator, start your bot in Visual Studio by using a browser as the application host. This Visual Studio screenshot shows that the bot will launch in Microsoft Edge when the run button is clicked.
When you click the run button, Visual Studio will build the application, deploy it to localhost, and launch the web browser to display the application's default.htm page. For example, here's the application's default.htm page shown in Microsoft Edge:
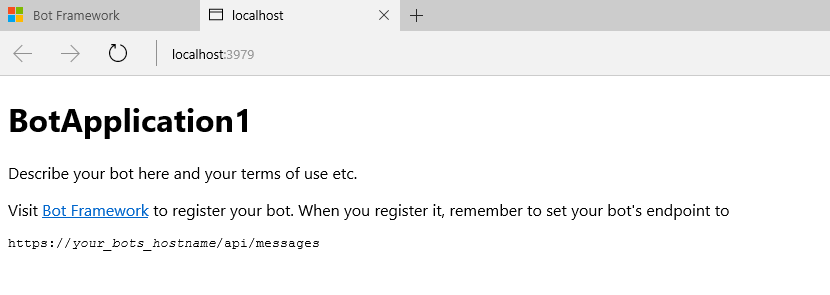
You can modify the default.htm file within your project to specify the name and description of your bot application.
At this point, your bot is running locally. Next, start the emulator and then connect to your bot in the emulator:
-
Type
http://localhost:port-number/api/messagesinto the address bar, where port-number matches the port number shown in the browser where your application is running. -
Click Connect. You won't need to specify Microsoft App ID and Microsoft App Password. You can leave these fields blank for now. You'll get this information later when you register your bot.
In the example shown above, the application is running on port number 3979, so the emulator address would be set to:
http://localhost:3979/api/messages.
Now that your bot is running locally and is connected to the emulator, test your bot by typing a few messages in the emulator. You should see that the bot responds to each message you send by echoing back your message prefixed with the text 'You sent' and ending with the text 'which was ## characters', where ## is the total number of characters in the message that you sent.+