Realtor Connect - is an app that helps connect realtors and home-seekers!
It is a tool that gives you, as a realtor, the ability to store your own properties, easily manage them, and share them with potential clients. In turn, users can easily search for the properties they want and communicate with realtors.
- Get an overview of the application here: Deployed application.
- Run the application on a local machine. For instructions, read Local startup guide.
Latest release version of the Realtor Connect: 1.0
The documentation is written in OpenApi and uses SwaggerUI.
To read it:
- Open the deployed application here: Documentation.
- Run the project locally and follow the link: Documentation.
- You can also read the Quick Start article to get basic information about the app and see examples of how to use the app.
A quick guide to running the program on a local machine.
The following instructions for running the program will be using Docker. So, it is recommended to install it before you start. Install Docker.
-
To build the application, you need to install Gradle. Install Gradle.
-
Install Java 17.
-
Clone the repository
git clone https://github.com/makurohashami/realtor-connect.git. -
To start the database, go to
scripts/samplesand run the scriptreset_db_docker.sh. You can customize the variables if you need to. -
If you want to use MailHog to intercept emails, open
scripts/samplesand run the scriptreset_mailhog_docker.sh. You can customize the variables if you need to. Read more about MailHog. -
Build the project using your IDE or open bash in the project directory and run
gradle clean assemble. -
Configure the environment variables. Read the table of the list of variables.
Some variables have default values. You do not need to set a variable if you are satisfied with the default value.
Variable Description Default value POSTGRES_HOST Host of the PostgreSQL server POSTGRES_USER User of the PostgreSQL server POSTGRES_PASSWORD Password to PostgreSQL server EMAIL_ENABLED Enables or disables sending emails from the app trueDEBUG_EMAIL_ENABLED To use MailHog to intercept all emails, set it to `true', otherwise the SMTP server will be used falseEMAIL_USERNAME At the moment, the application is configured with the Gmail SMTP server, so here you need to specify the Gmail address from which emails will be sent EMAIL_PASSWORD Put here your Google App Password. How to generate Google App Password. JWT_SECRET Generate your own JWT secret. For example, it will be a string of 32 random characters APP_DOMAIN If the application is deployed on a server, enter the server domain here to create URLs correctly (for example, to check user email) http://localhost:8080CDN_CLIENT The program uses CND to store user files. By default, there is a placeholderclient that simply simulates file operations, but currently the program has an implementation for the Cloudinary service (Cloudinary home). If you want to enable Cloudinary, set the variablecloudinary.placeholderCLOUDINARY_URL Enter the Cloudinary URL here after setting up your own Cloudinary storage. Optional if another CDN_CLIENT is configured CLOUDINARY_APP_PREFIX To save files to a separate folder instead of the storage root, specify its name. For example realtor-connect-prodEmpty String SCHEDULER_ENABLED Enables or disables application scheduled tasks trueACTUATOR_SHOW_VALUES Enables or disables showing env variables in actuator. Possible values: NEVER,ALWAYSandWHEN_AUTHORIZEDNEVERAPP_LOGGER_LEVEL Set logger level for application source code. Possible values: ERROR,WARN,INFO,DEBUGandTRACEINFOCUSTOM_LOGGER_LEVEL Some classes and methods in the application are automatically logged at the start and end. The AppLoggerInterceptoris used for this. Specify the level at which this class will be written. If the level is higher than or equal to the current level in the application, you will see logs. Possible values:ERROR,WARN,INFO,DEBUGandTRACEDEBUG -
Launch the application through your IDE or open bash and run
java -jar {project_path}/build/libs/realtor-connect-{app_version}.jar. -
All done! Now you can use Application locally.
This section describes the main features of the program, as well as examples of how to use the application. After reading this section, you will understand how to use the application, perform simple operations, and create your first real estate object.
- This application is a back end API communication with which goes through the HTTP protocol.
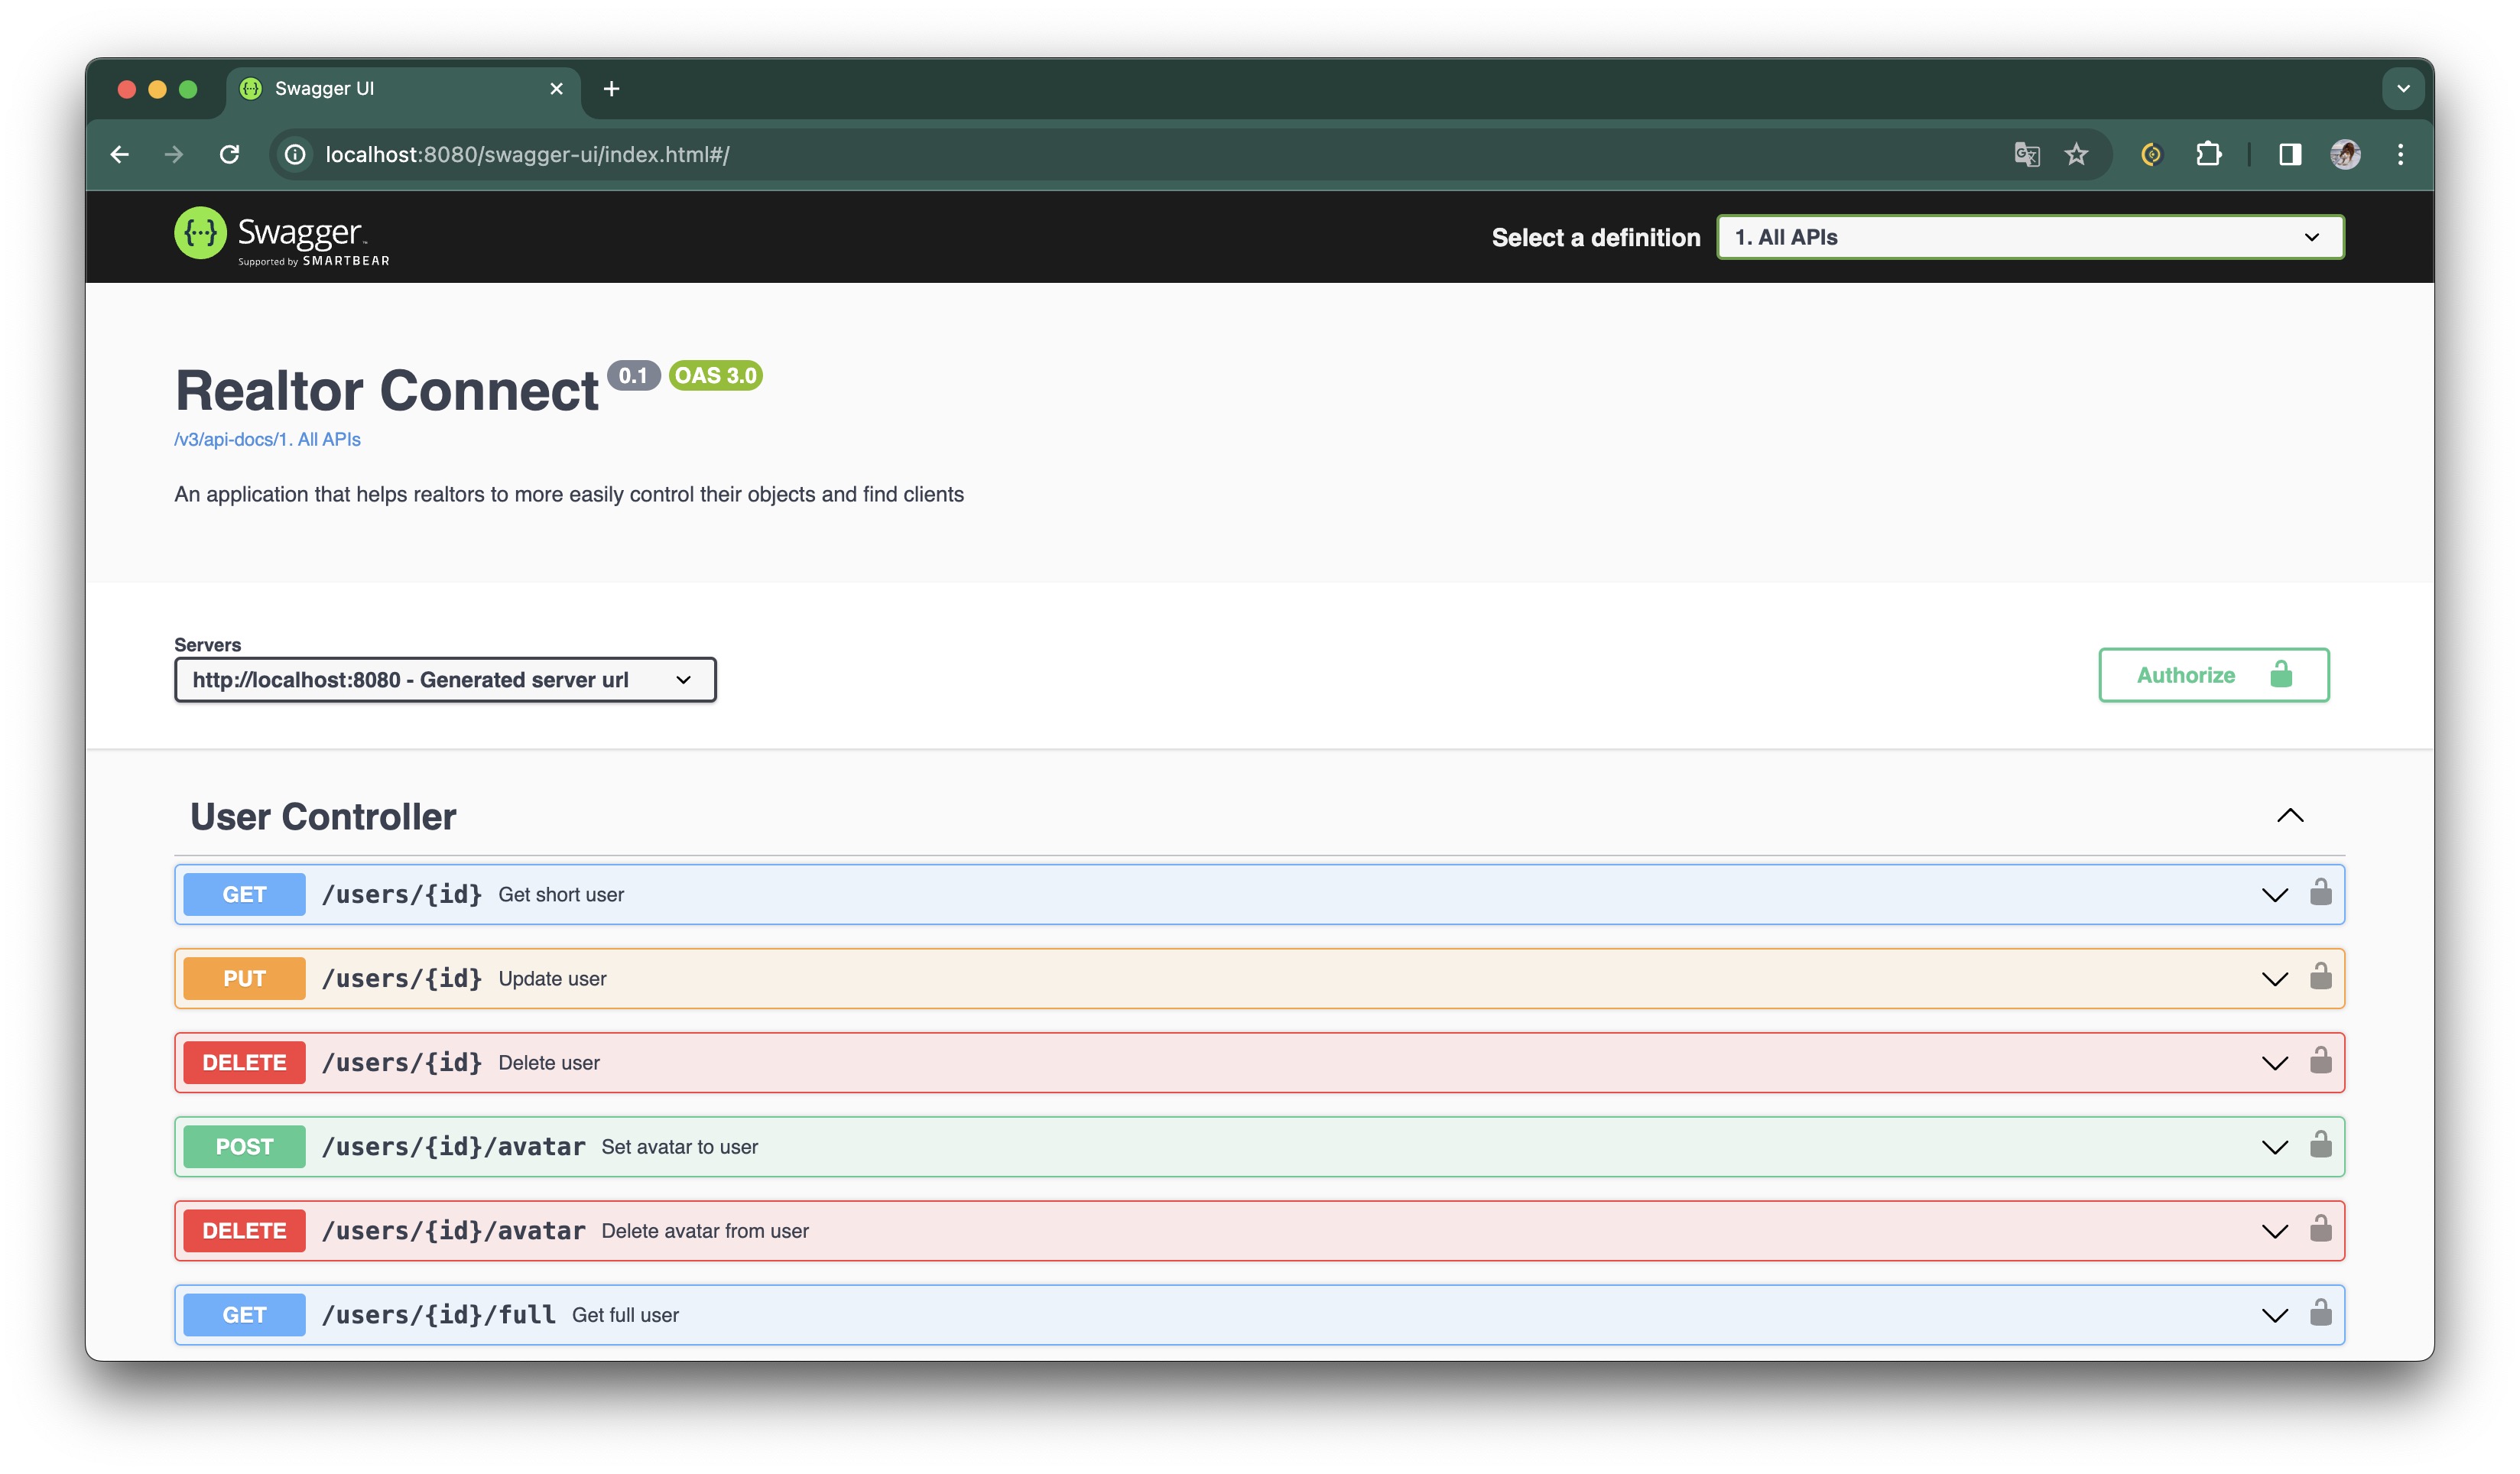
- The visual component of the application is the Swagger UI page, which forms the dynamic documentation of the project.
| Role | Permissions |
|---|---|
| Anonymous | - Can't see realtors contacts. - Only GET methods |
| User | - Can see only public real estates with only public photos. - Can see a limited number of fields on real estates |
| Realtor | - Can manage own contacts, real estates and photos. - Can see only public real estates of other realtors, but with their private photos. - Can see a limited number of fields on real estates of other realtors but all fields on own |
| Admin | - Have access to admin panel - Can manage other users, real estates... - Can see all field on these objects |
| Chief Admin | - Can be created only from DB. - Have the same permissions as Admin, but also can manage Admins |
List of content
Let's create a Realtor.
Go to the main page.
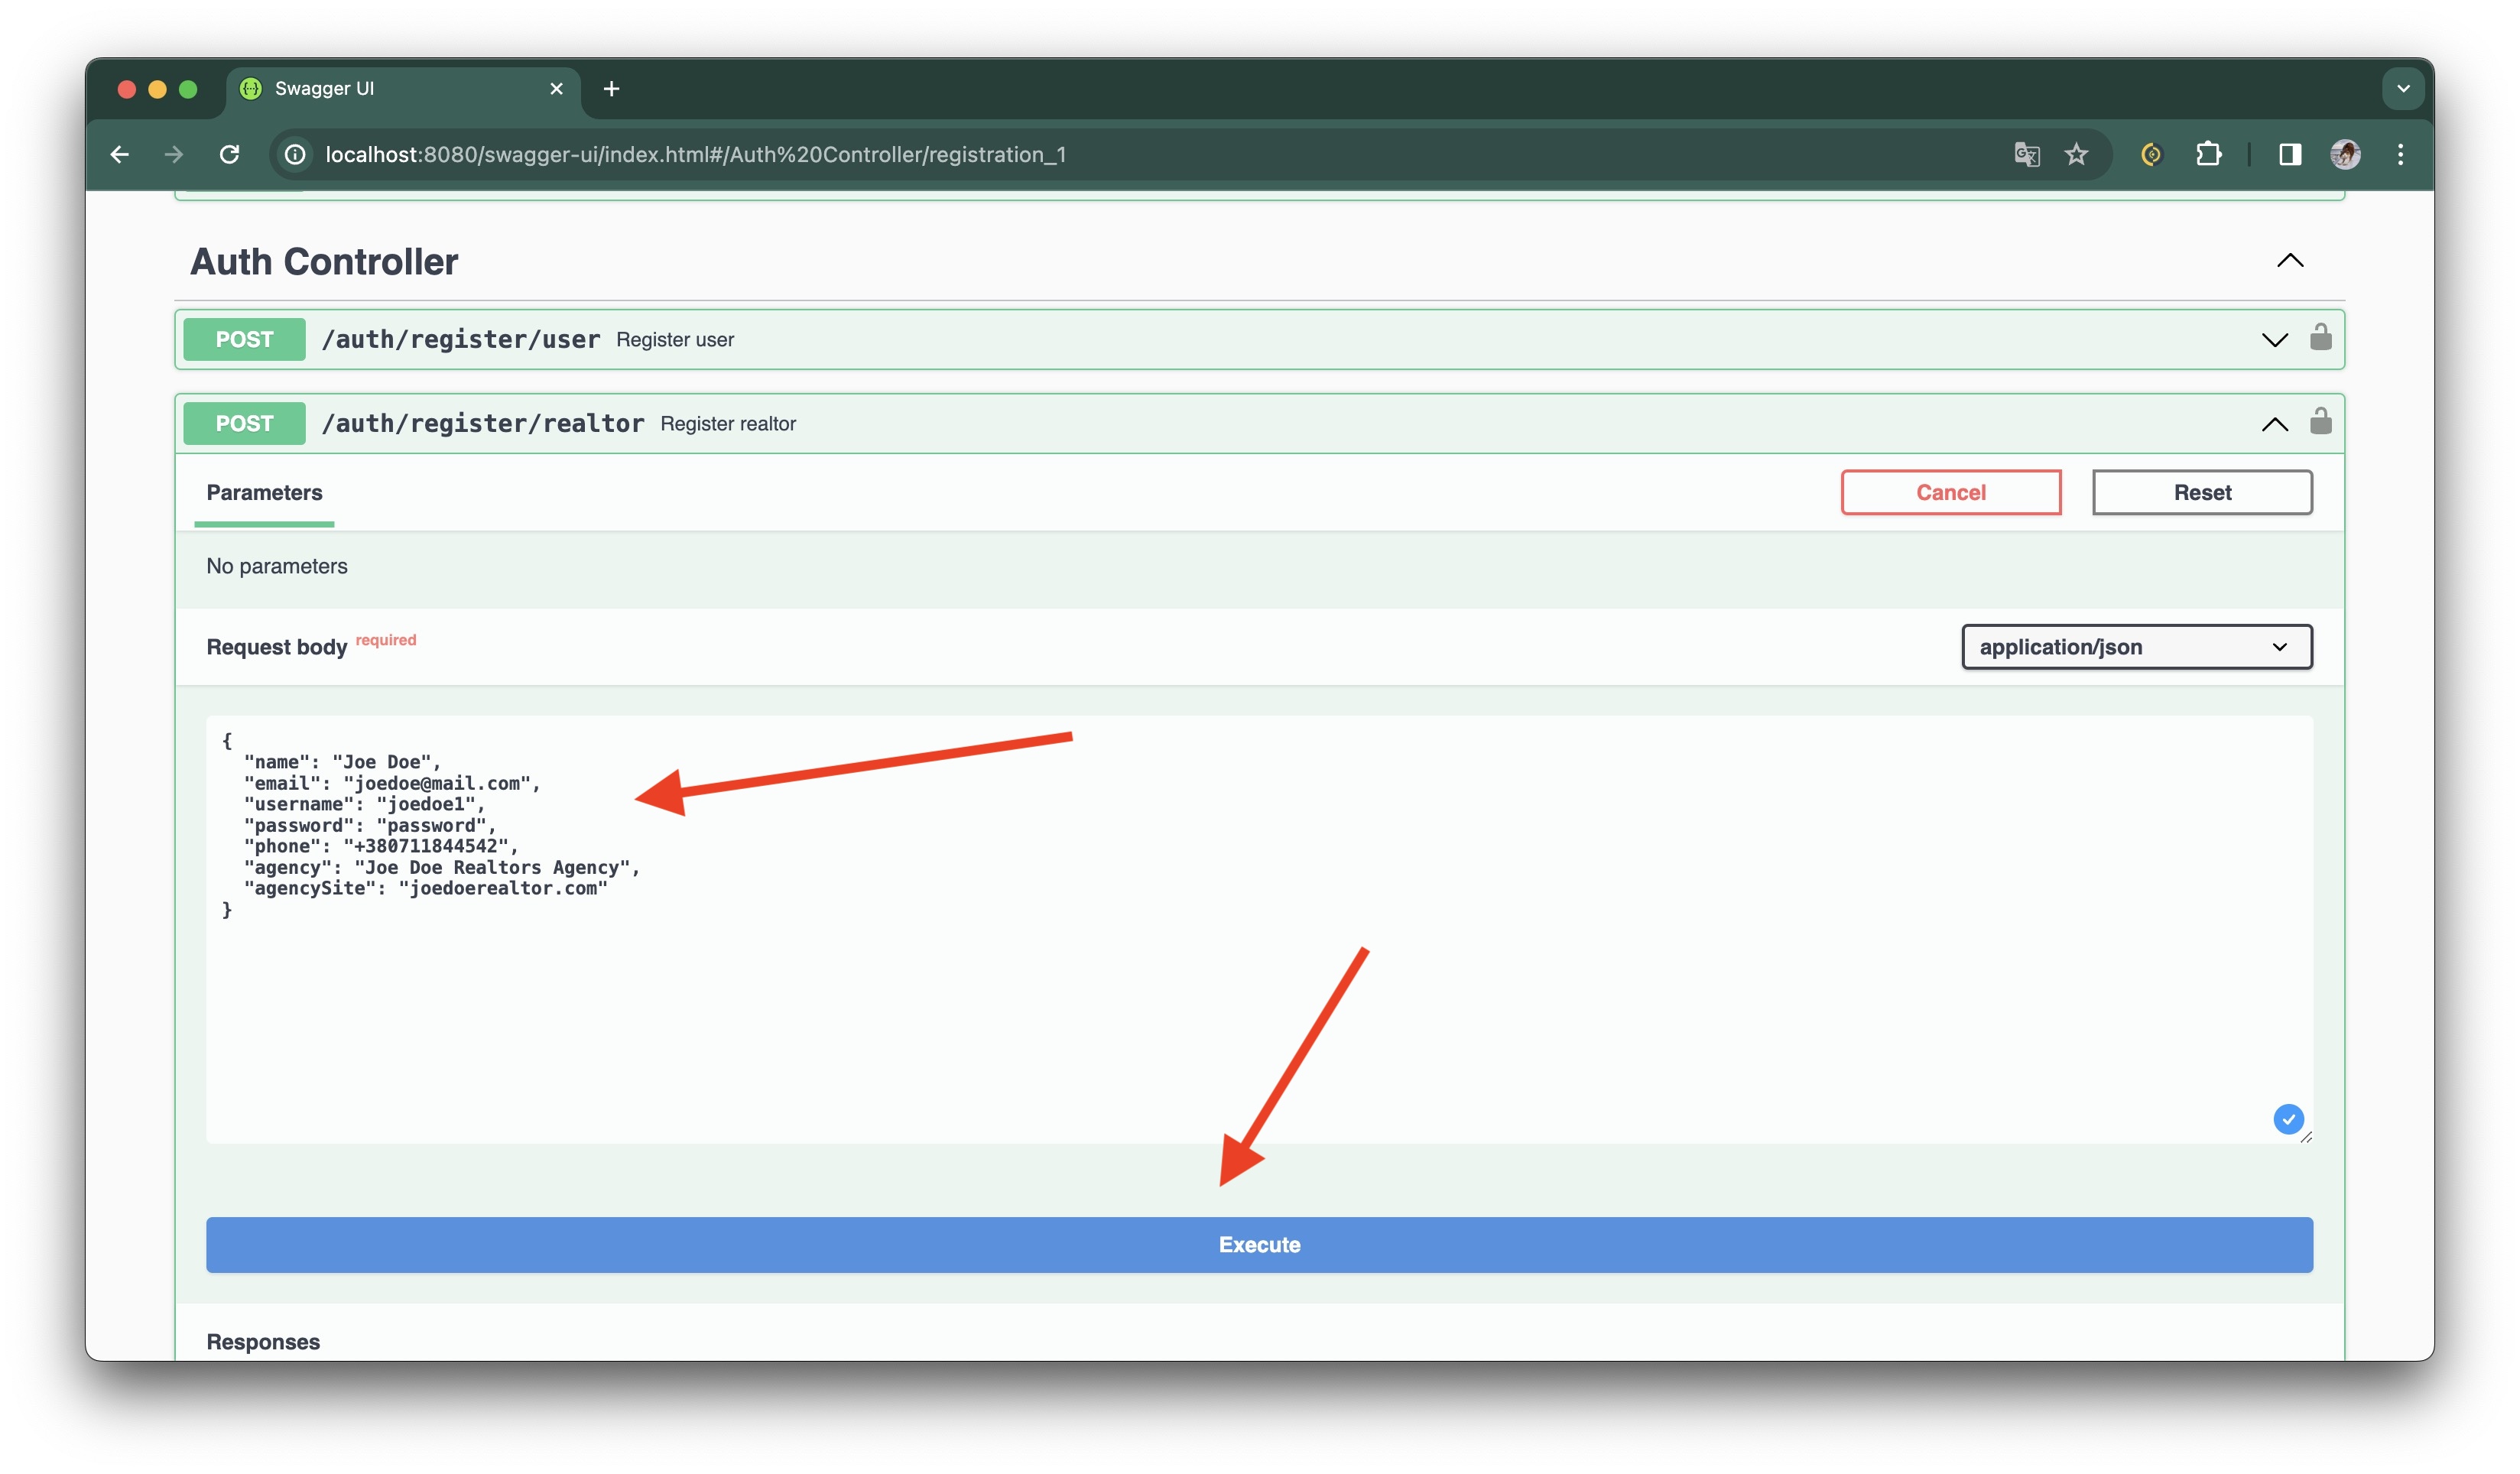
Go to Auth Controller, open the /auth/register/realtor endpoint and press Try it out button.

Next fill a request body with next JSON and press Execute button:
{
  "name": "Joe Doe",
  "email": "[email protected]",
  "username": "joedoe",
  "password": "pass",
  "phone": "+380711844542",
  "agency": "Joe Doe Private Realtor",
  "agencySite": "joedoerealtor.com"
}
In response, we get the following result:
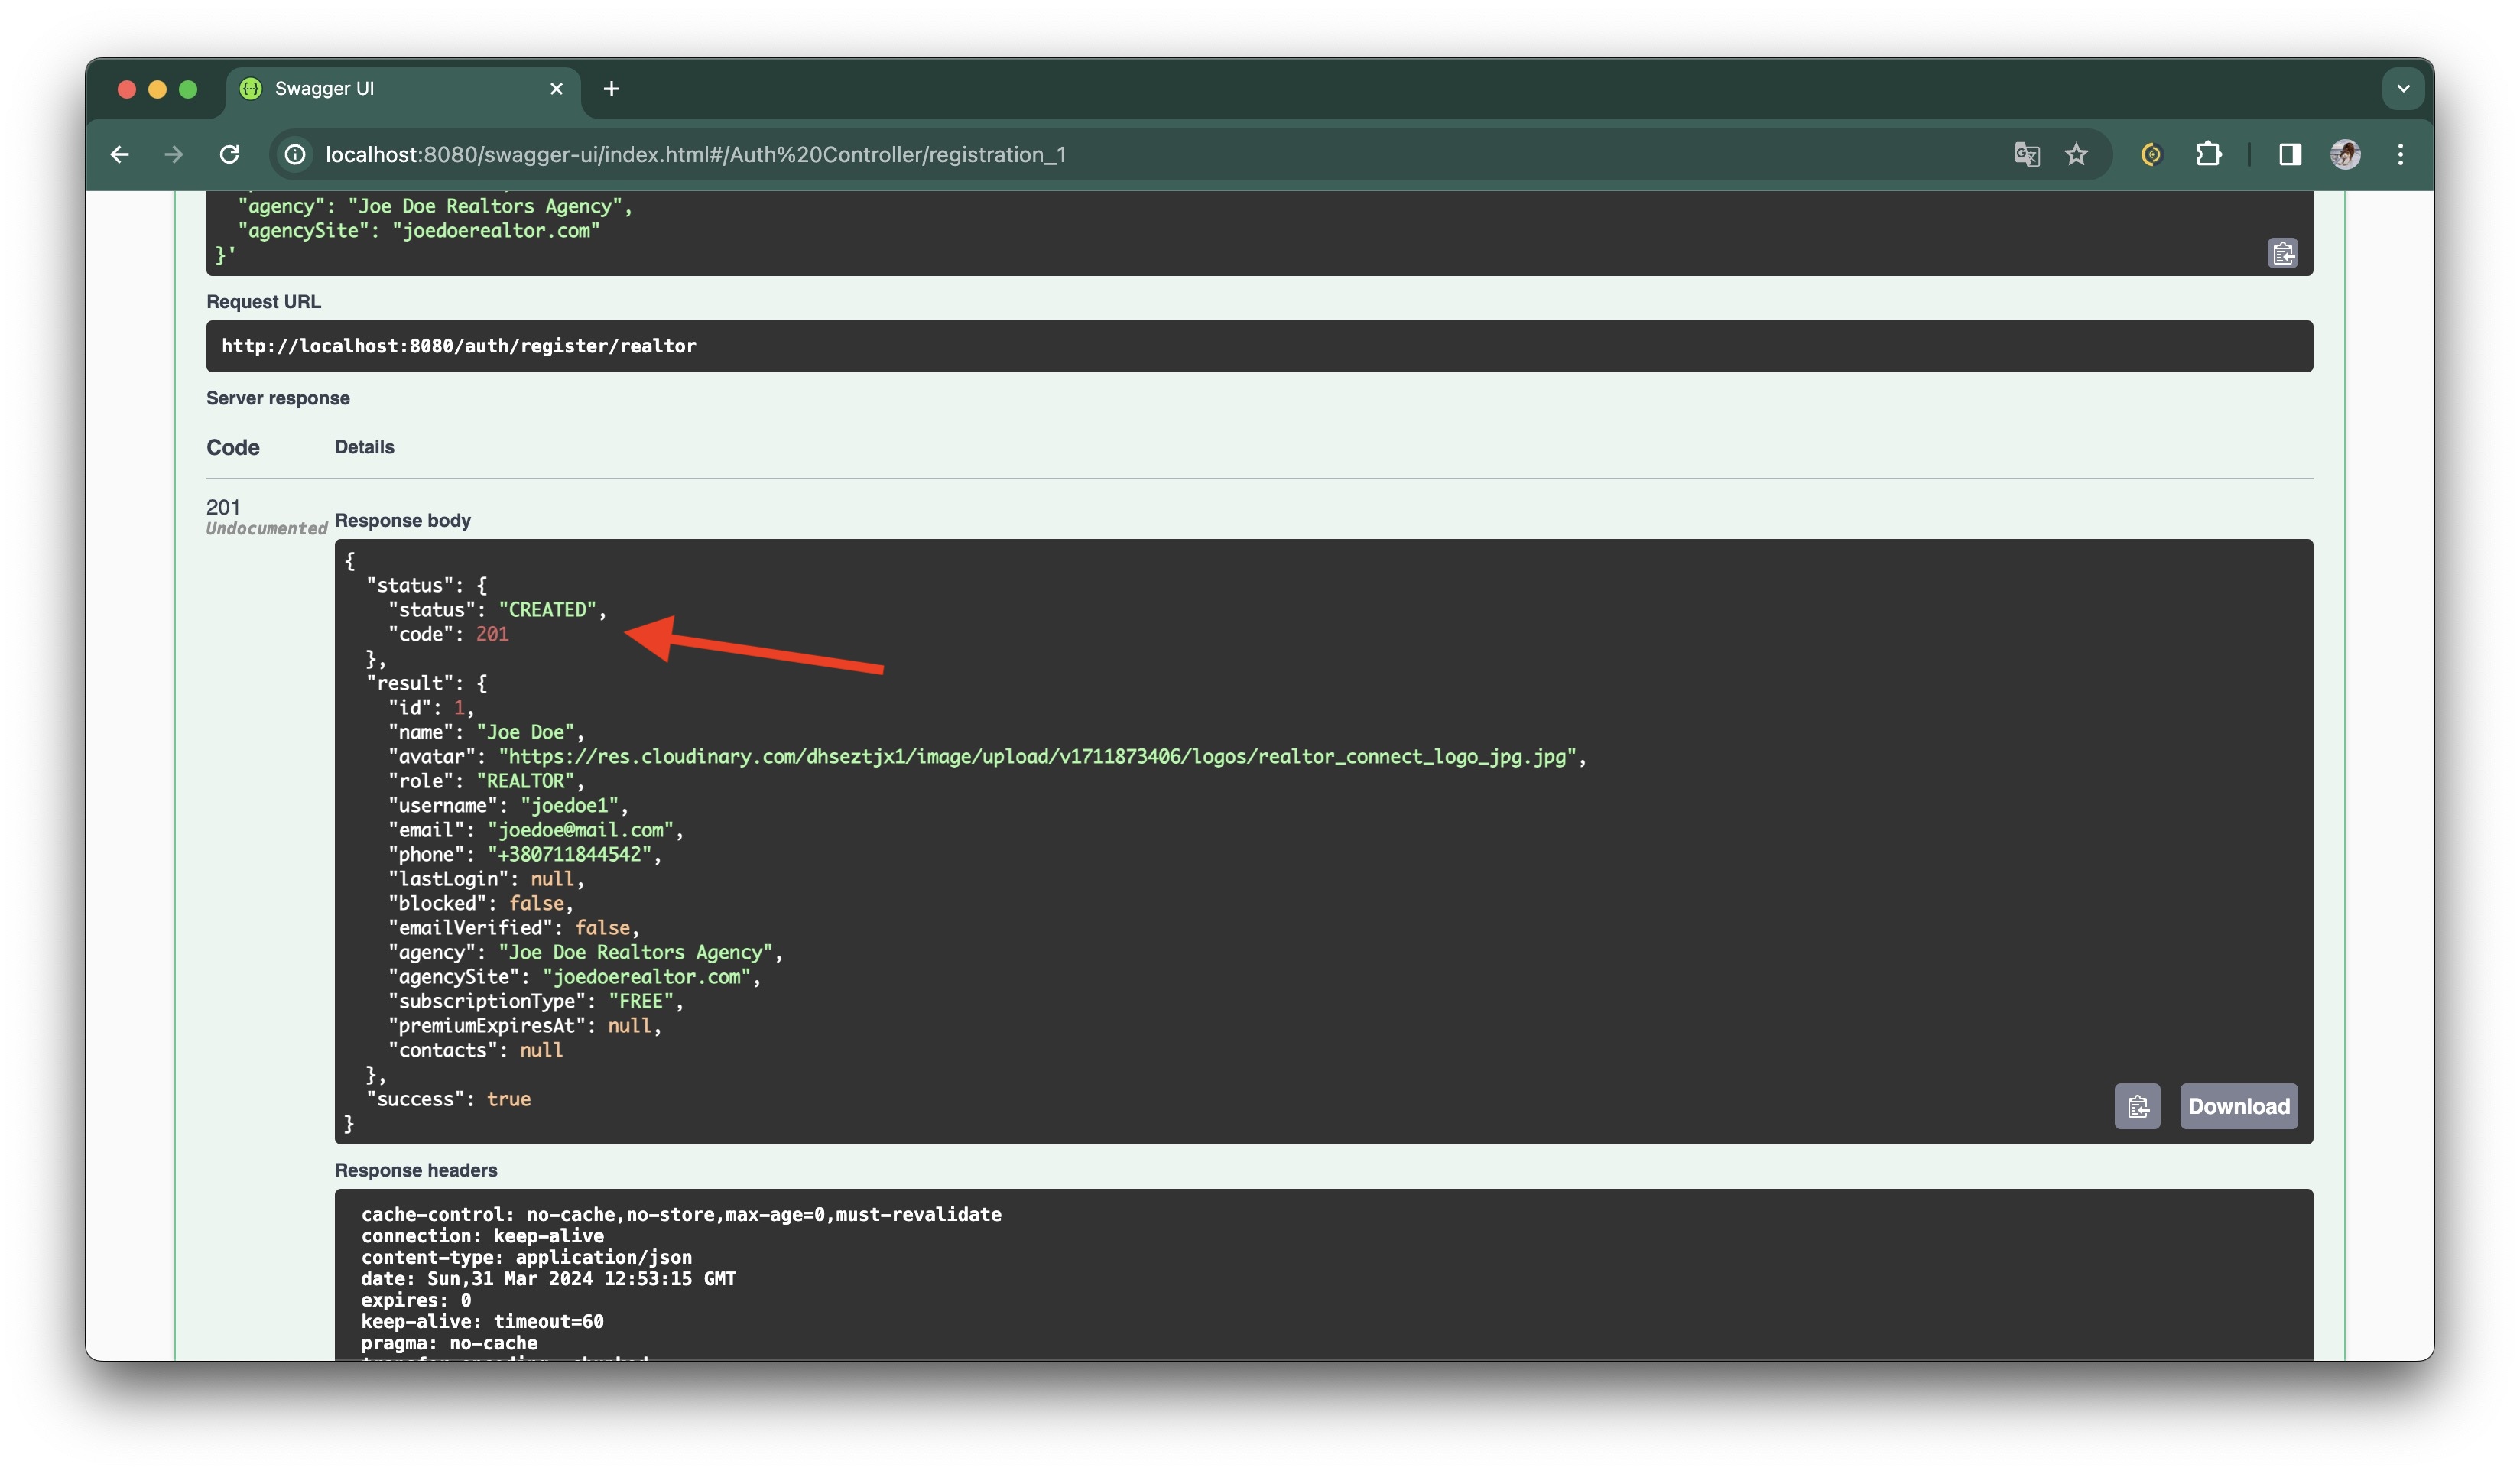
That's great. We just signed up.
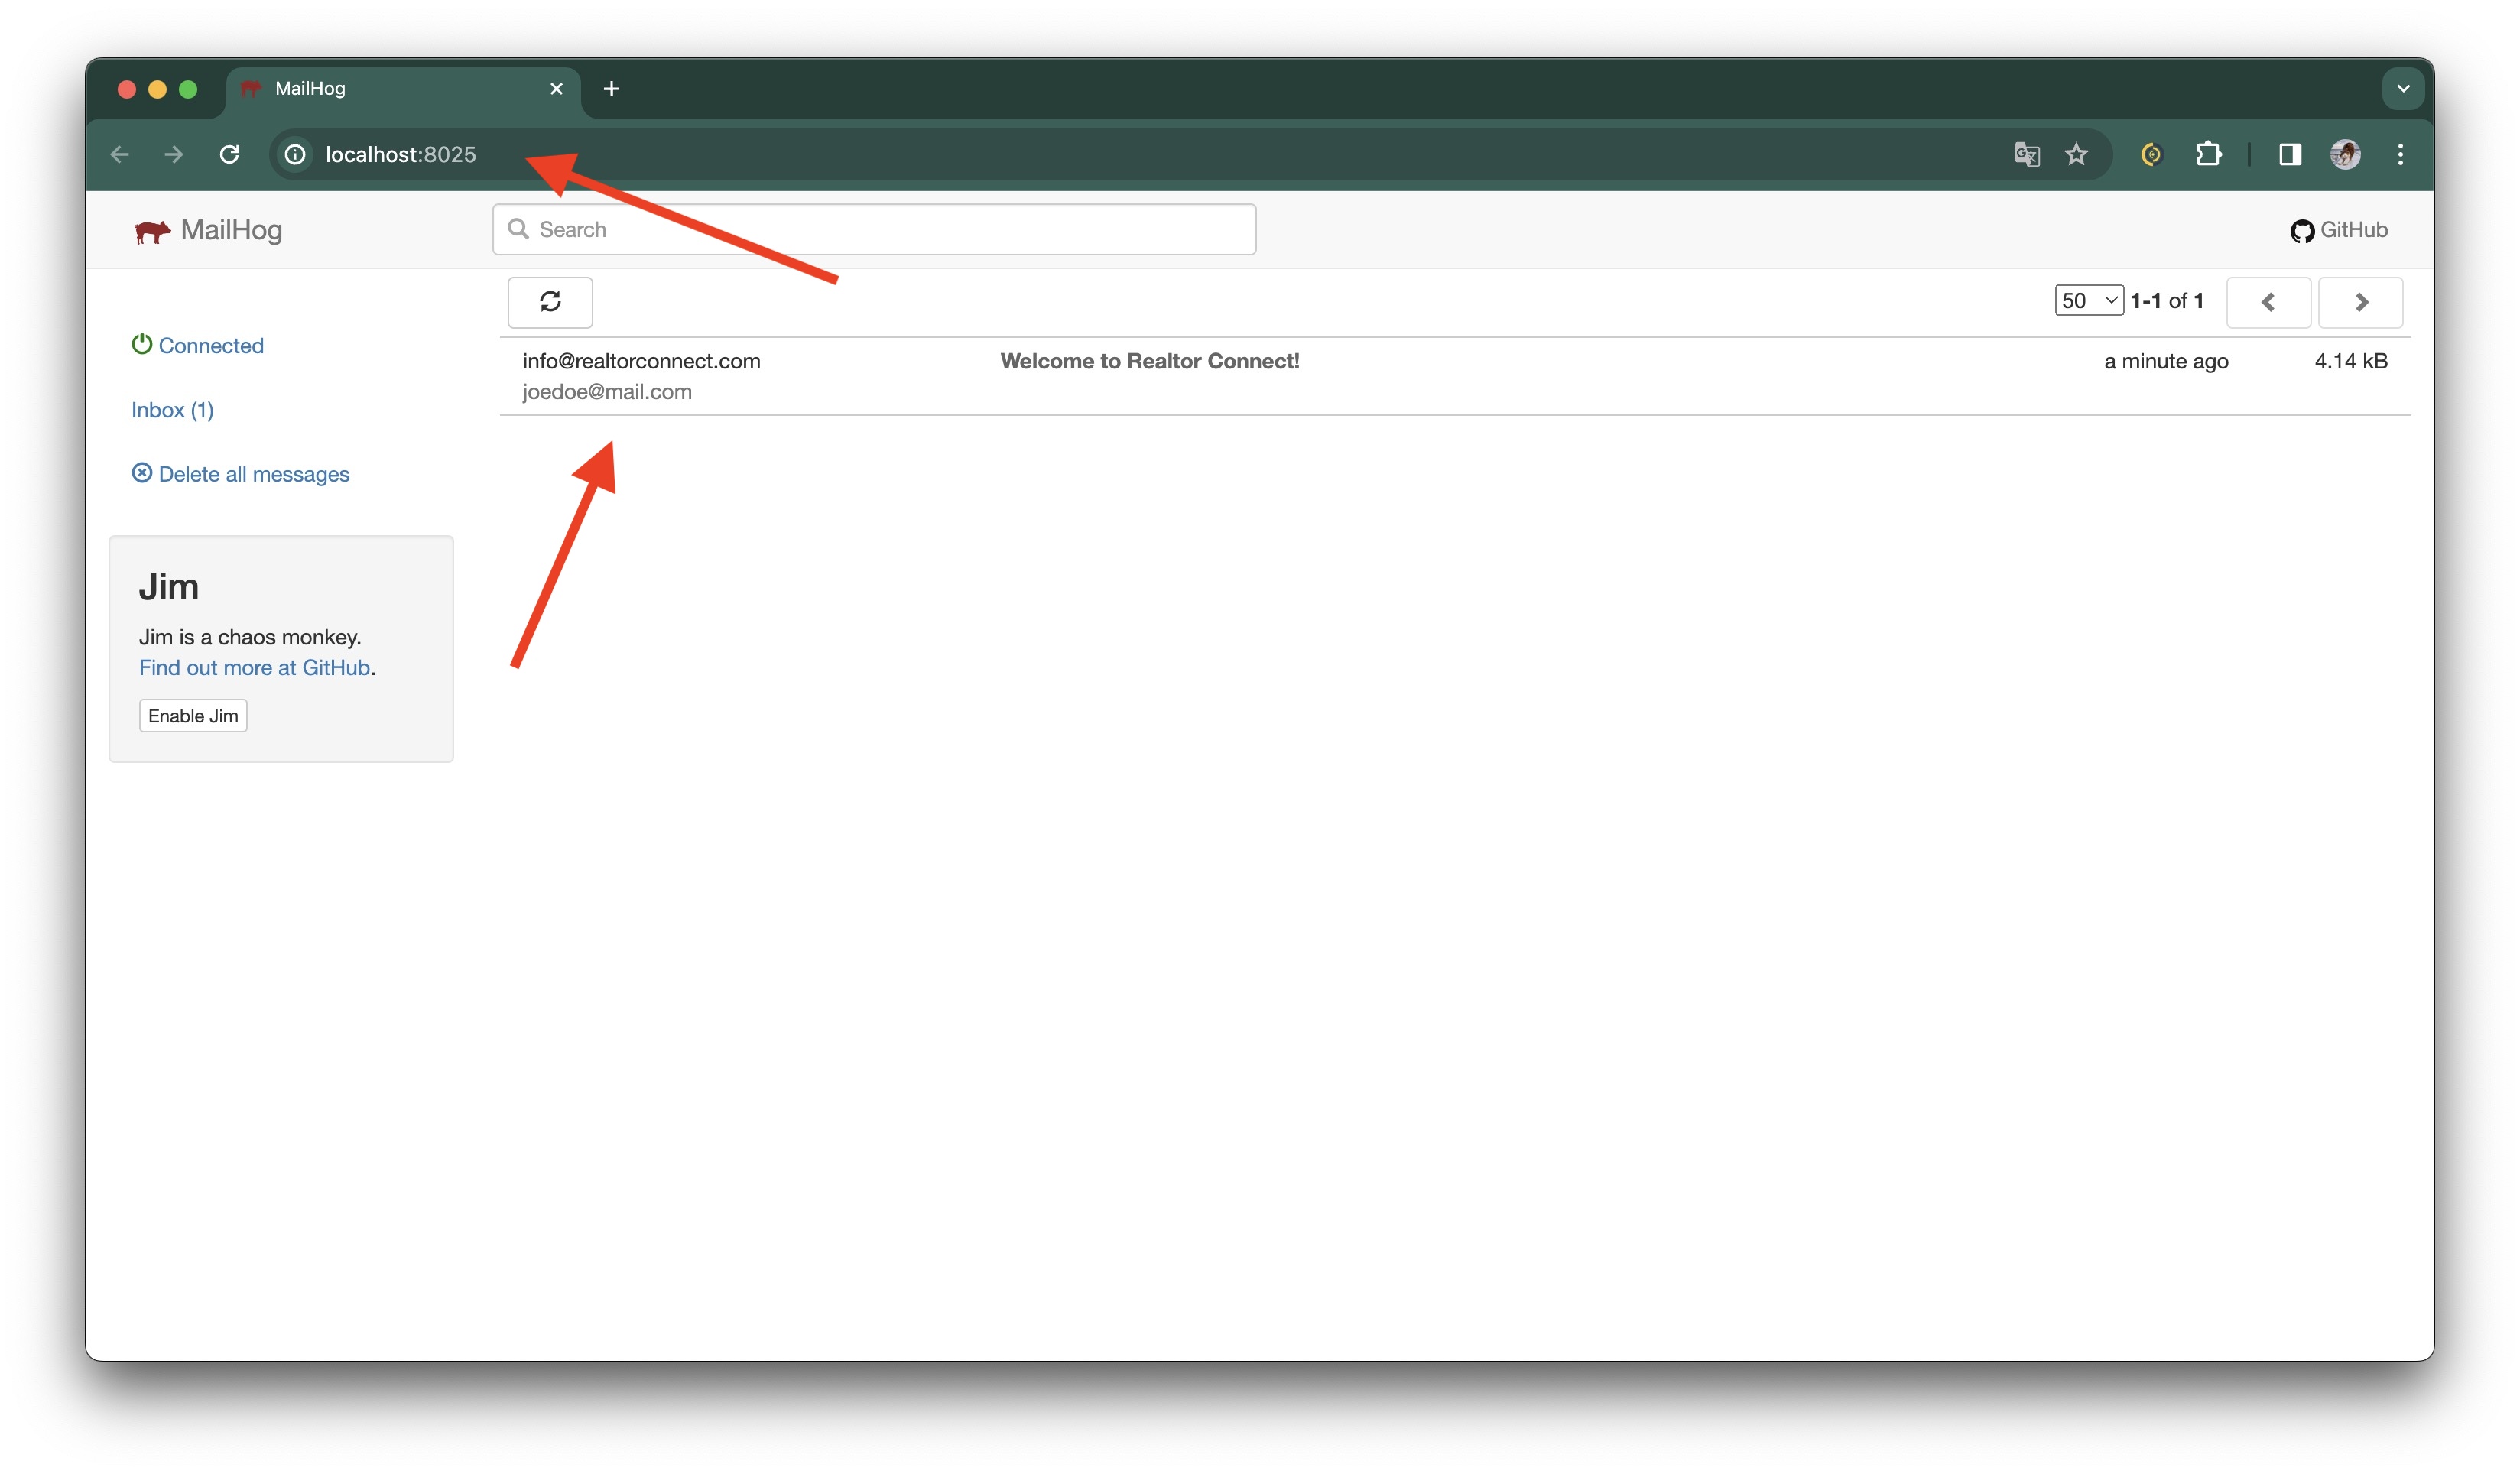
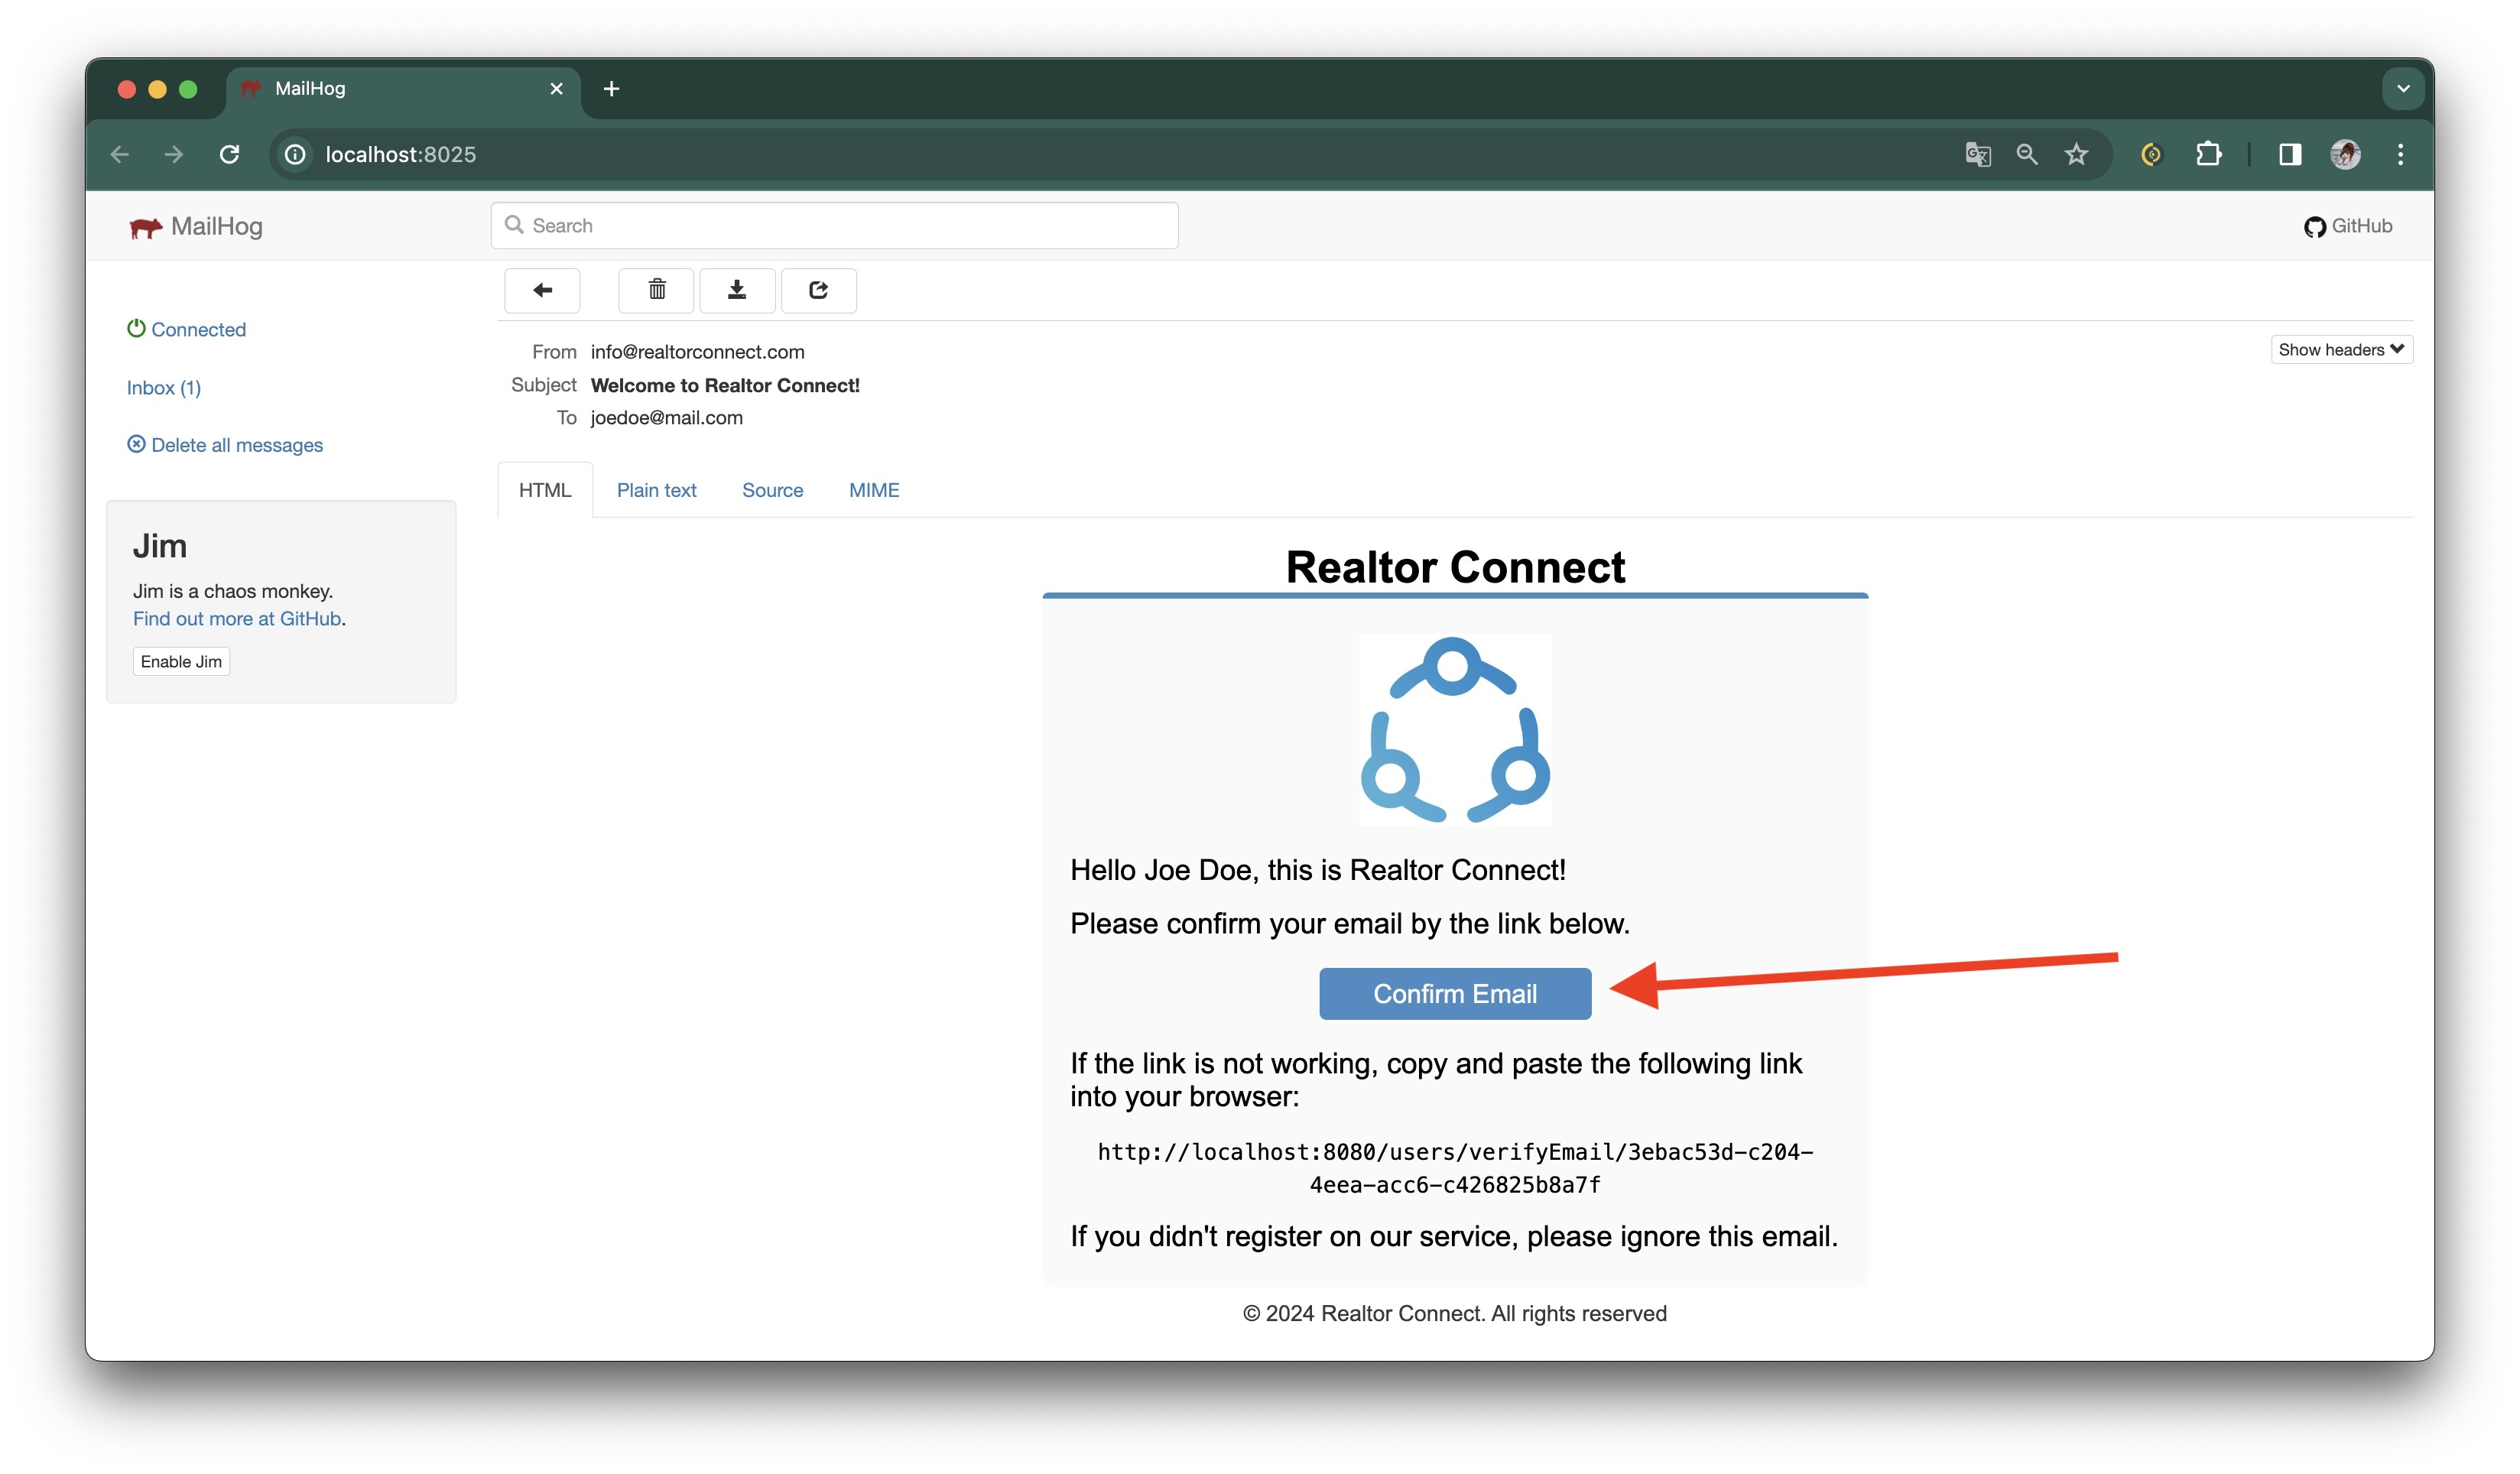
But we still can't log in to the app because our email is not verified. We have already received a welcome email. This example uses MailHog to capture all emails, so let's go to its page (Link for local started up: MailHog Page).
Here we can see welcome email. Let's open it.
Let's press Confirm Email button.
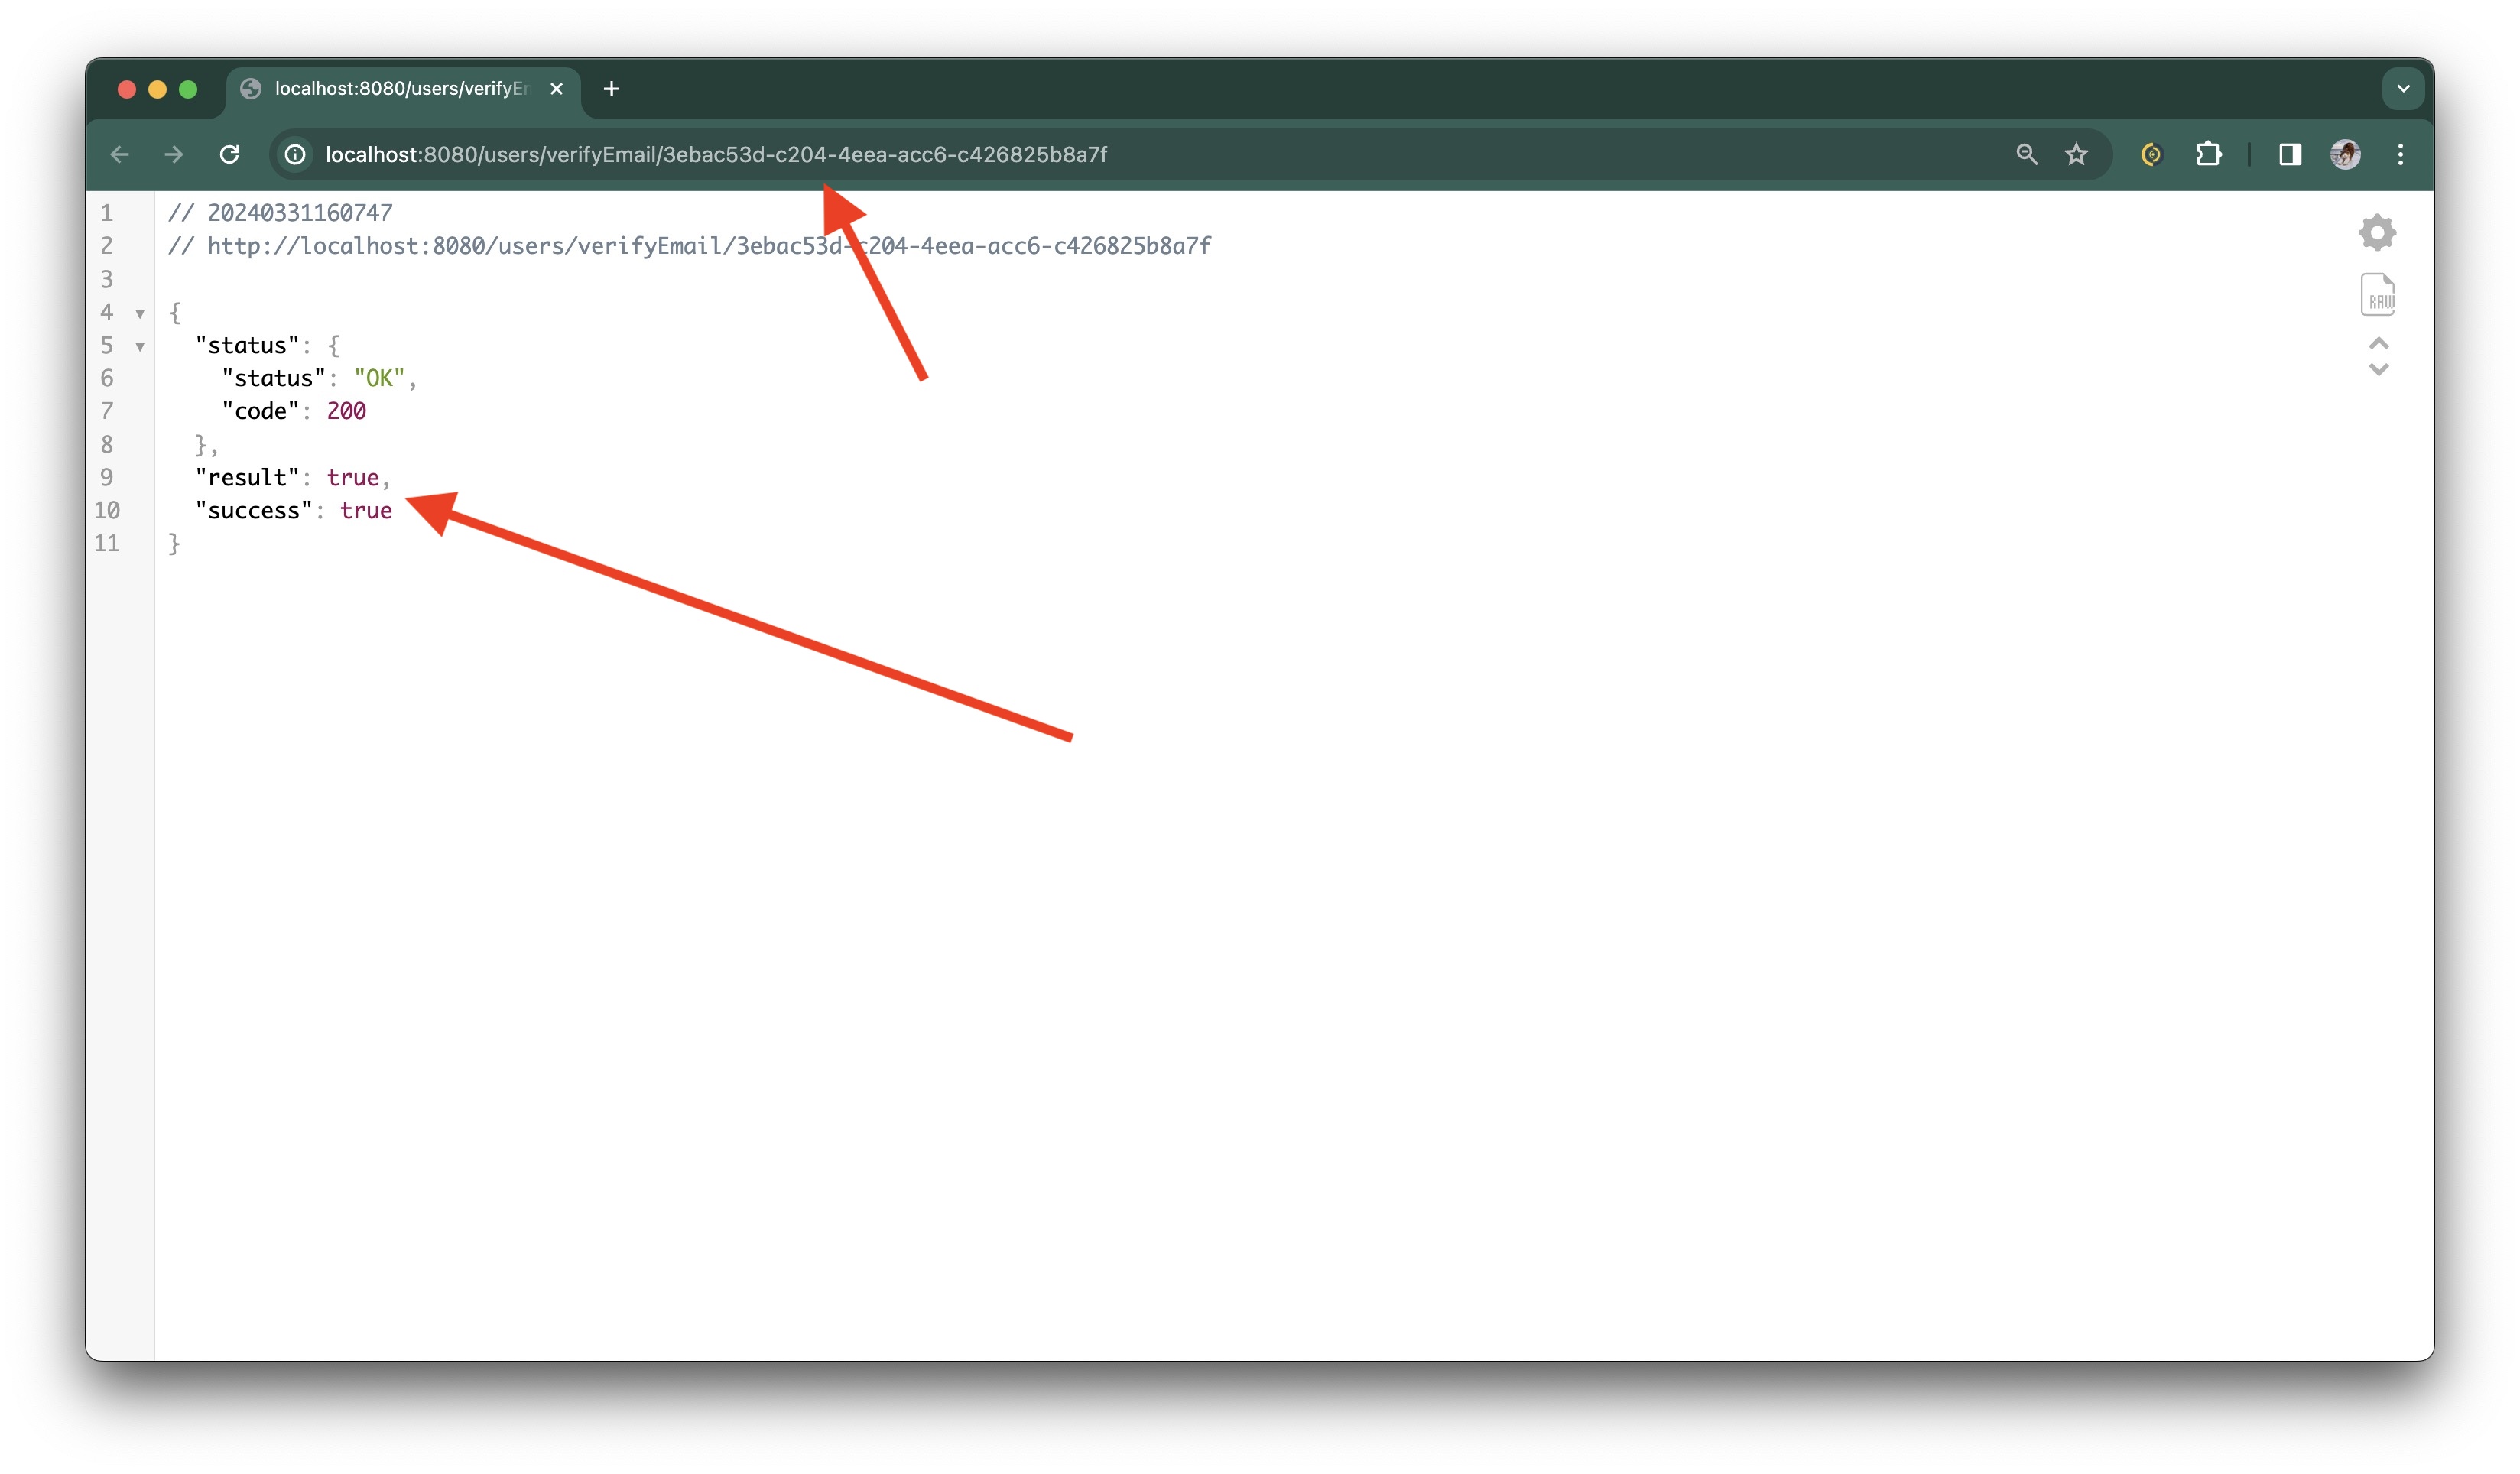
We've redirected on new page with json result. As you can see, success and result is true. We just confirmed email,
and now can successfully log in Realtor Connect.
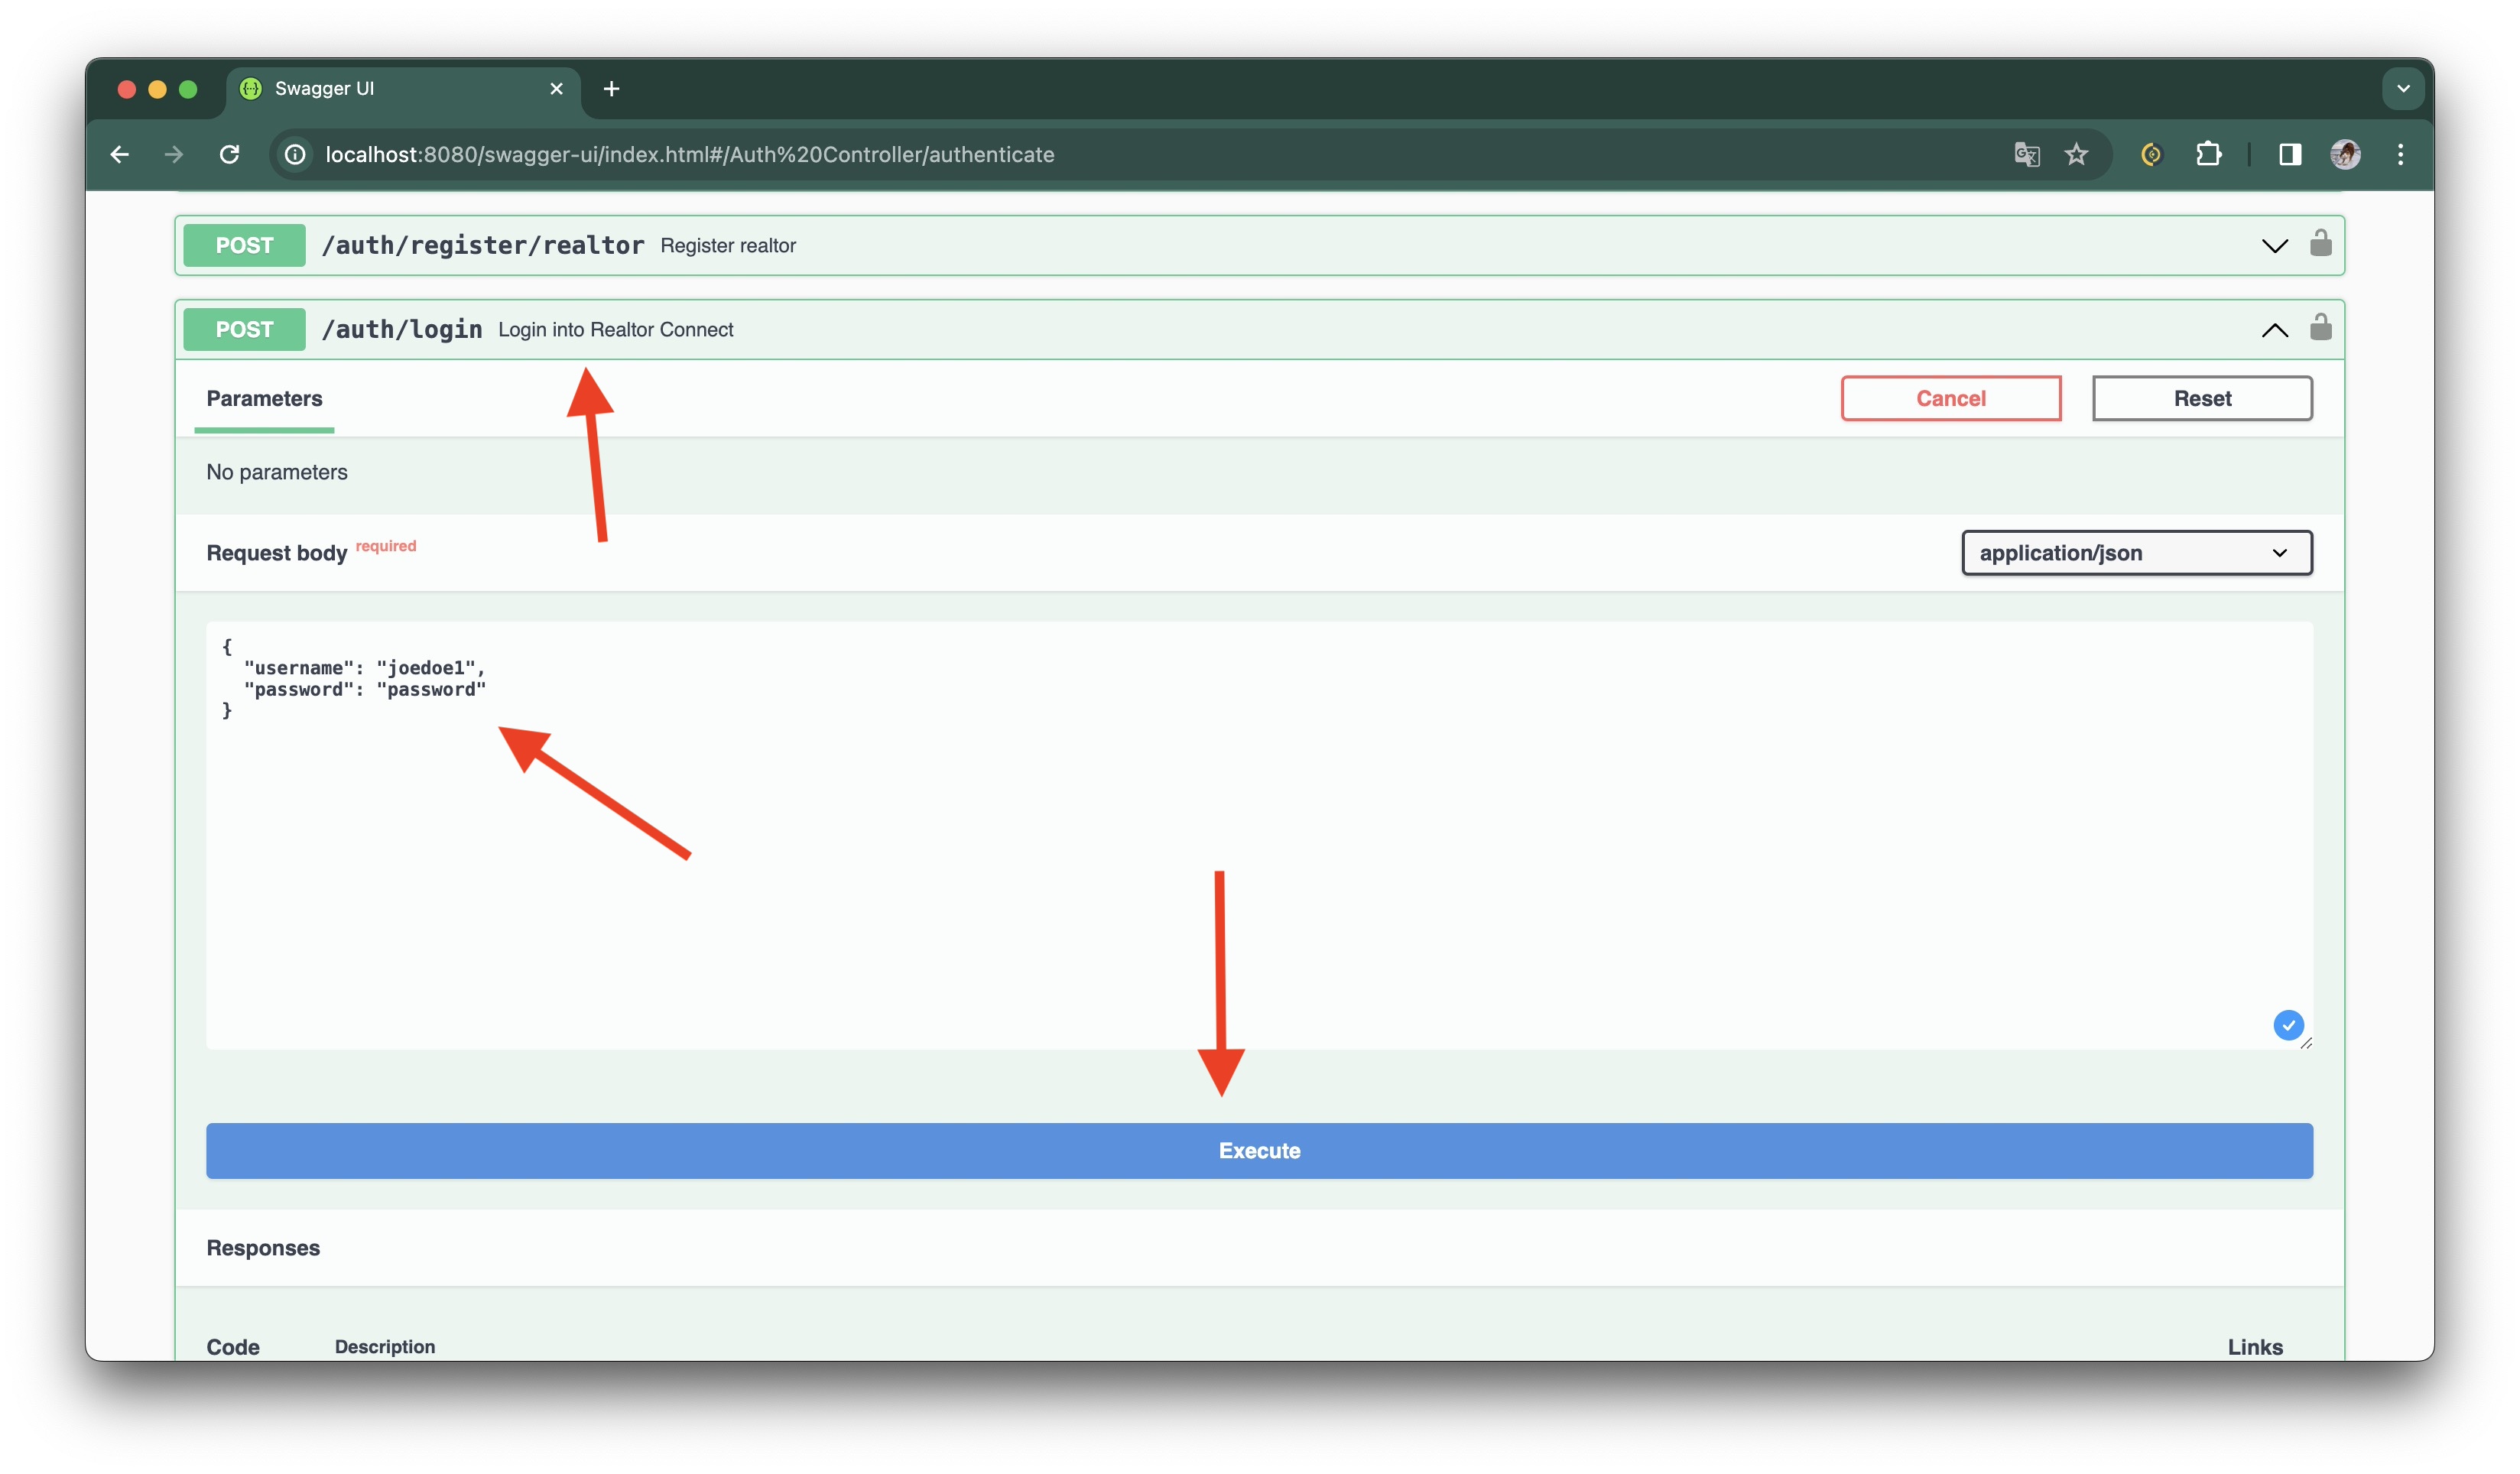
Got to the app and go to Auth Controller, open the /auth/login endpoint and press Try it out button. Next put in
request body following JSON and press Execute button:
{
  "username": "joedoe",
  "password": "pass"
}
Result. We've successfully authenticated.
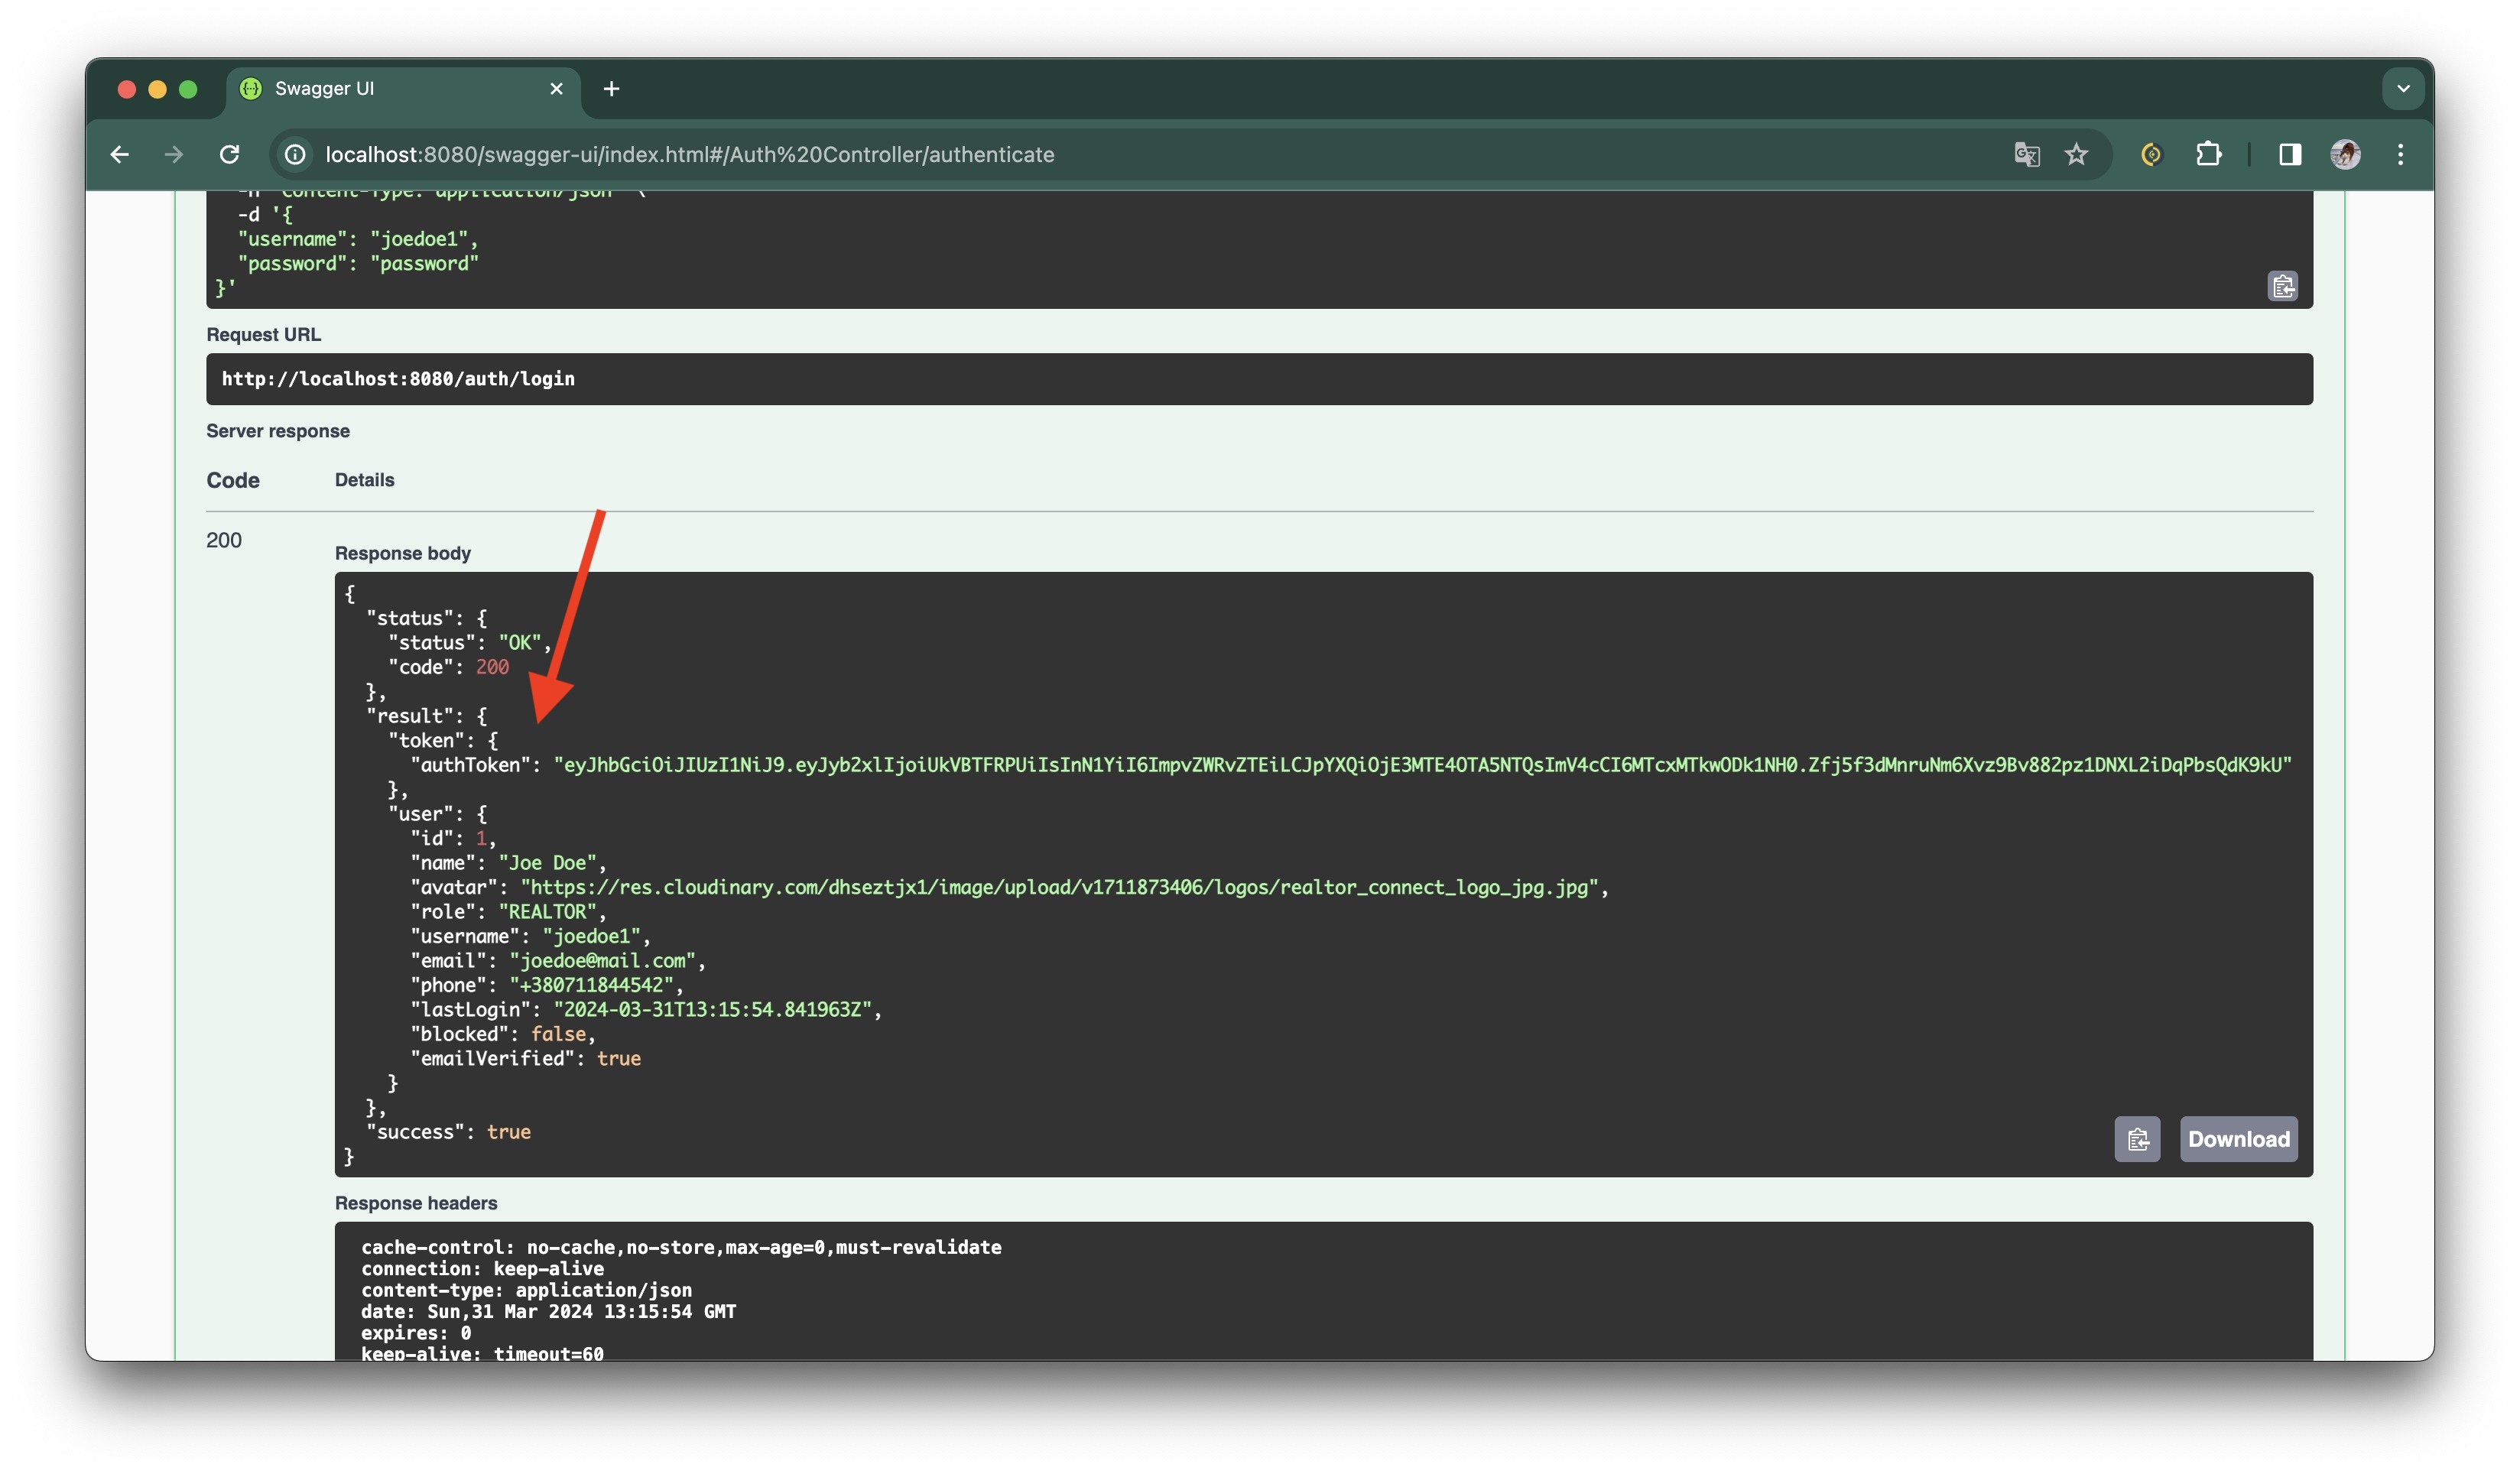
Let's copy an auth token, go to top of app page, press Autorize button, put there auth token and press Autorize
button.
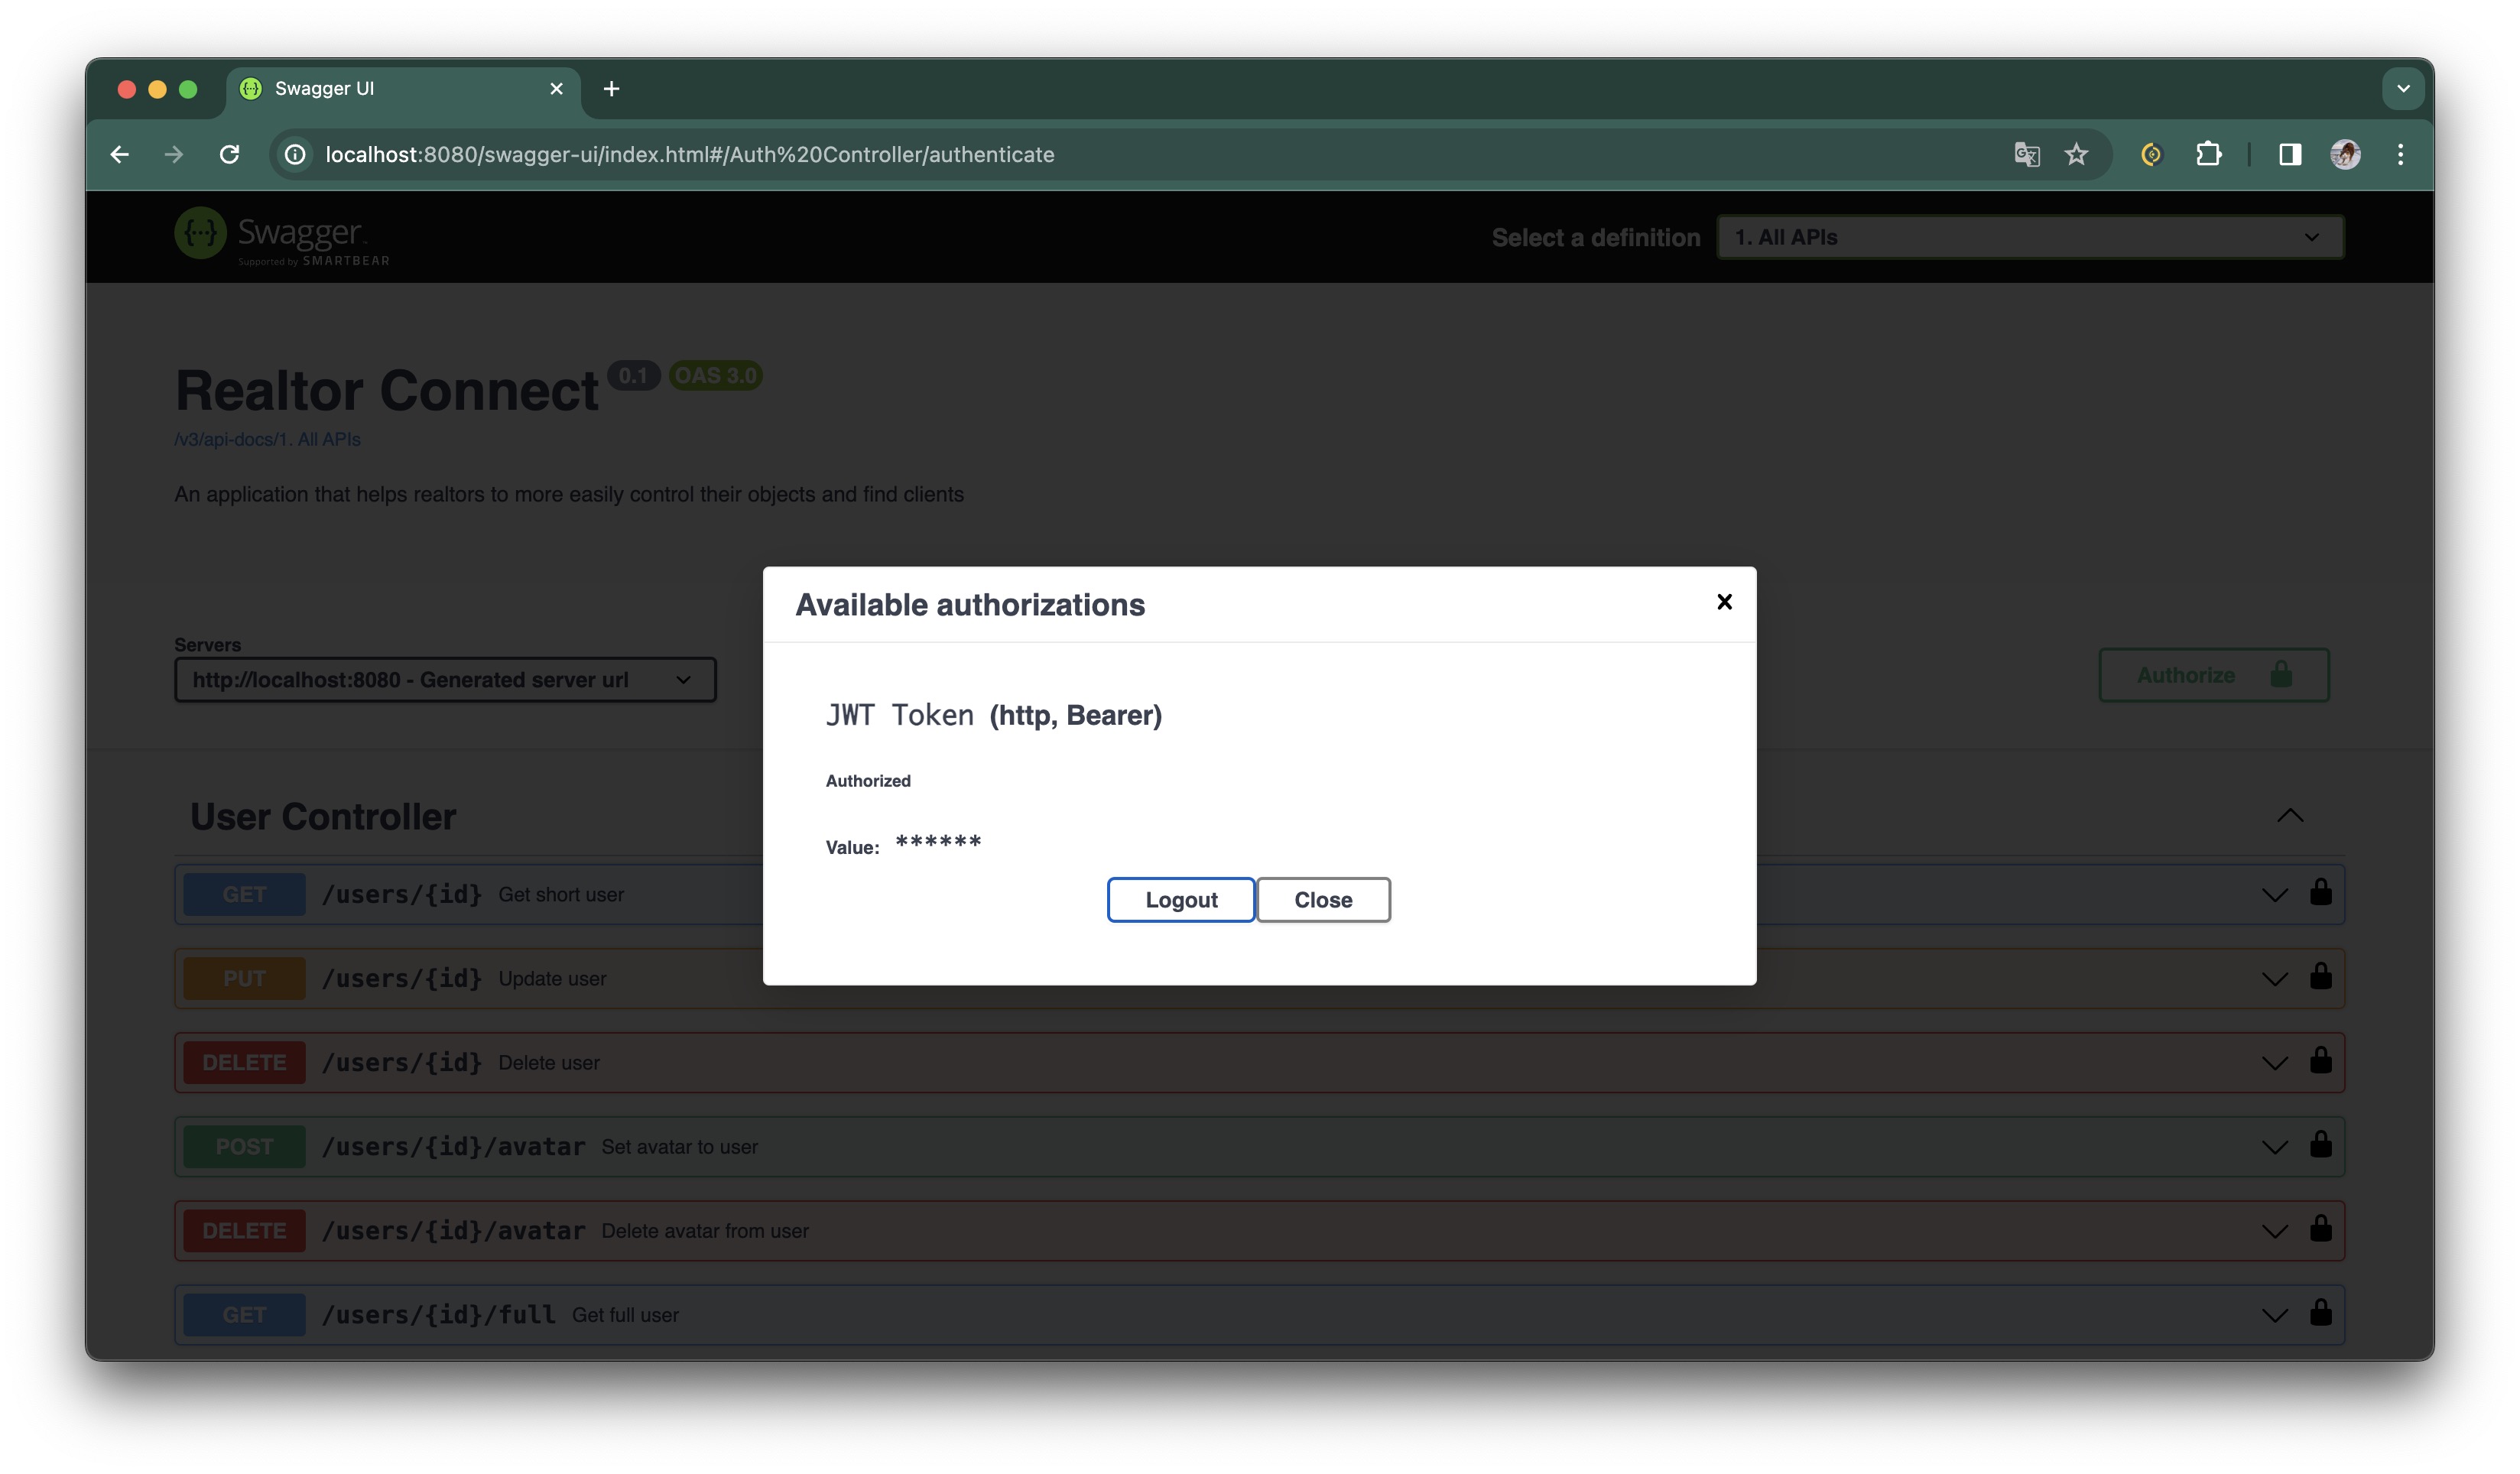
Now we can use app!
Go to Contact Controller and open a POST /realtors/{realtorId}/contacts, put there our id and next request:
{
  "type": "PHONE",
  "contact": "+380706023945"
}
Response:
{
  "status": {
    "status": "CREATED",
    "code": 201
  },
  "result": {
    "id": 1,
    "type": "PHONE",
    "contact": "+380706023945"
  },
  "success": true
}
Additional information:
- Only authenticated users can see your contacts, otherwise they will have an empty list.
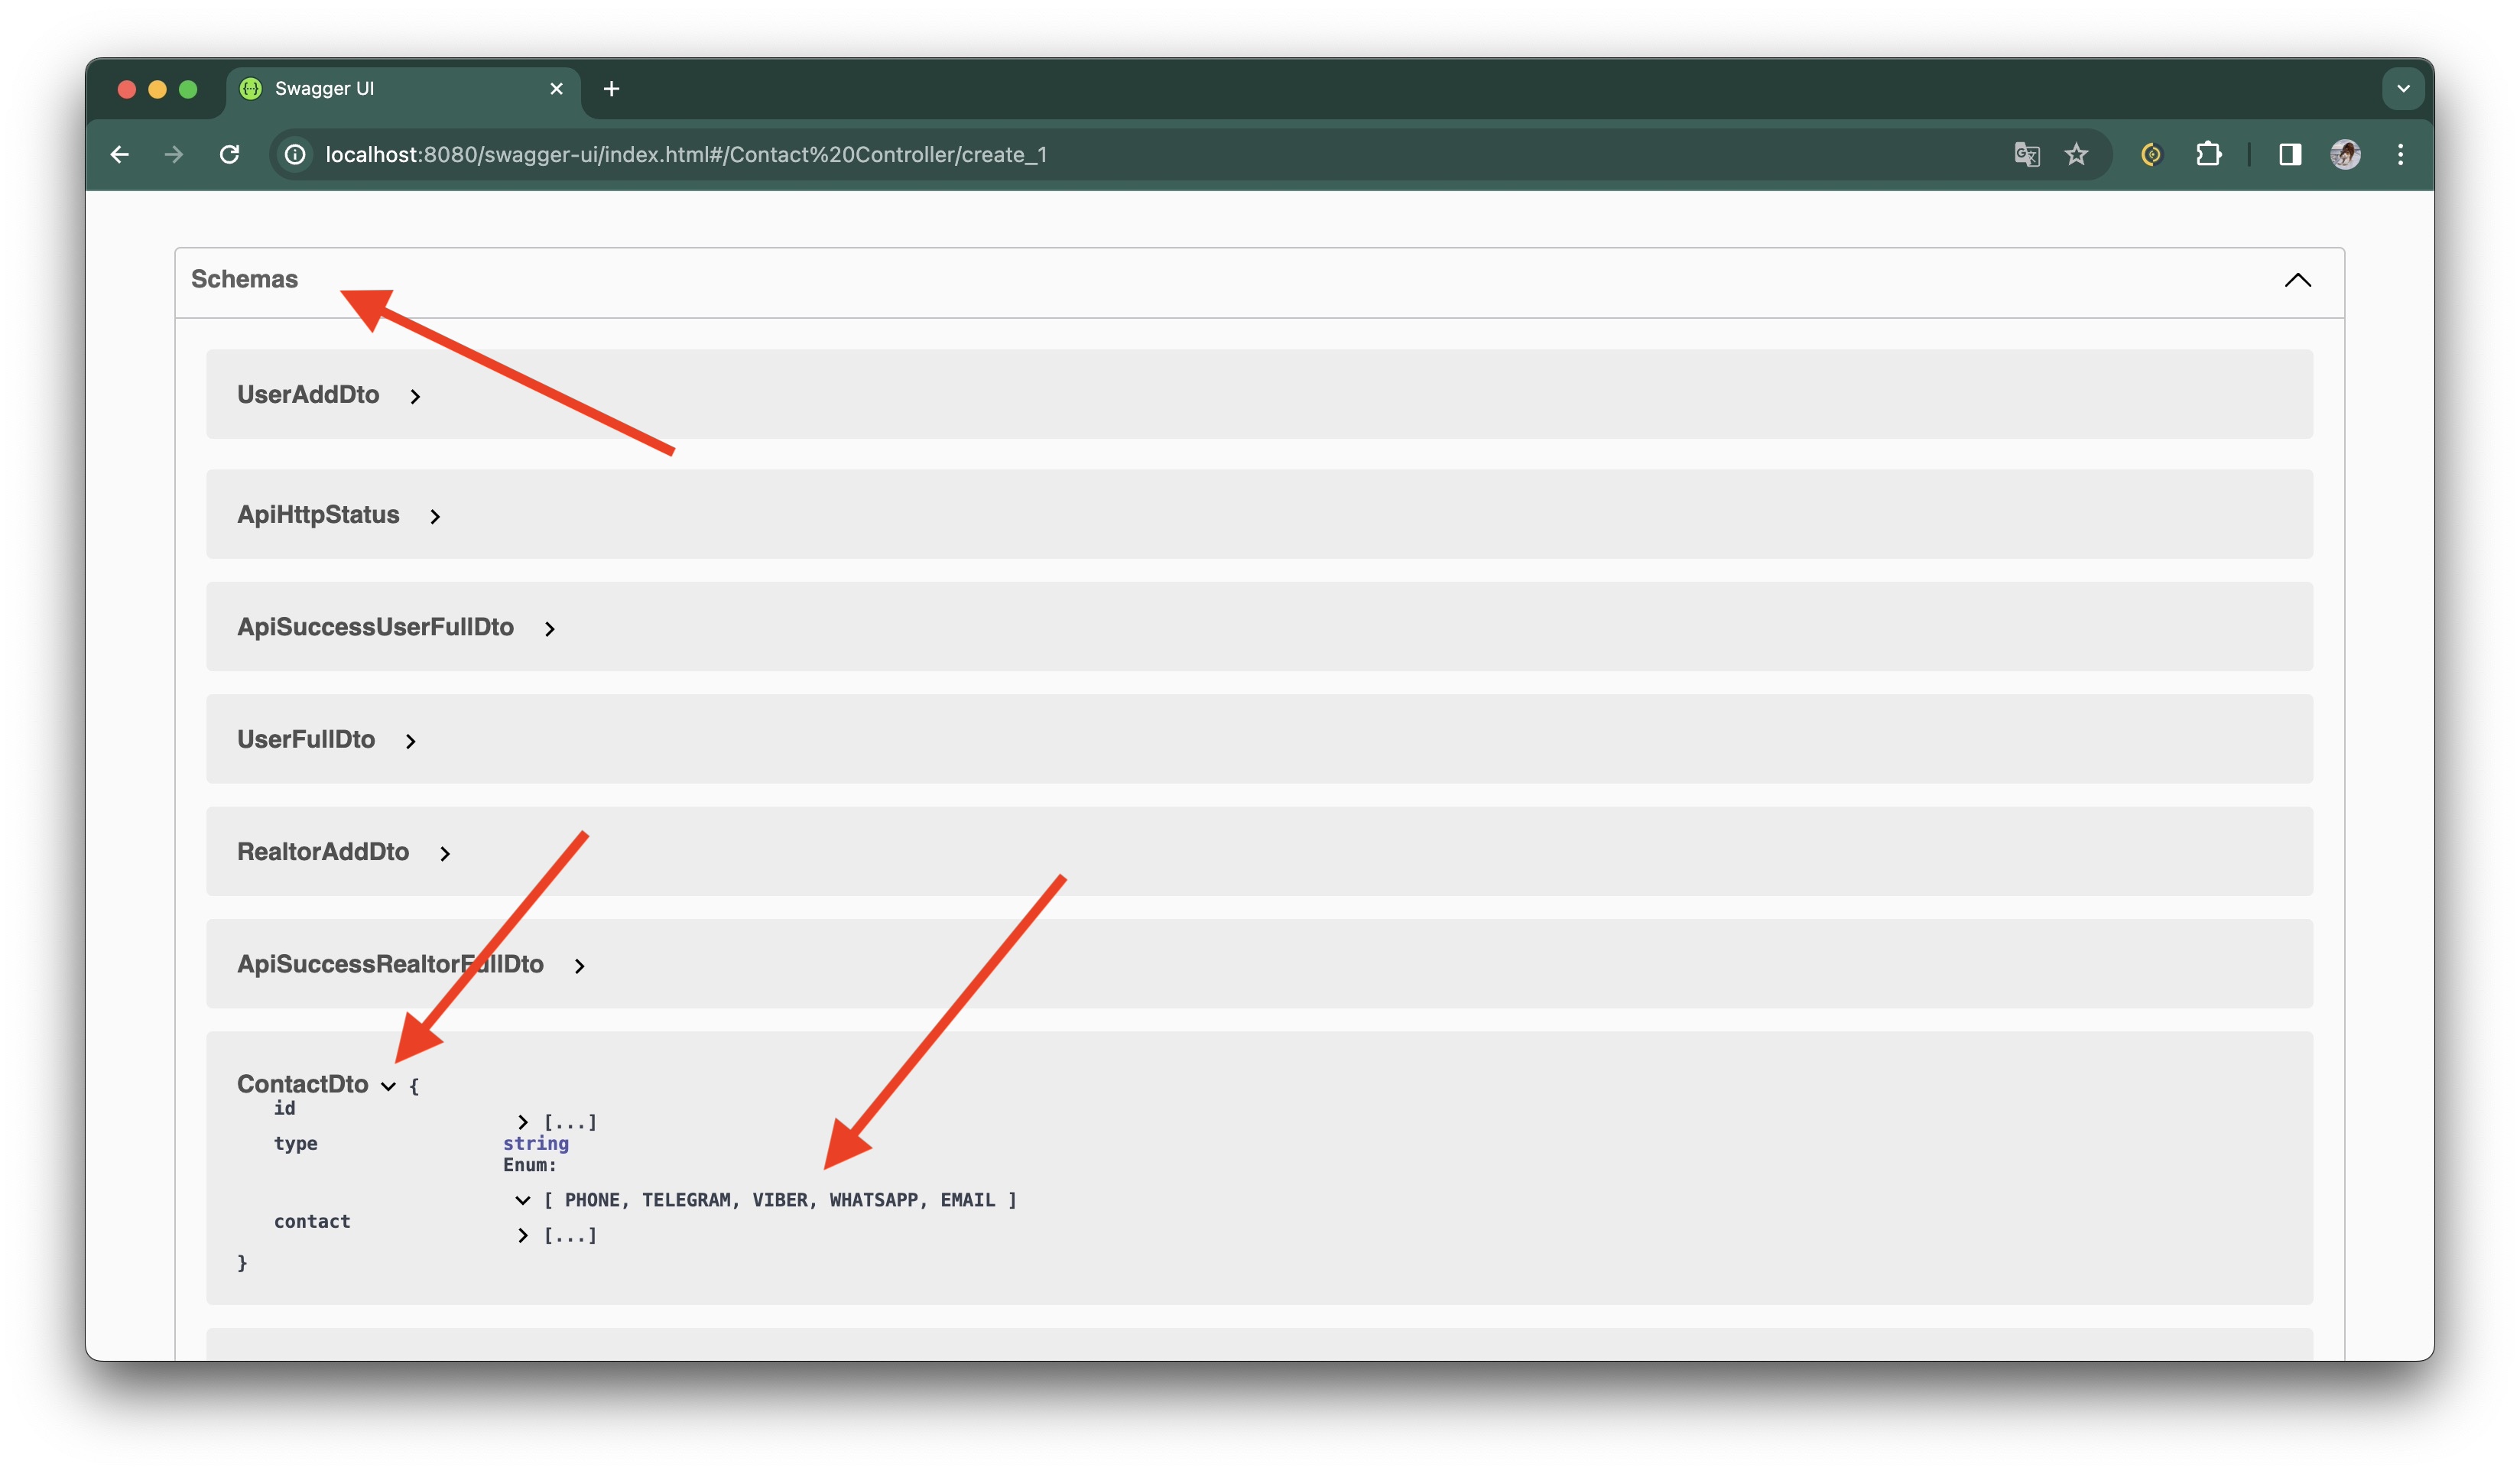
- You can find information about the possible types of contacts in the Schemas section at the bottom of the Swagger
page. This applies to any object in the app.
Go to Real Estate Controller and open POST /realtors/{realtorId}/real-estates with request body:
{
  "name": "One bedroom apartment with view of the opera house",
  "description": "One bedroom apartment for sale with a view of the opera house in the very center",
  "price": 125000,
  "owner": {
    "name": "Helen",
    "phone": "+380130495830",
    "email": null
  },
  "location": {
    "city": "Odesa",
    "district": "Primorsky",
    "residentialArea": "Centre",
    "street": "Rishelievskaya",
    "housingEstate": null,
    "houseNumber": 11,
    "block": null,
    "apartmentNumber": 6,
    "landmark": "Opera house"
  },
  "loggia": {
    "type": "LOGGIA",
    "count": 1,
    "glassed": false
  },
  "bathroom": {
    "type": "TOILET_BATH",
    "count": 1,
    "combined": true
  },
  "area": {
    "total": 82,
    "living": 60,
    "kitchen": 22
  },
  "floor": 3,
  "floorsInBuilding": 4,
  "buildingType": "APARTMENT",
  "heatingType": "CENTRALIZED",
  "windowsType": "METAL_PLASTIC",
  "hotWaterType": "CENTRALIZED",
  "stateType": "CAPITAL",
  "announcementType": "SALE",
  "roomsCount": 4,
  "ceilingHeight": 3.90,
  "documents": null,
  "private": false
}
As we can se from response, real estate was created
{
"status": {
"status": "CREATED",
"code": 201
},
"result": {
"id": 1,
"name": "One bedroom apartment with view of the opera house",
"description": "One bedroom apartment for sale with a view of the opera house in the very center",
"price": 125000,
"verified": false,
"owner": {
"name": "Helen",
"phone": "+380130495830",
"email": null
},
"location": {
"city": "Odesa",
"district": "Primorsky",
"residentialArea": "Centre",
"street": "Rishelievskaya",
"housingEstate": null,
"houseNumber": 11,
"block": null,
"apartmentNumber": 6,
"landmark": "Opera house"
},
"loggia": {
"type": "LOGGIA",
"count": 1,
"glassed": false
},
"bathroom": {
"type": "TOILET_BATH",
"count": 1,
"combined": true
},
"area": {
"total": 82,
"living": 60,
"kitchen": 22
},
"floor": 3,
"floorsInBuilding": 4,
"buildingType": "APARTMENT",
"heatingType": "CENTRALIZED",
"windowsType": "METAL_PLASTIC",
"hotWaterType": "CENTRALIZED",
"stateType": "CAPITAL",
"announcementType": "SALE",
"roomsCount": 4,
"ceilingHeight": 3.9,
"documents": null,
"called": true,
"calledAt": "2024-03-31T14:05:16.366401Z",
"photos": [],
"realtorId": 1,
"private": false
},
"success": true
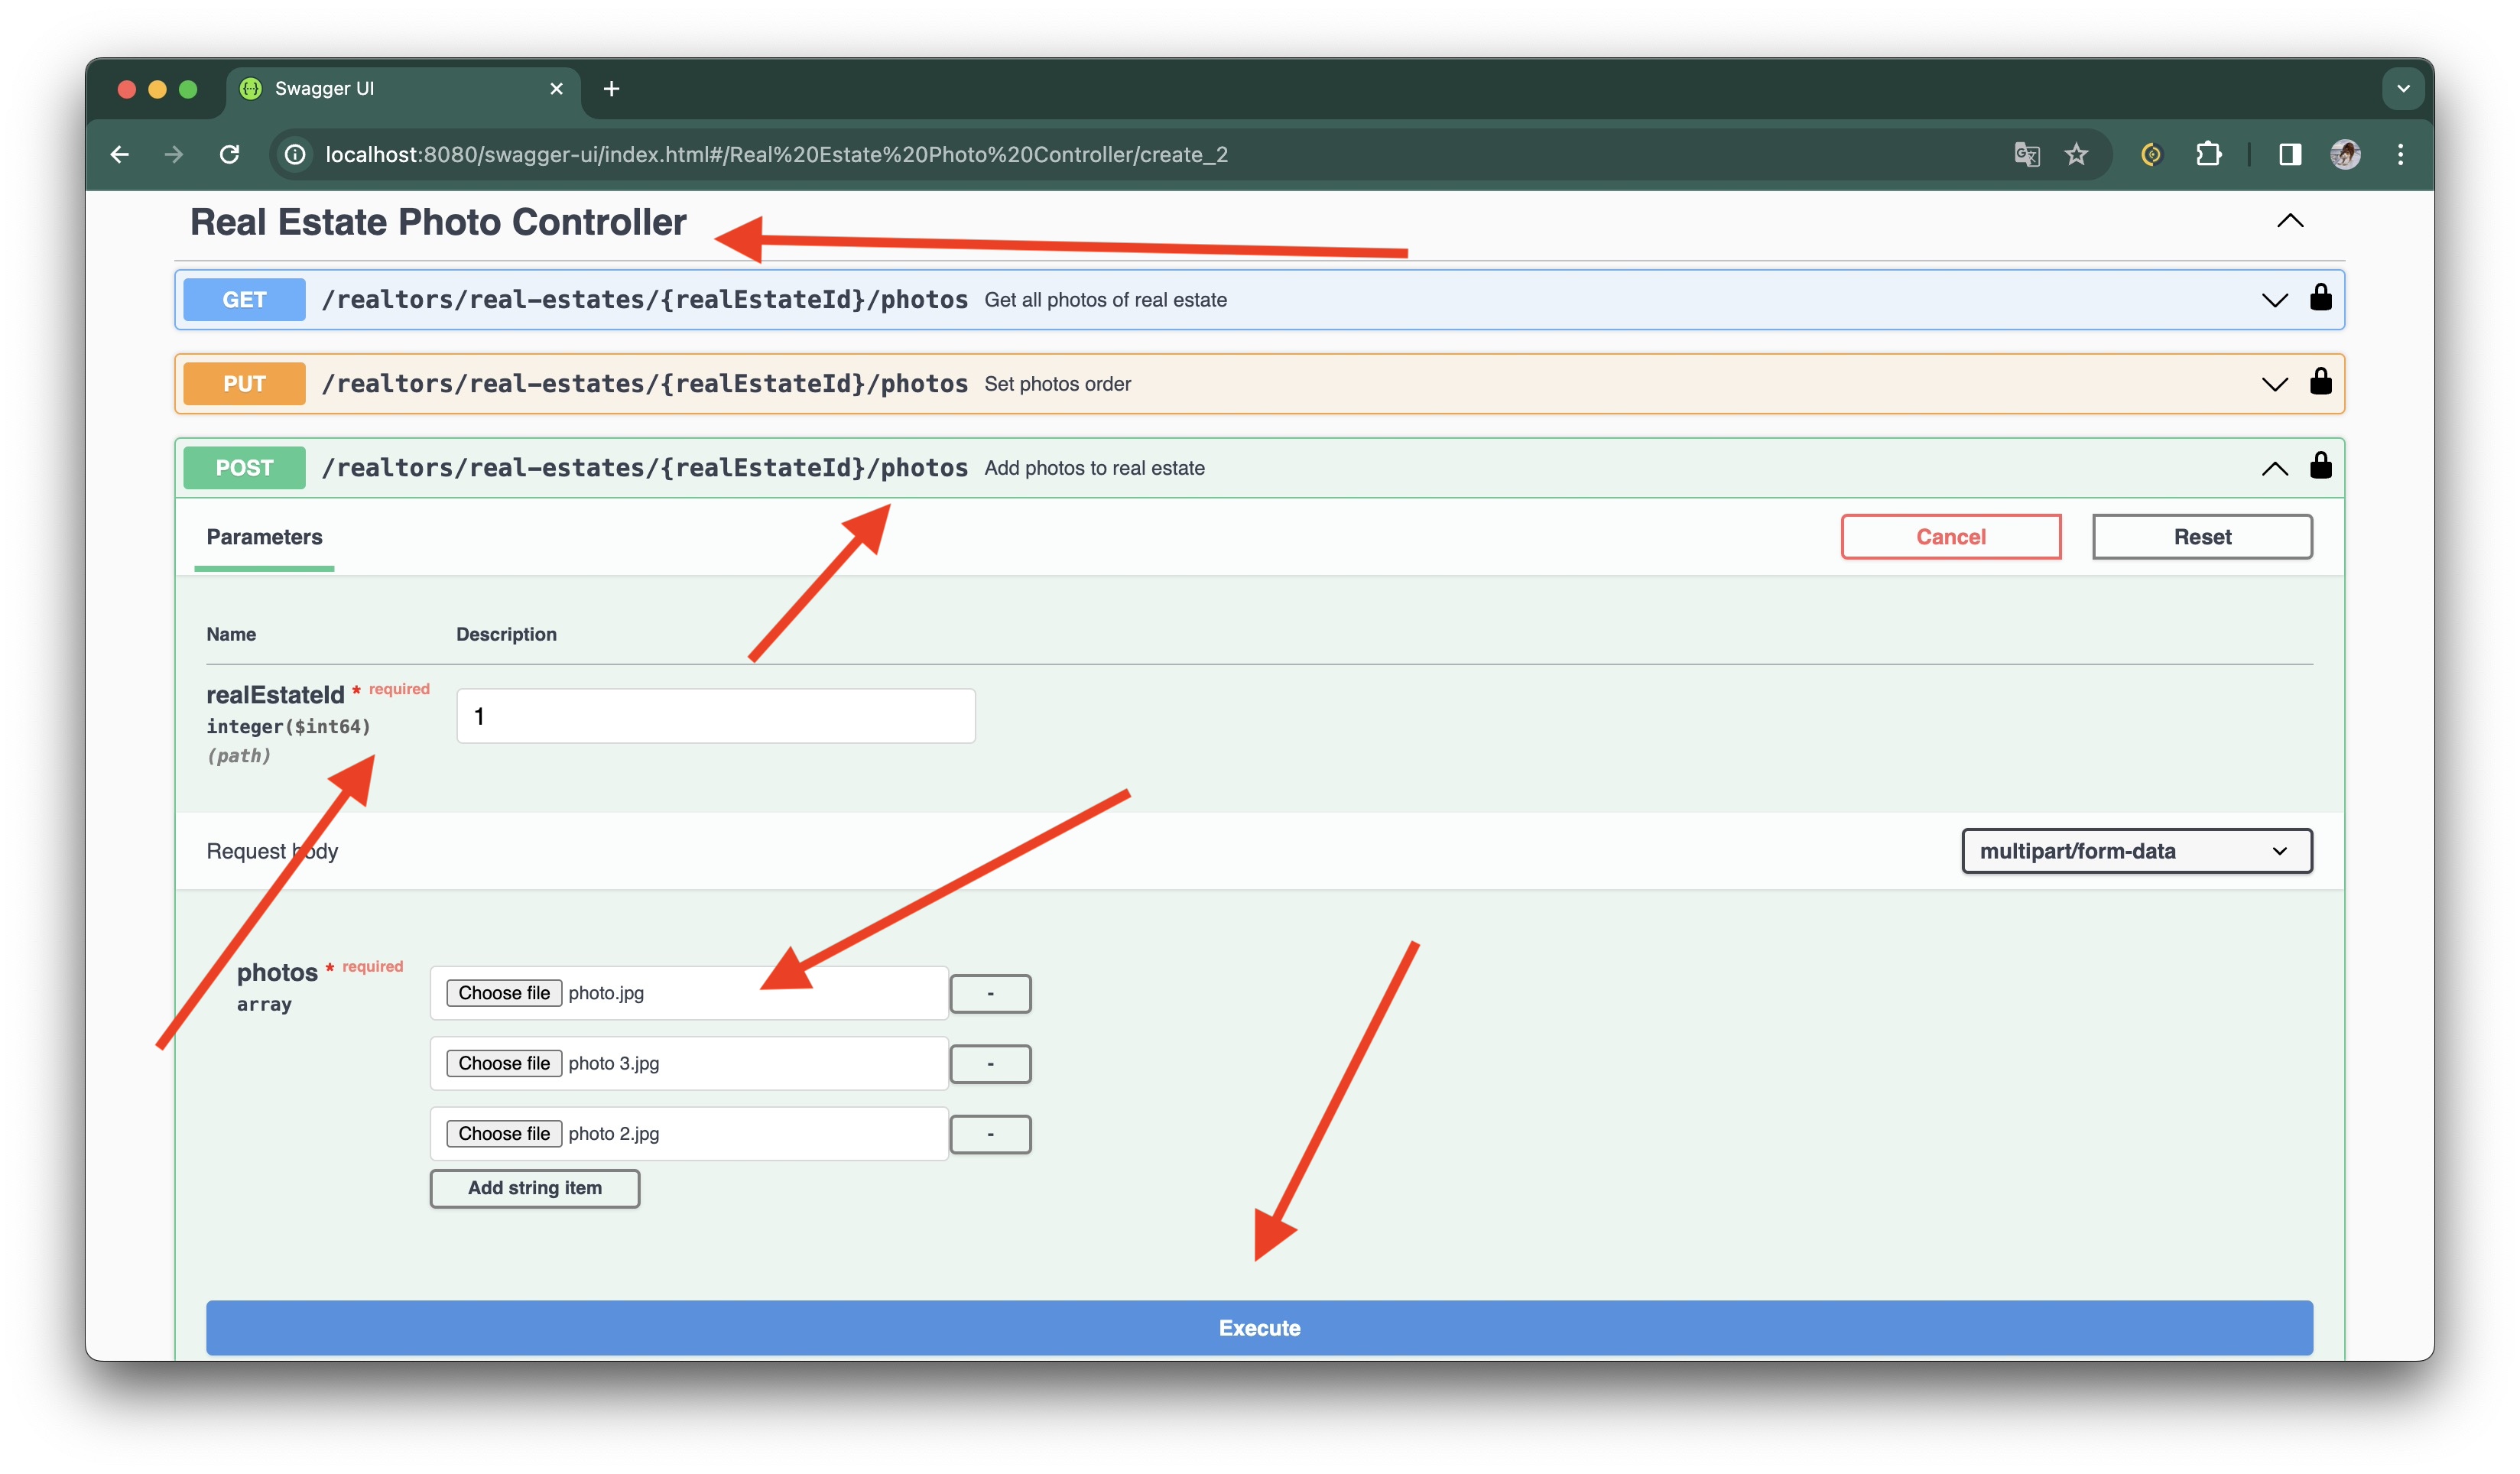
}Now let's add photos. Go to Real Estate Photo Controller and open POST /realtors/real-estates/{realEstateId}/photos:
Response:
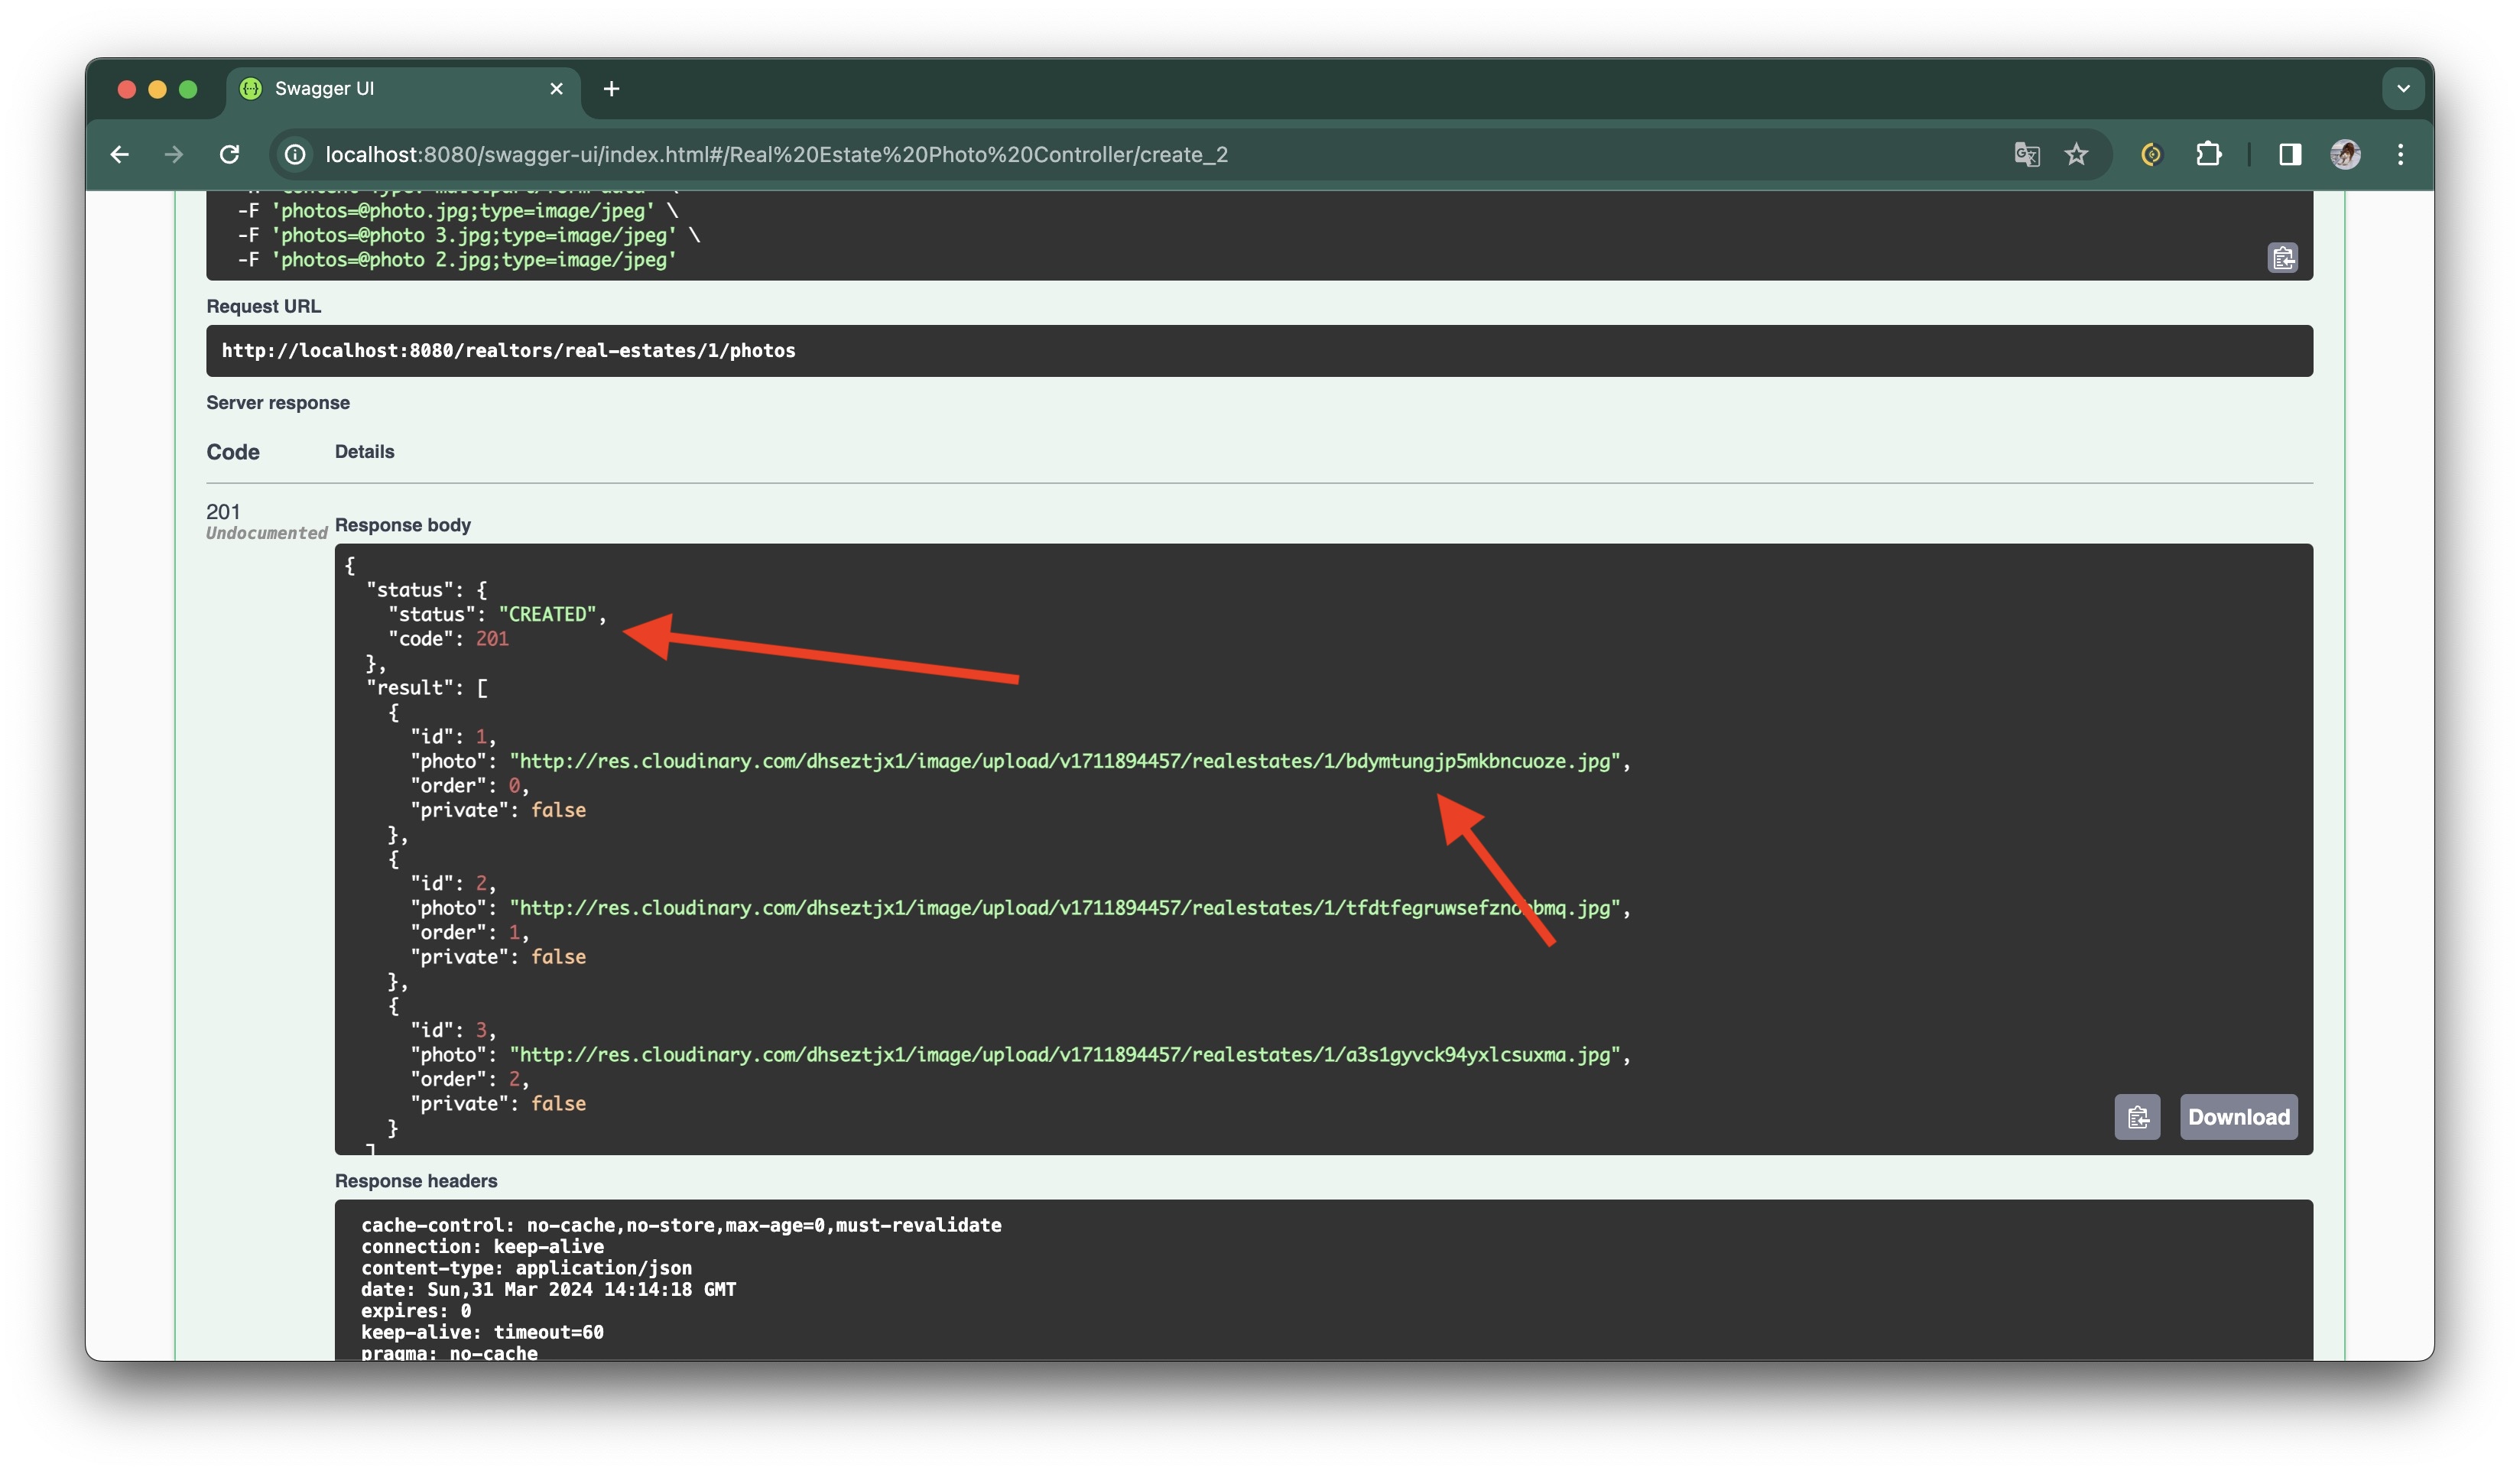
Enjoy!