Provides the ability to show various dialogs, child windows, message boxes and Wizards in a DI injectable service ready to plug into MVVM AvaloniaUI applications.
The general idea is to make it as simple as possible to handle all the basics of using dialogs with as few assumptions as possible whilst also providing a feature rich experience.
More or less everything is replaceable, extendable & customisable.


https://jamsoft.github.io/JamSoft.AvaloniaUI.Dialogs/
dotnet add package JamSoft.AvaloniaUI.Dialogs --version 1.4.0Install-Package JamSoft.AvaloniaUI.Dialogs -Version 1.4.0<PackageReference Include="JamSoft.AvaloniaUI.Dialogs" Version="1.4.0" />paket add JamSoft.AvaloniaUI.Dialogs --version 1.4.0- Windows 10 & 11
- MacOS Sonoma 14.5
- Pop!_OS 22.04
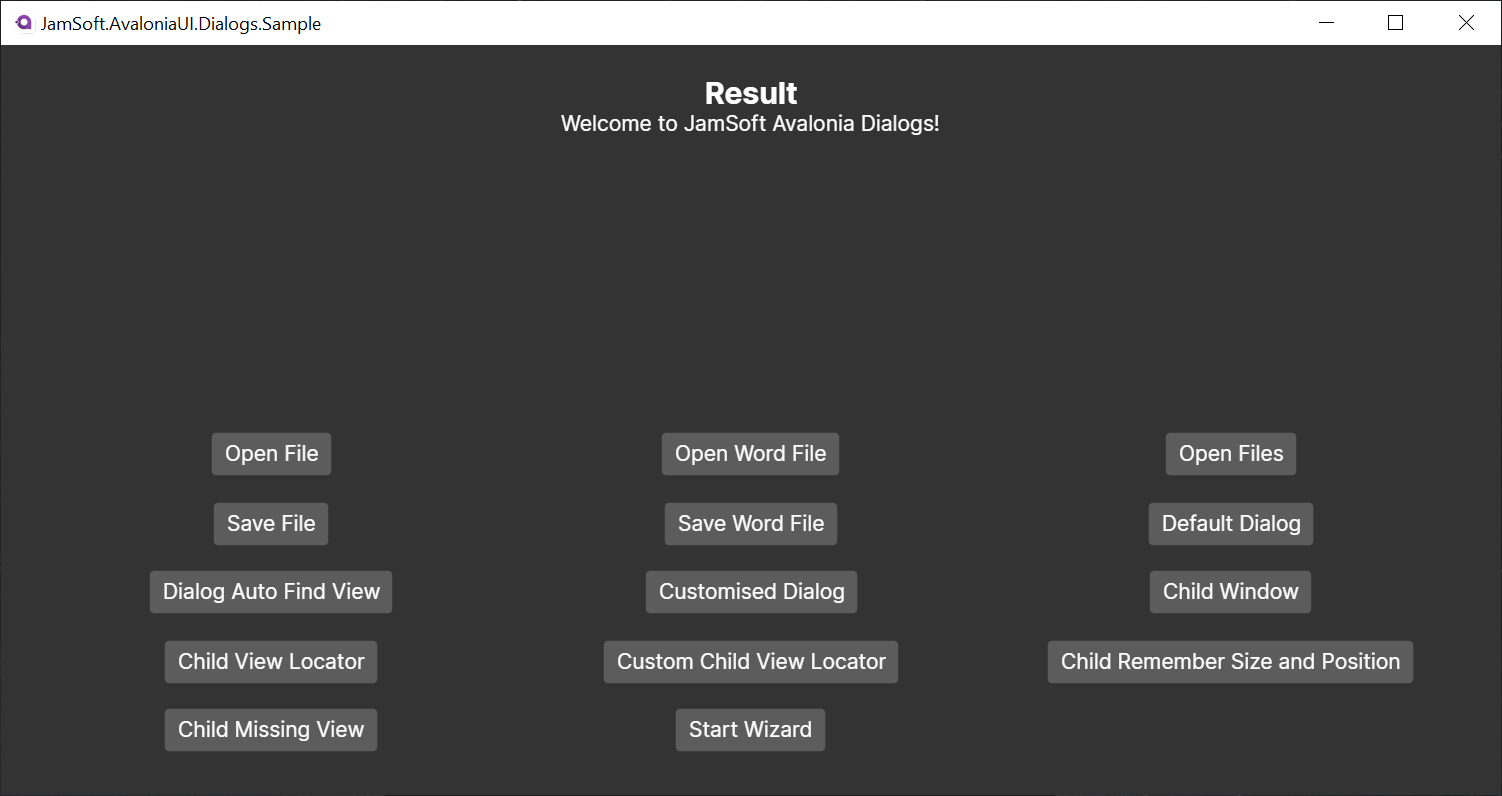
The sample application demonstrates how to use the library in a real-world scenario. It shows how to use the dialog service to open files, save files, show message boxes, show dialogs and child windows. It also demonstrates how to use the wizard control along with saving and restoring window sizes and positions.
<Application.Styles>
    <FluentTheme />
    <StyleInclude Source="avares://JamSoft.AvaloniaUI.Dialogs/Themes/Default.axaml"/>
</Application.Styles><Application.Styles>
<FluentTheme />
<StyleInclude Source="avares://JamSoft.AvaloniaUI.Dialogs/Themes/MsgBoxStyles.axaml"/>
<StyleInclude Source="avares://JamSoft.AvaloniaUI.Dialogs/Themes/ChildStyle.axaml"/>
<StyleInclude Source="avares://JamSoft.AvaloniaUI.Dialogs/Themes/ModalStyle.axaml"/>
<StyleInclude Source="avares://JamSoft.AvaloniaUI.Dialogs/Themes/WizardStyle.axaml"/>
<StyleInclude Source="avares://JamSoft.AvaloniaUI.Dialogs/Themes/WizardStepStyle.axaml"/>
</Application.Styles>Since we are using plain old Window objects, basic styling properties like Background colors will be inherited from your own applications default Window style, such as:
<Style Selector="Window">
    <Setter Property="Background" Value="#333333" />
</Style>
The same is true for your default button styles and basic text and font settings so theming things should be little more than plugging in the library and starting to use it.
IDialogService dialogService = DialogServiceFactory.Create(new DialogServiceConfiguration({
    ApplicationName = "Dialog Sample App",
    UseApplicationNameInTitle = true,
    ViewsAssemblyName = Assembly.GetExecutingAssembly().GetName().Name
});IMessageBoxService msgboxService = DialogServiceFactory.CreateMessageBoxService();public static void Main(string[] args)
{
RegisterDependencies();
BuildAvaloniaApp()
.StartWithClassicDesktopLifetime(args);
}
private static void RegisterDependencies() =>
BootStrapper.Register(Locator.CurrentMutable, Locator.Current);
public class BootStrapper
{
    public static void Register(IMutableDependencyResolver services, IReadonlyDependencyResolver resolver)
    {
        services.RegisterLazySingleton(() => DialogServiceFactory.Create(new DialogServiceConfiguration
        {
            ApplicationName = "Dialog Sample App",
            UseApplicationNameInTitle = true,
            ViewsAssemblyName = "JamSoft.AvaloniaUI.Dialogs.Sample"
        }));

        services.RegisterLazySingleton(DialogServiceFactory.CreateMessageBoxService);

        services.Register(() => new MainWindowViewModel(resolver.GetService<IDialogService>()!, resolver.GetService<IMessageBoxService>()!));
        services.Register(() => new MyDialogViewModel());
        services.Register(() => new MyChildViewModel());
    }
} Now that we have this setup and registered, we can make use of the service from view models like this. First, add it as a constructor parameter.
private readonly IDialogService _dialogService;
private readonly IMessageBoxService _messageBoxService;

public MainWindowViewModel(IDialogService dialogService, IMessageBoxService messageBoxService)
{
    _dialogService = dialogService;
    _messageBoxService = messageBoxService;
}
...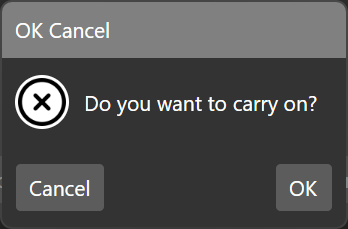
The message box implementation closely follows the .NET/Forms/WPF MessageBox class. It provides a simple way to show message boxes with various button configurations and icons.
The Show method returns a MsgBoxResult object which contains the button result that was clicked by the user. This can be used to determine the action to take in your application.
If the checkbox is also used, by providing text for the CheckBox message in the Show call, the result can be checked in the returned MsgBoxResult object.
public sealed class MsgBoxResult
{
    public MsgBoxButtonResult ButtonResult { get; }

    public bool CheckBoxResult { get; }

    private MsgBoxResult(bool checkBoxResult, MsgBoxButtonResult buttonResult)
    {
        CheckBoxResult = checkBoxResult;
        ButtonResult = buttonResult;
    }

    public static MsgBoxResult CreateResult(bool checkBoxChecked, MsgBoxButtonResult buttonResult) => new(checkBoxChecked, buttonResult);
}var msgbResult = await _messageBoxService.Show("OK Cancel", "Do you want to carry on?", MsgBoxButton.OkCancel, MsgBoxImage.Question);You can also pass a view model instance to the Show method to customise the message box using the default provided MsgBoxViewModel class.
var viewModel = new MsgBoxViewModel("Yes No With Icon", "Do you want to carry on?", MsgBoxButton.YesNo, MsgBoxImage.Warning);
var btnResult = await _messageBoxService.Show(viewModel);
You can also use any custom view model class by implementing the IMessageBoxViewModel interface.
public class MyCustomMsgBoxViewModel : IMsgBoxViewModel
{
}

var myCustomMsgBoxViewModel = new MyCustomMsgBoxViewModel();
...
var btnResult = await _messageBoxService.Show(myCustomMsgBoxViewModel);var viewModel = new MsgBoxViewModel("Yes No With Icon", "Do you want to carry on?", MsgBoxButton.YesNo, MsgBoxImage.Custom);
viewModel.Icon = new Bitmap("myicon.png");
var result = await _messageBoxService.Show(viewModel);<Style Selector="Ellipse#MsgBoxIconBackgroundEllipse">
<Setter Property="Fill" Value="Red"/>
</Style>var result = await _messageBoxService.Show("German Yes No Cancel", "Möchten Sie weitermachen?",
MsgBoxButton.YesNoCancel,
MsgBoxImage.Question, "Nein", "Ja", "Abbrechen");
var msgBoxResult = await _messageBoxService.Show("OK Cancel With Checkbox", "Do you want to carry on?", MsgBoxButton.OkCancel, MsgBoxImage.Error, checkBoxText:"Don't ask me again");
msgBoxResult.ButtonResult;
msgBoxResult.CheckBoxResult;string path = await _dialogService.OpenFile("Open Any File");string path = await _dialogService.OpenFile("Open Word File", new List<FileDialogFilter>
{
new("Word Files")
{
Patterns = new List<string> { "*.docx", "*.doc" },
AppleUniformTypeIdentifiers = new List<string> { "com.microsoft.word.doc", "org.openxmlformats.wordprocessingml.document" },
MimeTypes = new List<string> { "application/msword", "application/vnd.openxmlformats-officedocument.wordprocessingml.document" }
}
});You can also make use of the built in CommonFilters helper class.
string path = await _dialogService.OpenFile("Open Word File", new List<FileDialogFilter>
{
    CommonFilters.WordFilter
});string[] paths = await _dialogService.OpenFiles("Open Multiple Files");string path = await _dialogService.SaveFile("Save Any File");string path = await _dialogService.SaveFile("Save New MyApp Project", new List<FileDialogFilter>
{
new()
{
Name = "MyApp Project",
Patterns = new List<string> { "*.myappext" },
AppleUniformTypeIdentifiers = new List<string> { "com.myorgname.myappext" },
}
});There are two base view model classes already baked in for ease of use of the library. These are provided as defaults and a starting point. Create a suitable view model and inherit from either DialogViewModel or ChildWindowViewModel as base class.

_dialogService.ShowDialog(Locator.Current.GetService<MyDialogViewModel>(), DialogCallback);

private void DialogCallback(MyDialogViewModel obj)
{
    Message = obj.DialogMessage;
}private void ShowCustomizedDialogCommandExecuted()
{
var vm = Locator.Current.GetService<MyDialogViewModel>();
vm.AcceptCommandText = "Accept";
vm.CancelCommandText = "Oh No!";
_dialogService.ShowDialog(vm, DialogCallback);
}private void ShowCustomizedDialogCommandExecuted()
{
var vm = Locator.Current.GetService<MyDialogViewModel>();
vm.AcceptCommandText = "Accept";
vm.CancelCommandText = "Oh No!";
_dialogService.ShowDialog(new MyAlternateDialogView(), vm, DialogCallback);
}The dialog buttons are also associated with their keyboard inputs.
<Window.KeyBindings>
    <KeyBinding Gesture="Escape" Command="{Binding CancelCommand}" />
    <KeyBinding Gesture="Enter" Command="{Binding AcceptCommand}" />
</Window.KeyBindings>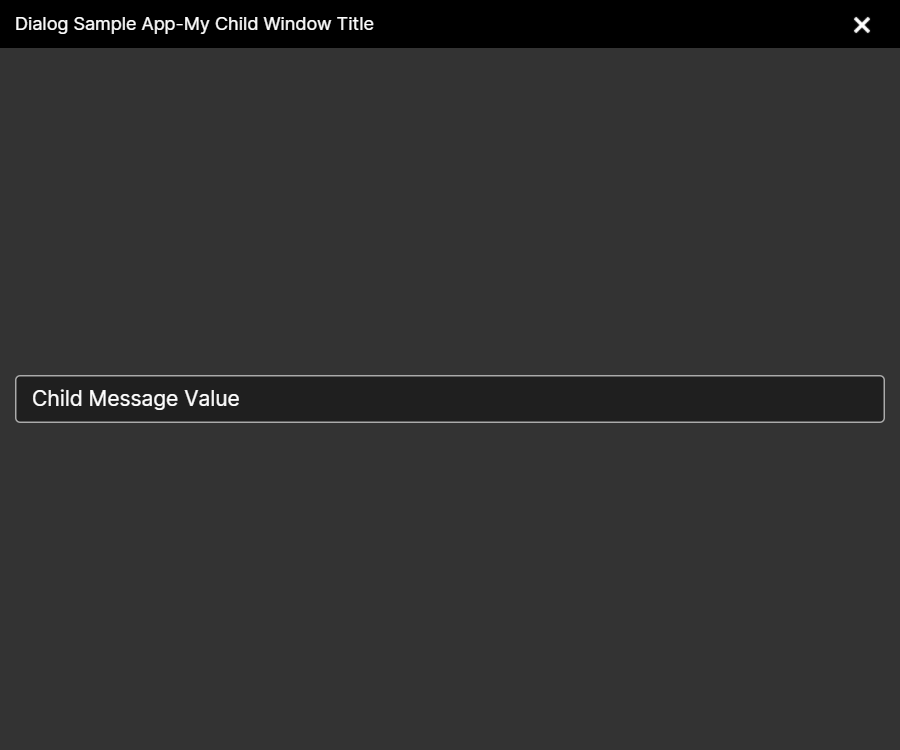
private void ShowChildWindowCommandExecuted()
{
    var vm = Locator.Current.GetService<MyChildViewModel>();

    // these values could be stored in user settings and loaded at runtime etc.
    vm.RequestedLeft = 50;
    vm.RequestedTop = 50;
    vm.RequestedHeight = 600;
    vm.RequestedWidth = 800;
    vm.ChildMessage = "Child Message Value";
    vm.ChildWindowTitle = "My Child Window Title";

    _dialogService.ShowChildWindow(vm, model =>
    {
        Message = $"Child Closed - {model.ChildMessage}";
    });
}
The child windows are draggable and also update these properties in real-time. This means that your application can easily restore child window positions between application runs by storing these values.
private void ShowChildWindowCommandExecuted()
{
    var vm = Locator.Current.GetService<MyChildViewModel>();

    ...

    _dialogService.ShowChildWindow(new MyAlternateChildView(), vm, model =>
    {
        Message = $"Child Closed - {model.ChildMessage}";
    });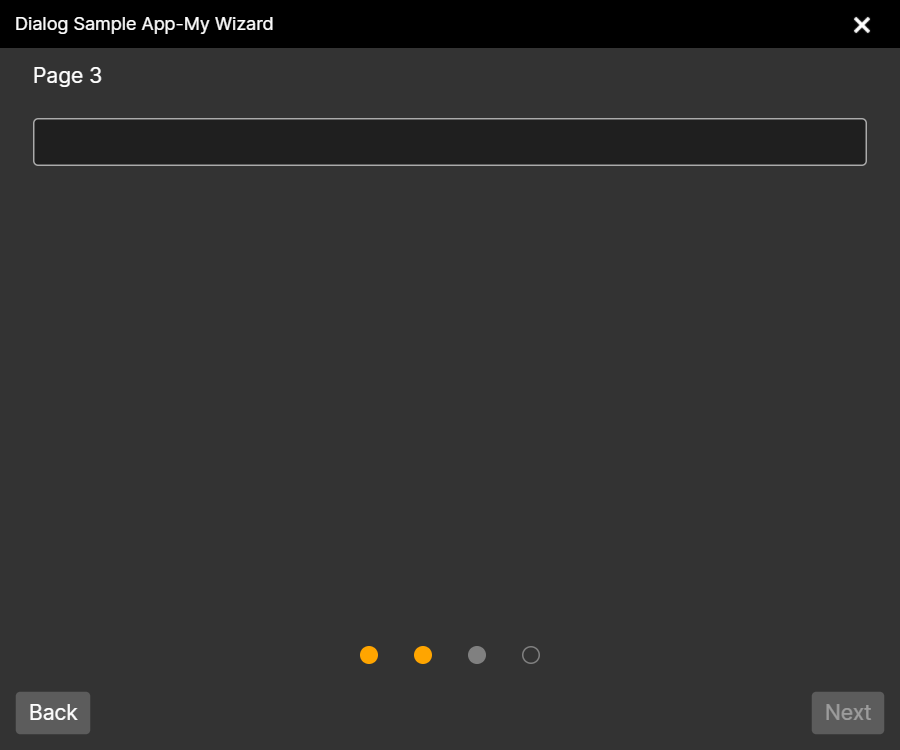
}The library also has a wizard control allowing multiple page dialogs. You can define a wizard like this:
private void WizardViewCommandExecuted()
{
    var vm = Locator.Current.GetService<MyWizardViewModel>();

    vm.RequestedLeft = MyUserSettings.Instance.Left;
    vm.RequestedTop = MyUserSettings.Instance.Top;
    vm.RequestedHeight = MyUserSettings.Instance.Height;
    vm.RequestedWidth = MyUserSettings.Instance.Width;

    vm.ChildWindowTitle = "My Wizard";

    _dialogService.StartWizard(vm, model =>
    {
        Message = $"Wizard Closed - {model.GetType()}";
    });
}<controls:Wizard ButtonPlacement="Bottom" ProgressPlacement="Bottom">
<controls:WizardStep Header="Page 1" StepComplete="{Binding WizardStepOneComplete}">
<controls:WizardStep.Content>
<StackPanel Orientation="Vertical" Spacing="20">
<TextBlock>Page 1</TextBlock>
<TextBox Foreground="White" Text="{Binding ValueOne}"/>
</StackPanel>
</controls:WizardStep.Content>
</controls:WizardStep>
<controls:WizardStep Header="Page 2" StepComplete="{Binding WizardStepTwoComplete}">
<controls:WizardStep.Content>
<StackPanel Orientation="Vertical" Spacing="20">
<TextBlock>Page 2</TextBlock>
<TextBox Foreground="White" Text="{Binding ValueTwo}"/>
</StackPanel>
</controls:WizardStep.Content>
</controls:WizardStep>
<controls:WizardStep Header="Page 3" StepComplete="{Binding WizardStepThreeComplete}">
<controls:WizardStep.Content>
<StackPanel Orientation="Vertical" Spacing="20">
<TextBlock>Page 3</TextBlock>
<TextBox Foreground="White" Text="{Binding ValueThree}"/>
</StackPanel>
</controls:WizardStep.Content>
</controls:WizardStep>
<controls:WizardStep Header="Page 4" StepComplete="{Binding WizardStepFourComplete}">
<controls:WizardStep.Content>
<StackPanel Orientation="Vertical" Spacing="20">
<TextBlock>Final Step</TextBlock>
<TextBox Foreground="White" Text="{Binding ValueFour}"/>
</StackPanel>
</controls:WizardStep.Content>
</controls:WizardStep>
</controls:Wizard>The WizardStep defines a bindable property called StepComplete which you can bind in your view model to control step validation and navigation. It also makes use of the ChildWindow so inherits the position awareness should you want that functionality.
First you need a mechanism to store positions as set by the user moving things around.
public class MyUserSettings : SettingsBase<MyUserSettings>
{
    public double Left { get; set; } = 50;
    public double Top { get; set; } = 50;
    public double Height { get; set; } = 600;
    public double Width { get; set; } = 800;
}
SettingsBase<T> can be found in the JamSoft.Helpers package https://github.com/jamsoft/JamSoft.Helpers
Nuget - https://www.nuget.org/packages/JamSoft.Helpers
Then in your view model you can listen for the RequestCloseDialog event and respond accordingly by storing the settings in the OnRequestCloseDialog method.
public class MyChildWindowViewModel : ChildWindowViewModel
{
    private string? _childMessage;

    public MyChildWindowViewModel()
    {
        RequestCloseDialog += OnRequestCloseDialog;
    }

    public string? ChildMessage
    {
        get => _childMessage;
        set => RaiseAndSetIfChanged(ref _childMessage, value);
    }

    private void OnRequestCloseDialog(object? sender, RequestCloseDialogEventArgs e)
    {
        MyUserSettings.Instance.Top = RequestedTop;
        MyUserSettings.Instance.Left = RequestedLeft;
        MyUserSettings.Instance.Width = RequestedWidth;
        MyUserSettings.Instance.Height = RequestedHeight;

        RequestCloseDialog -= OnRequestCloseDialog;
    }
}
The next time this view model is requested by the user you can then restore these values.
vm.RequestedLeft = MyUserSettings.Instance.Left;
vm.RequestedTop = MyUserSettings.Instance.Top;
vm.RequestedHeight = MyUserSettings.Instance.Height;
vm.RequestedWidth = MyUserSettings.Instance.Width;

vm.ChildWindowTitle = "My Custom Child Window Title";

_dialogService.ShowChildWindow(vm, model =>
{
    Message = $"Child Remember Position Closed - {model.GetType()}";
});
See the Sample Application for a complete implementation example and further guidance.
You can easily target elements of the dialogs via their names and types, such as:
<Application>
    <Application.Styles>

        <Style Selector="Button.CloseChildButton:pointerover /template/ Border">
                <Setter Property="Background" Value="#c42b1c" />
        </Style>

        <Style Selector="DockPanel#ChromeDockPanel">
                <Setter Property="Height" Value="32"/>
                <Setter Property="Background" Value="#000000"/>
        </Style>

        <Style Selector="TextBlock#ChromeDockPanelTitle">
                <Setter Property="FontSize" Value="12"/>
                <Setter Property="VerticalAlignment" Value="Center" />
                <Setter Property="Margin" Value="10,0"/>
        </Style>

        <!-- Override Wizard complete ellipse fill and stroke -->
        <Style Selector="controls|WizardStep:complete /template/ Ellipse#PART_SelectedPipe">
            <Setter Property="Fill" Value="DeepPink" />
            <Setter Property="StrokeThickness" Value="0" />
        </Style>

        <!-- Hide the child window Chrome -->
        <Style Selector="DockPanel#ChromeDockPanel">
            <Setter Property="IsVisible" Value="False" />
        </Style>

    </Application.Styles>
</Application>Window sizes and positions on Linux not always accurate due to window manager differences. Under investigation.