Routing
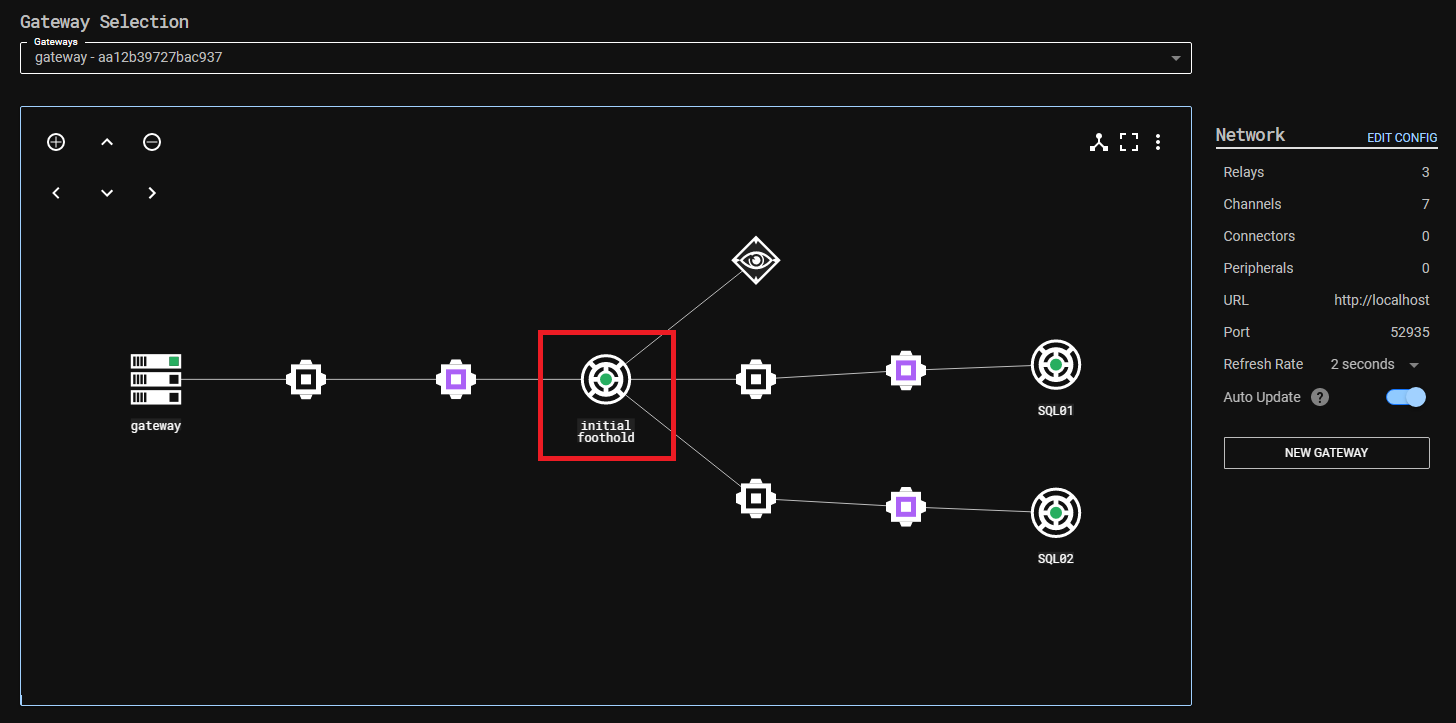
- This example demonstrates how to handle gaining access to a Relay that has been lost due to an intermediary relay being lost. Consider the situation below, where we have access to
SQL01andSQL02through the intermediary Relayinitial_foothold:
-
At some point the
initial_footholdrelay either dies, or through some user error access to the SQL servers is lost. We know theinitial_footholdis dead because it no longer responds to the Ping command. -
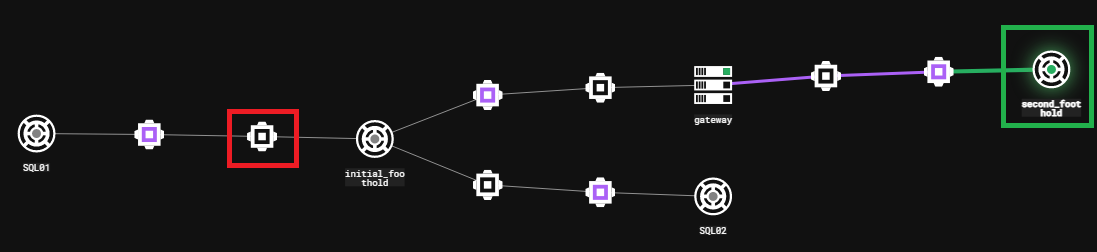
If we regain a foothold in the network we can also regain access to the SQL servers through routing. In the figure below we see the
second_footholdhighlighted in green. In order to setup the channels to get back toSQL01we need to copy the information from the Interface (highlighted in red).
-
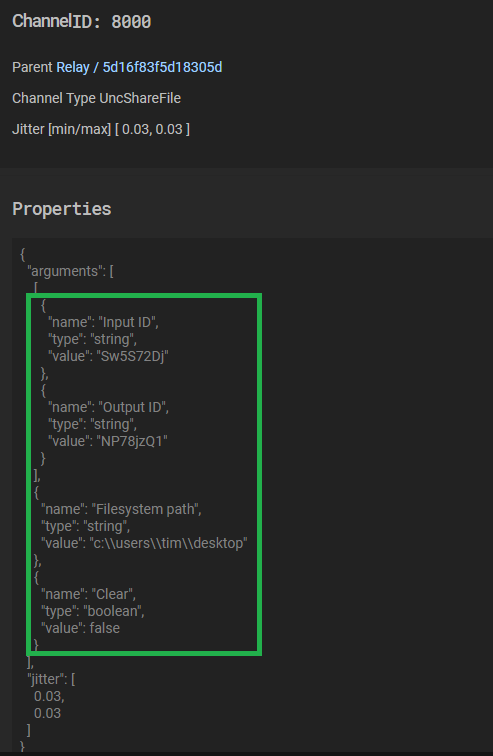
We double click the highlighted interface and copy the arguments shown into a notepad.
-
Using the information provided from the previous step, we create a new listening interface on
second_footholdthat is identical to the listening channel betweeninitial_footholdandSQL01.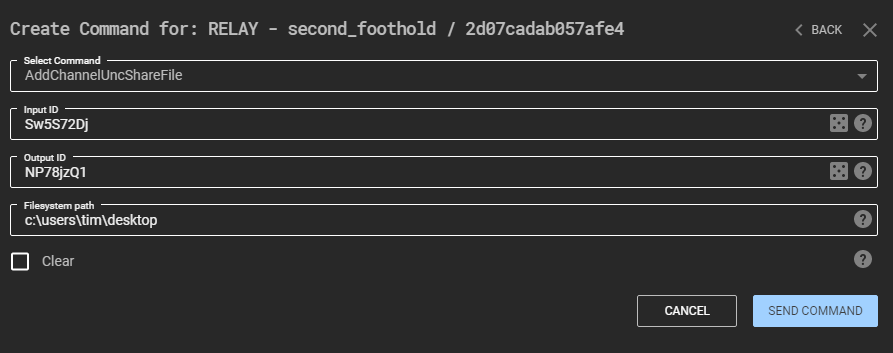
-
Once this channel is listening, we need to grab the RelayID of
SQL01and the DeviceID of the Interface we wish to connect to. This information can be obtained by clicking on the Relay and selecting the highlighted values:
-
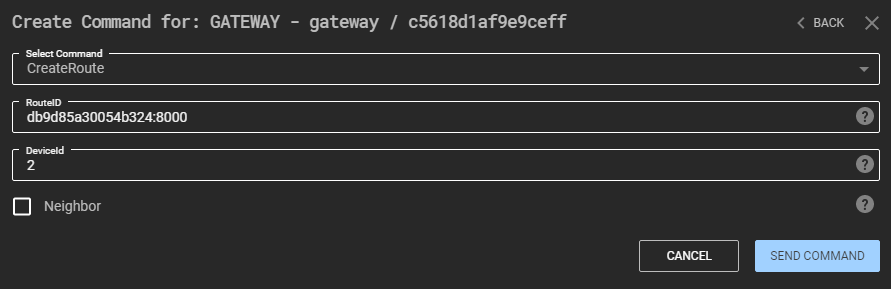
Now, on
second_footholdwe run the CreateRoute command. The command shown below instructs the Relay to update its routing table such that it understands thatSQL01'sInterface with ID 8000 can be reached by sending packets out of the Interface with ID 1 (the channel we setup earlier).
-
Important to note in this command is the use of the RelayID colon seperated DeviceId identifier. Think of this as a hostname and port. Also of note is the Neighbour boolean set to true, this is because we are routing to a Relay that will be 1 hop away.
-
At this point your network should look similar to that shown below, note there is now a loop where two routes could be used to reach
SQL01, although we can't use the route throughinitial_footholdas it is dead.
-
The next stage is to update the Gateway's routing table. This is an important step and should be executed with care. We must tell the Gateway about this new route to
SQL01. At this point in time the Gateway only knows that packets destined forSQL01must go throughinitial_foothold. We must delete this route and add our new route. For this stage we need the RelayID ofSQL01andsecond_foothold. -
The figure below shows the Gateway's routing table, highlighted in red is the current route to
SQL01out of DeviceID 1 (which is connected toinitial_foothold). We need to delete this route by clicking on the 3 button's highlighted in yellow. In green is the route tosecond_foothold, this goes through DeviceID 2, we need this information for the next step.
-
The CreateRoute command for the Gateway is therefore:
-
If we now delete the
initial_footholdrelay by sending it the Close command (it won't reachinitial_footholdbut will remove it from our graph), we should be left with the following network, and access back toSQL01: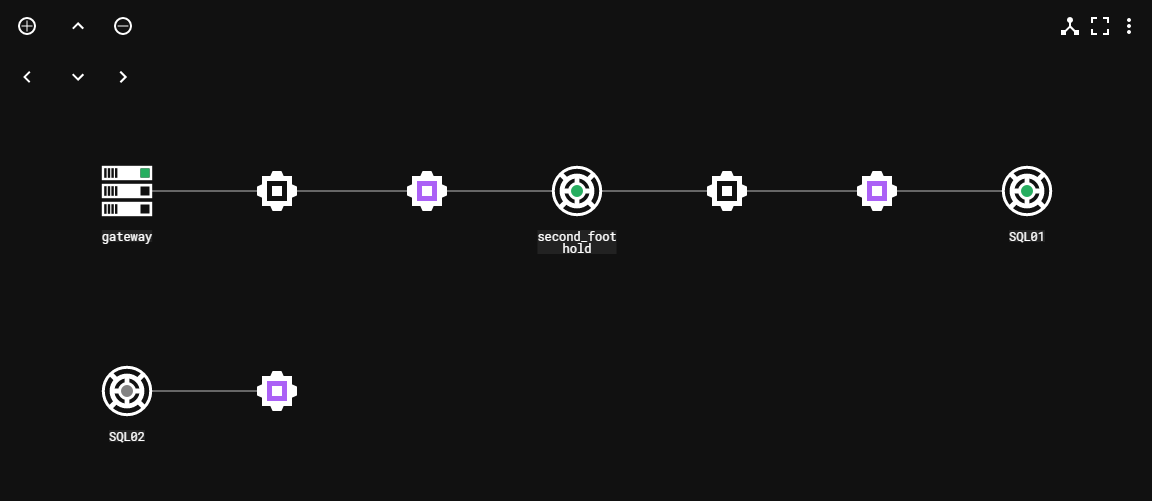
-
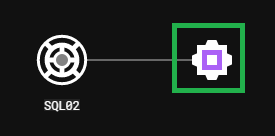
This example follows directly from the previous. We have gained access to
SQL01, but have closedinitial_footholdand mistakenly forgotten to keep note of the Interface arguments as we did in the last example. We can regain access toSQL02by reversing some of the arguments. -
First, we click on the Gateway Return Channel Interface highlighted below in green and copy the arguments that were used to create it as before.
-
The arguments are as follows:
{
  "arguments": [
    [
      {
        "name": "Output ID",
        "type": "string",
        "value": "M5EXErzK"
      },
      {
        "name": "Input ID",
        "type": "string",
        "value": "g2HFrb9a"
      }
    ],
    {
      "name": "Filesystem path",
      "type": "string",
      "value": "c:\\users\\tim\\desktop"
    },
    {
      "name": "Clear",
      "type": "boolean",
      "value": false
    }
  ],
  "jitter": [
    0.03,
    0.03
  ]
}
-
In order to create a listening Interface on
second_footholdwe can create a new UncShareFile channel, however we must reverse the InputID and OutputID shown above. To be completely concise, the InputID shown above isg2HFrb9aand therefore when we create this new channel the OutputID will beg2HFrb9a. This is demonstrated in the next figure.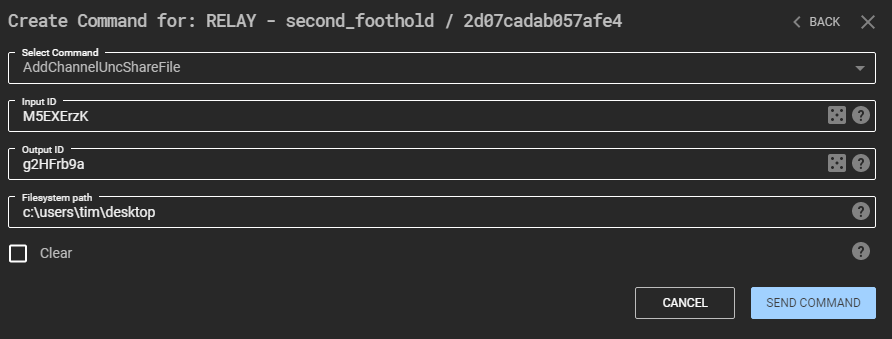
-
NOTE: If the Relay was setup from a Negotiation channel then do not reverse the arguments. In this instance when creating the channel, we would set the InputID to
g2HFrb9aand the OutputID toM5EXErzK. -
Now, all we have to do is create the relevant routes as we did previously. The RelayID for
SQL02is748cb67487182ef6. The CreateRoute command to be executed onsecond_footholdis as follows: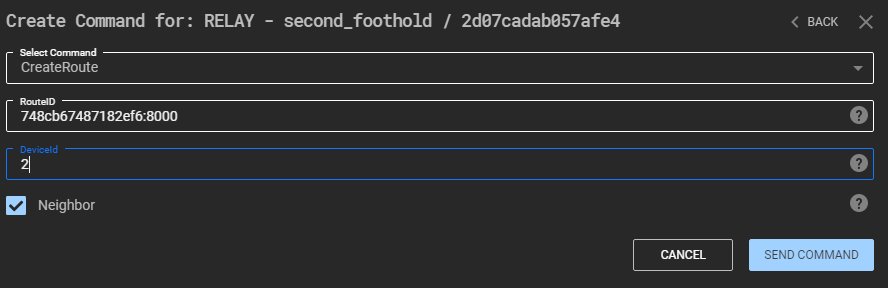
-
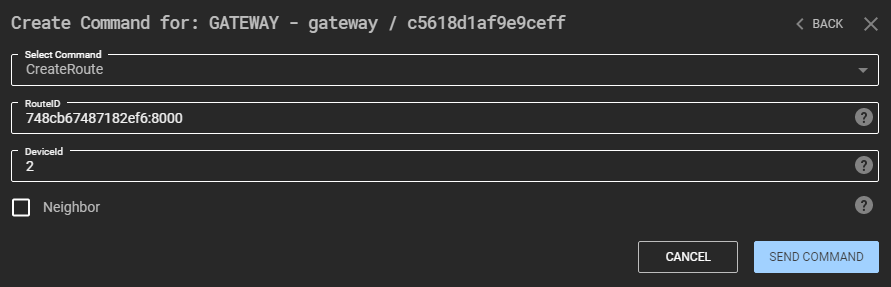
We delete the old route in the gateway as previously described, and the CreateRoute command on the Gateway is as follows:
- The following video demonstrates gaining access to a Relay that had a redundant access listener setup - https://youtu.be/UZ7M9dbcjOY