USER configure a block
To configure a block just select it. The sidebar on the right will change to show the controls to edit the properties of the block.
Example with a lambda block:
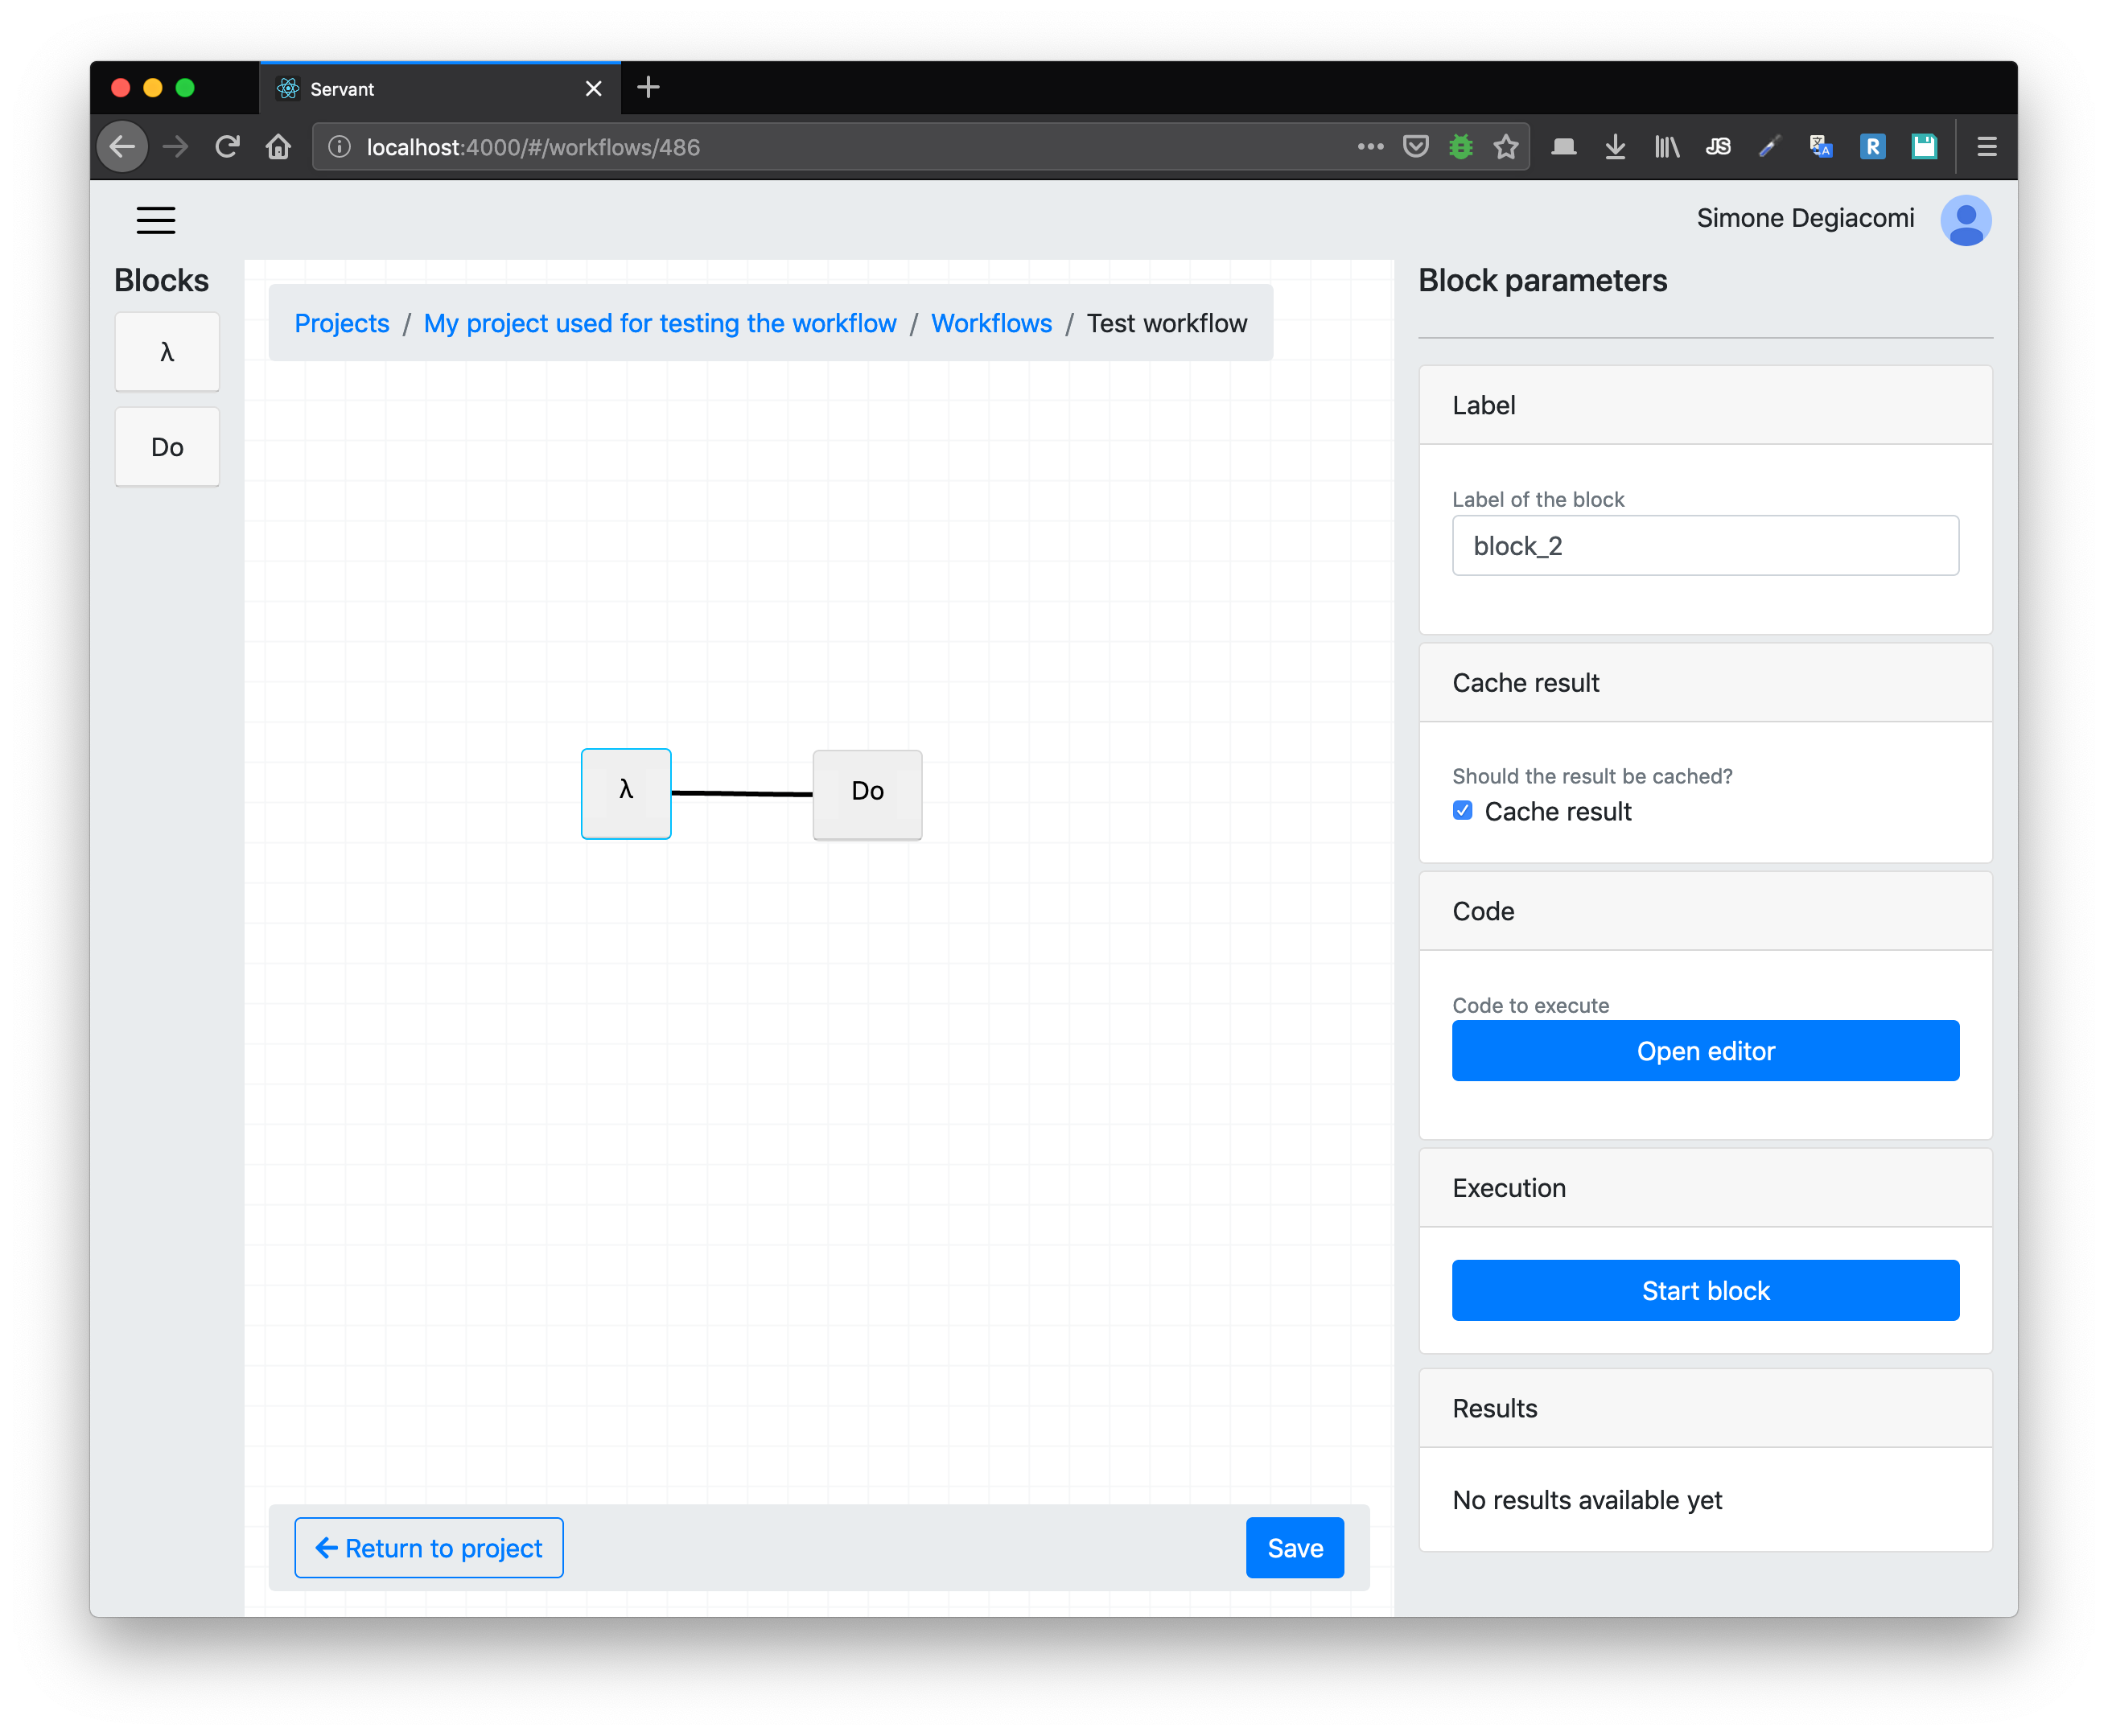
Each block as a label (which is unique) and that it's used to identify the block in the lambda code. When you drag a new block, the editor automatically assigns a label, but you're free to customize it using the corresponding input field.
Currently ll the blocks have a cache checkbox as parameter. If the checkbox is checked, when the block is successfully ran the result will be cached and if the workflow will be started again in the future, the block will not start but the result will be loaded from the cache.
The property that a do block has it the code property. If you press the "Open editor" button on block sidebar you'll see a dialog that show the current code of the lambda block. You can upload a file contianing JavaScript source code insert driectly the code in the small editor.
The code you write will receive a global object called input that associates the label of the blocks connected to the input port of the block with the items their returned as output.
To return items from your code just use return keyword.
TODO: Document how to return items as output (structure of the object to return).
A lambda block has several properties, but they are all documented by a short text that precedes the input control of the property. Most of the properties are simple number or texts, but there are you properties that are more advanced: The job design and the blocking context.
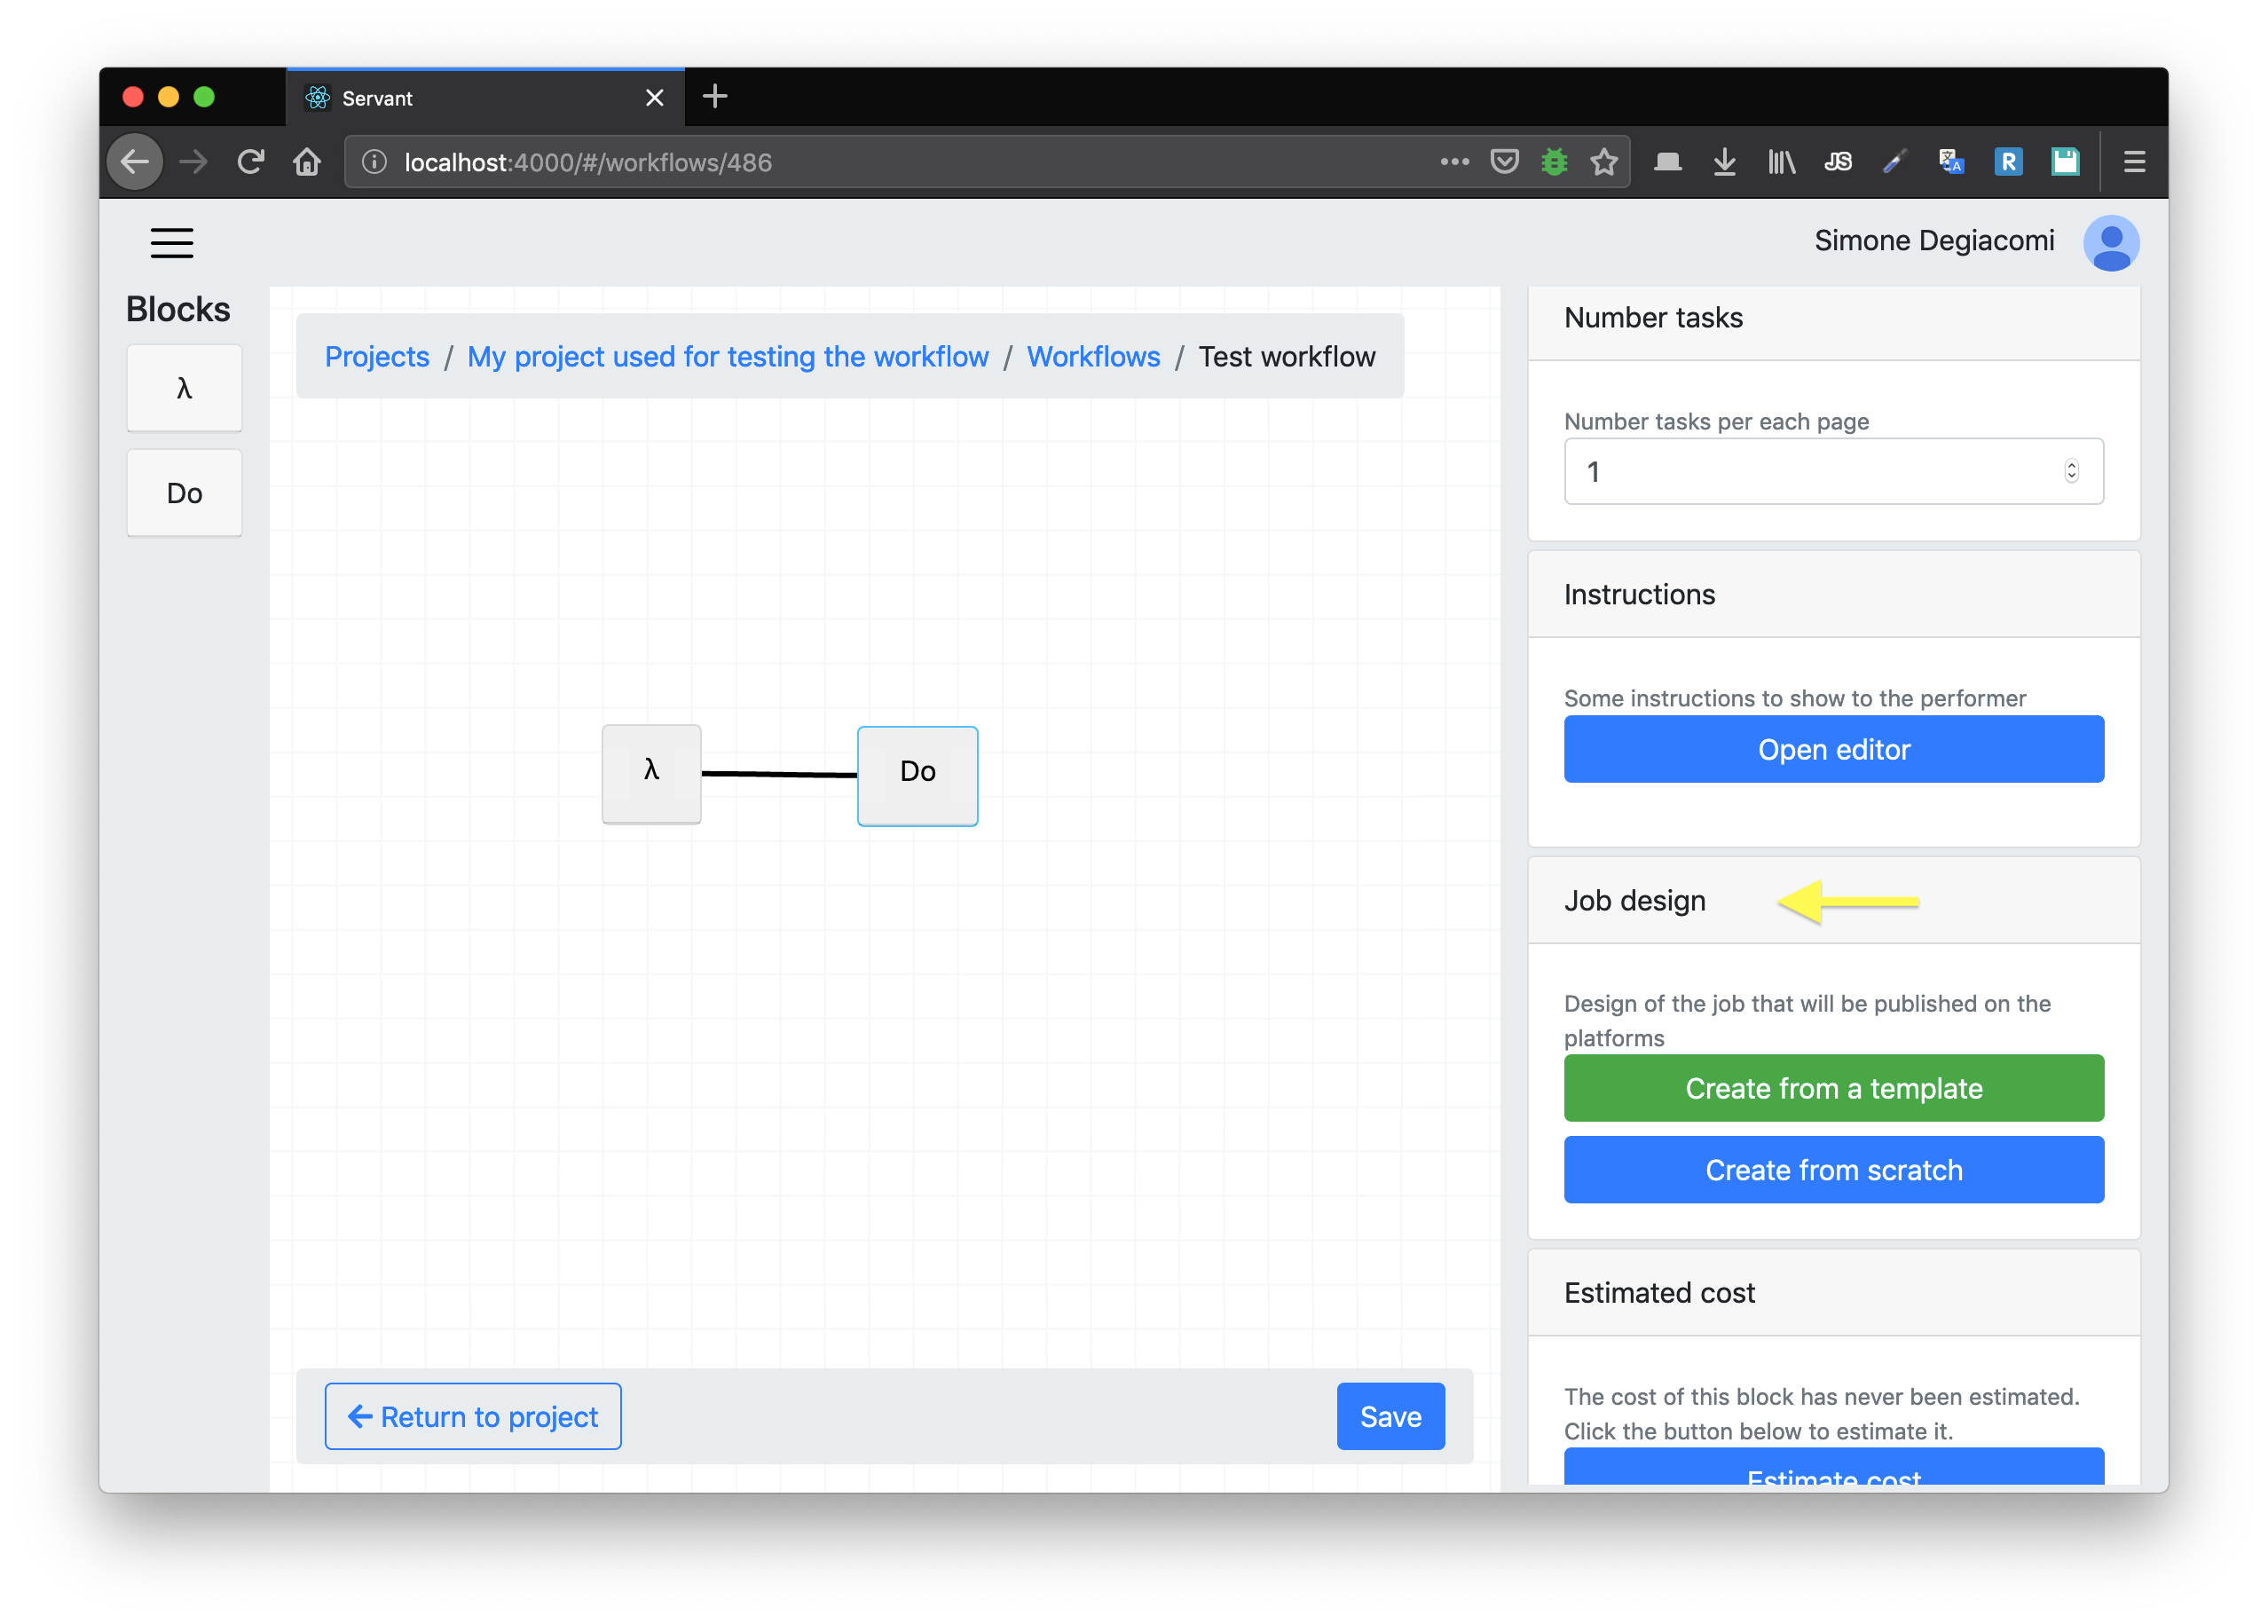
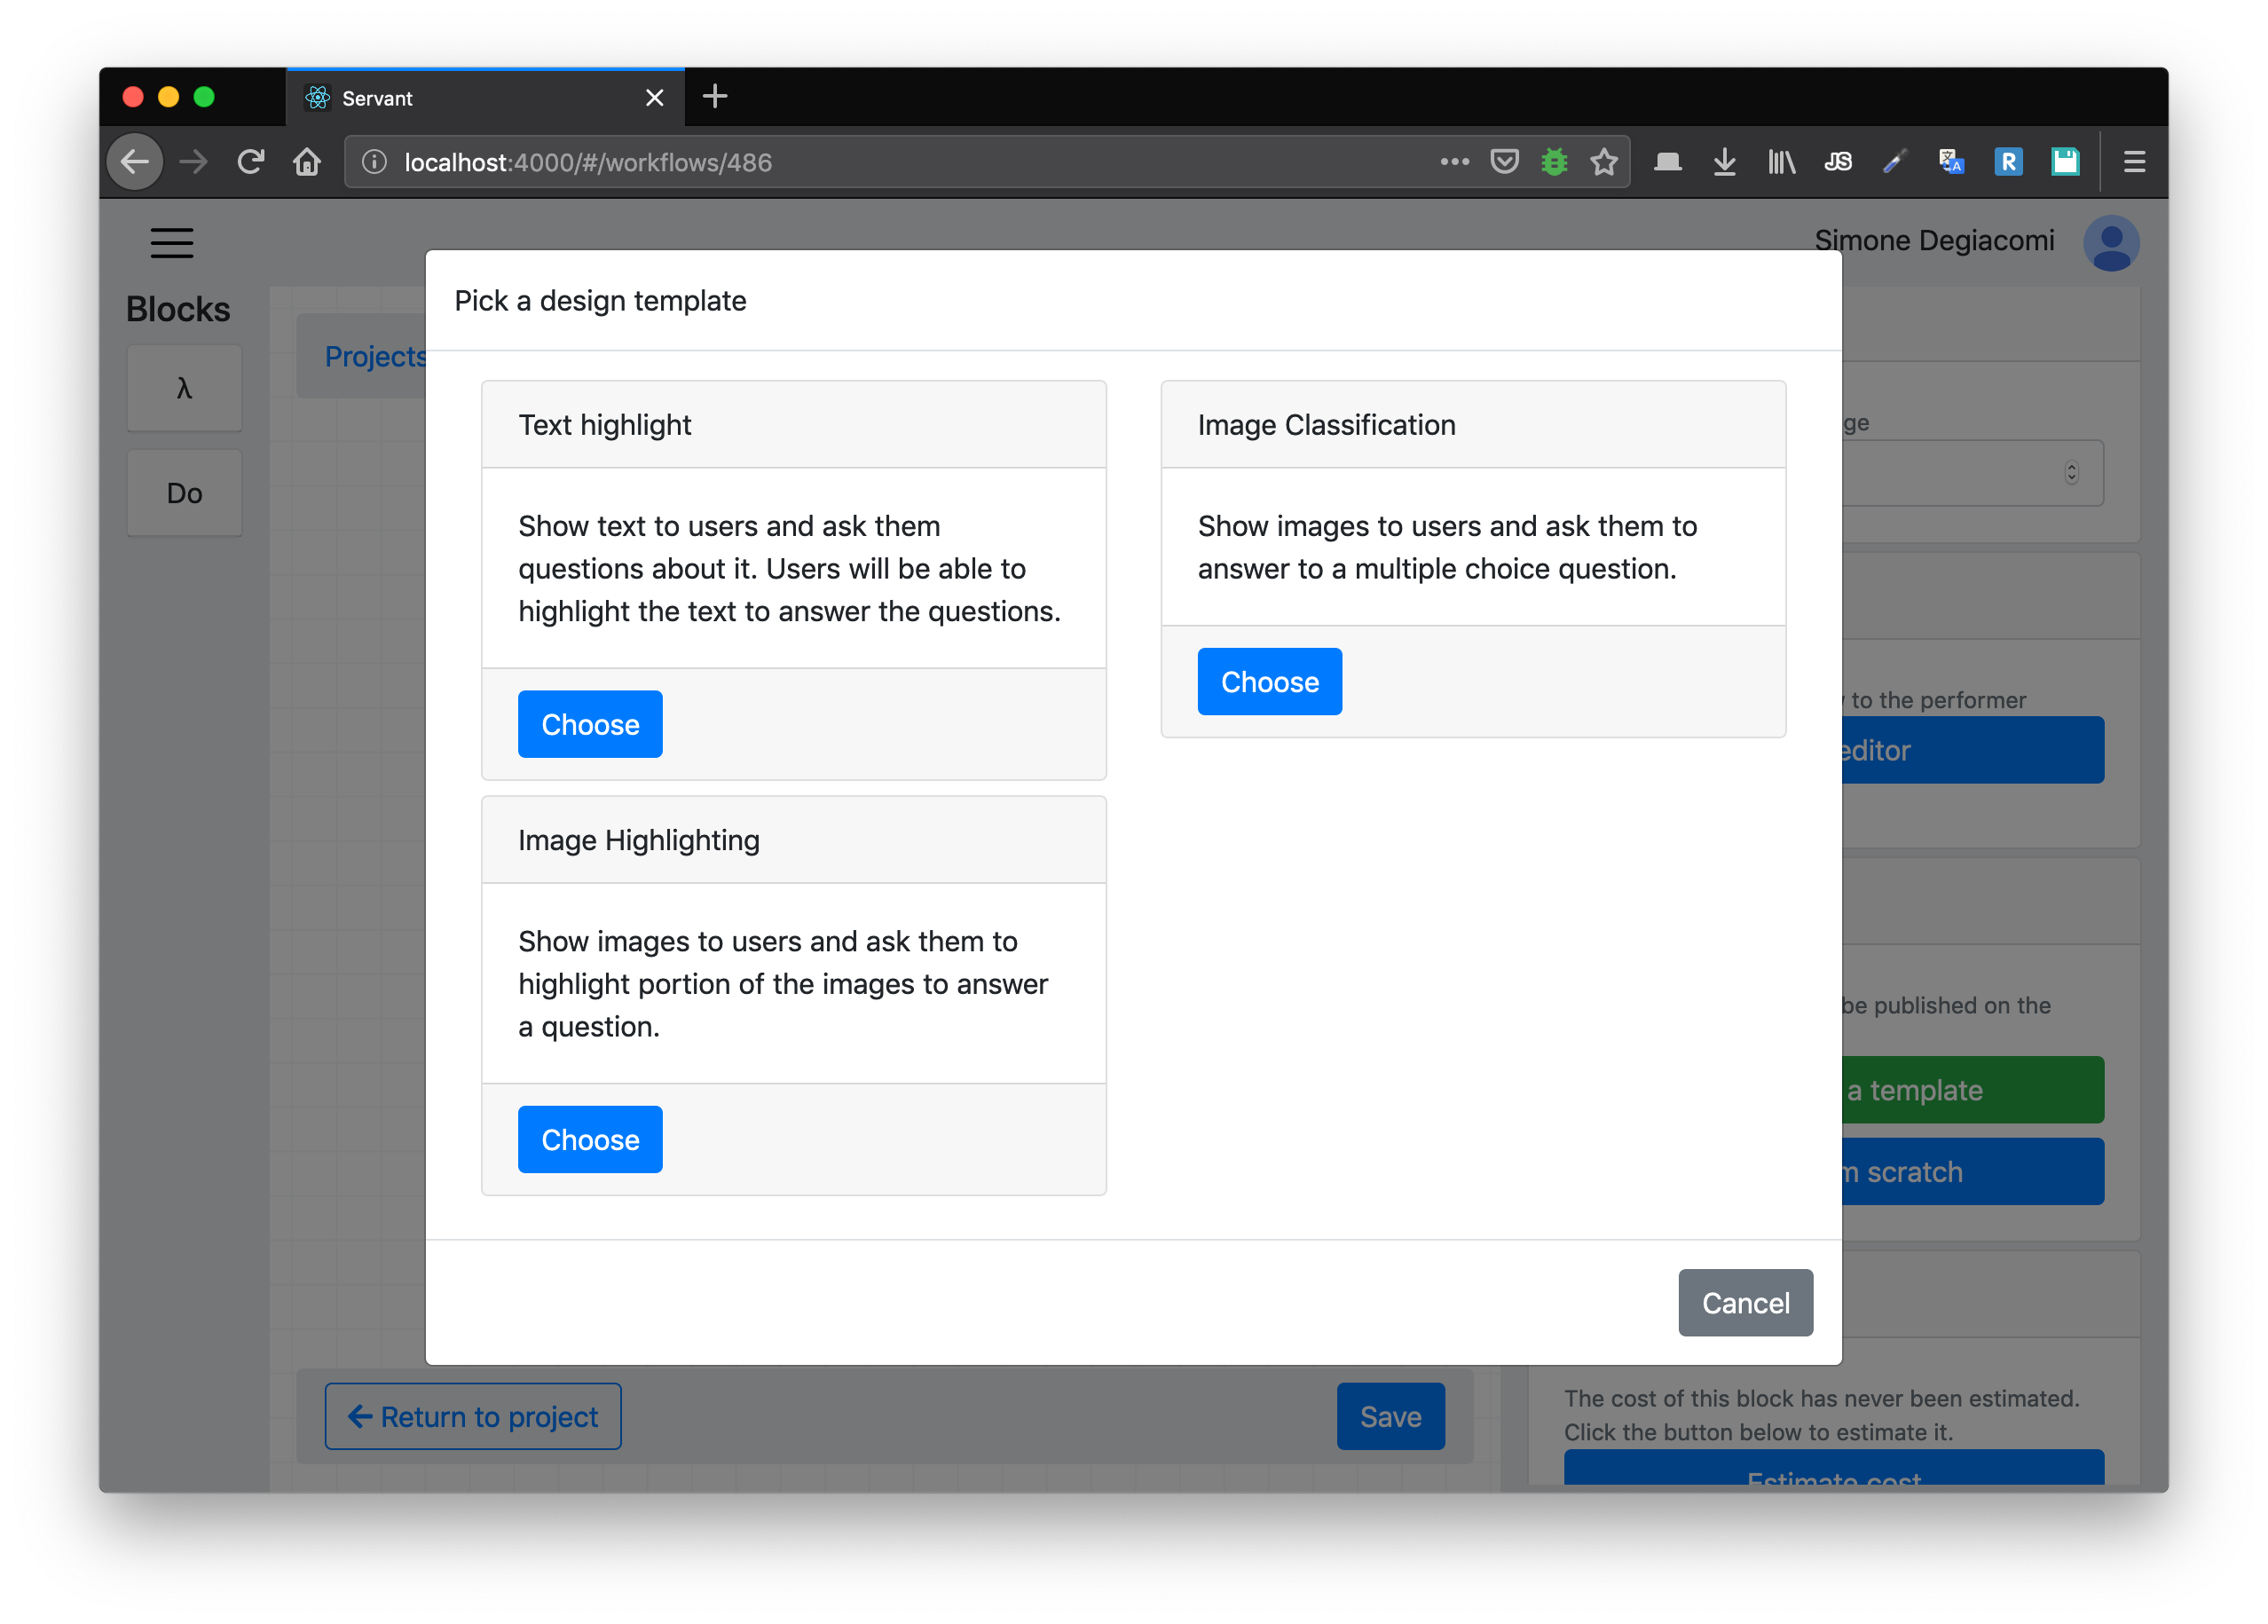
When you drag a do block on the graph the do block doesn't have a design job. You can decide to create the design starting from scratch or using a predefined template.
Independently from what you choose, you'll then open the design editor, which is also based on drag and drop.
Example of the job design editor having chosen the Text highlight template:
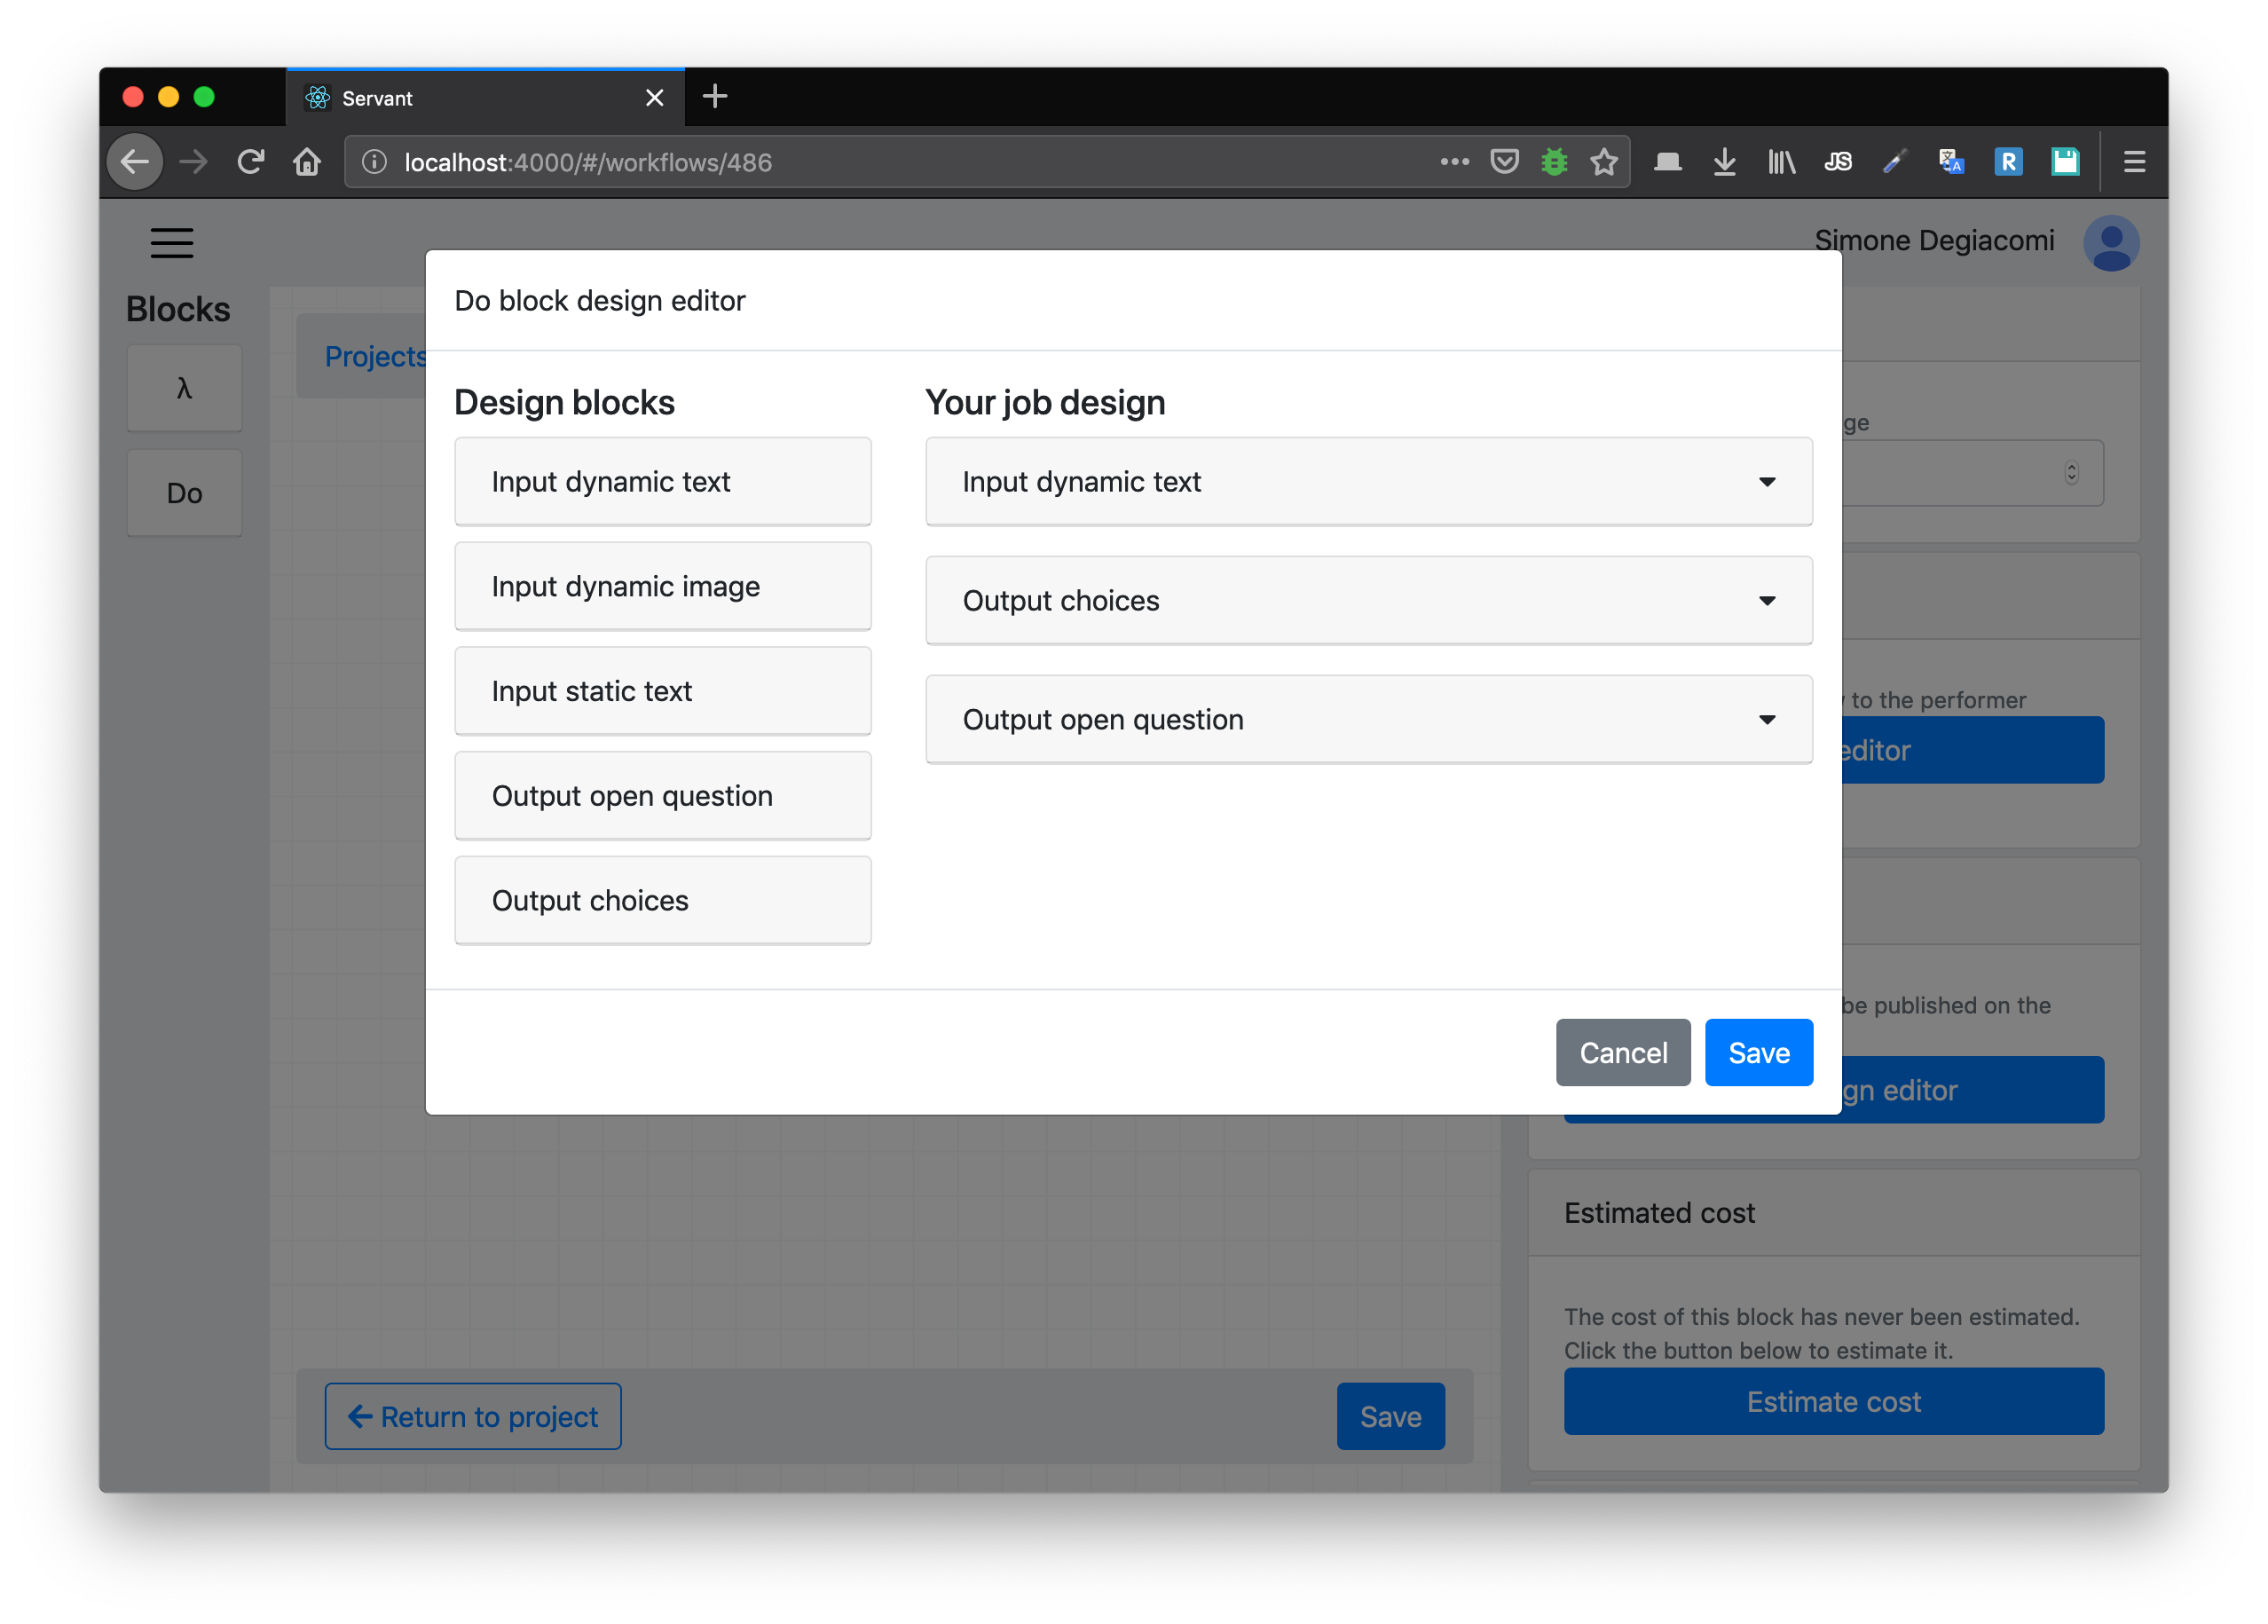
Like in the workflow editor, on the left you can find a list of available blocks. On the right you can see the blocks used by your design. Whe you open the editor each block is collapsed, but you can see all the properties clicking on the little arrow on the right.
You may want to prevent workers from jumping from one job to the other. To implement this you can create blocking contexts. Each do block can have a blocking context. If a do block has a blocking context, workers that work on the job generated by the do blocks will not be able to work on other do blocks of the same blocking context.
You define a blocking context in the properties of the workflow:

Each blocking context has a name, a color and a text that will be shown to the worker if he/she tries to work on a job of the same blocking context in which he/she already worked.
On the blocking context control you can also find a conveniet checkbox that allows you to enable a single blocking context for all the do blocks.