Guest Additions
sudo /media/$USER/VBox*/VBoxLinux*.run: command not found
sudo /media/$USER/VBox*/VBoxLinux*.run: No such file or directory
Please ensure that you follow all of the steps.
 CAUTION! It may appear that your terminal has become frozen/stalled when running one or more of the following commands in this guide. Do NOT close the Terminal or reboot your computer/VM while these commands are running. Please allow them to finish. Stopping these installation procedures while they are taking place can result in the virtual disk of your VM becoming corrupted which will lead to the VM no longer working and/or booting up.
Unmount the Guest Additions ISO in the VM and Virtual Box.
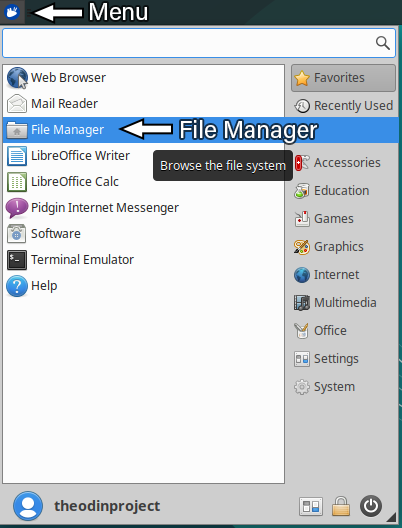
Open the File Manager in your Xubuntu OS (Operating System) by clicking the Menu button ![]() in the top-left corner of the Xubuntu VM, then selecting File Manager
in the top-left corner of the Xubuntu VM, then selecting File Manager  .
.
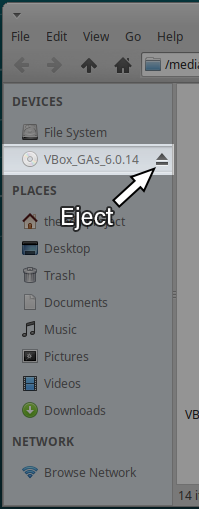
Check under Devices on the left-hand side of the File Manager for a device named similar to VBox_GAs_6.0.14 and click the Eject button.
 Note: Do not be concerned if you do not find the Guest Additions ISO mounted in the File Manager. Please continue with the rest of the steps.
Shutdown the VM then open Virtual Box.
Look under Storage and click the filename that appears next to IDE Secondary Master which will make a pop-up window appear. Select Remove disk from Virtual Drive from this pop-up window.

Once you have unmounted the ISO, it should state [Optical Drive]: Empty instead of showing a filename.

Note: Do not be concerned if you do not find see the Guest Additions ISO mounted in Virtual Box. Please continue with the rest of the steps.
Start your VM and wait for the Operating System to load.
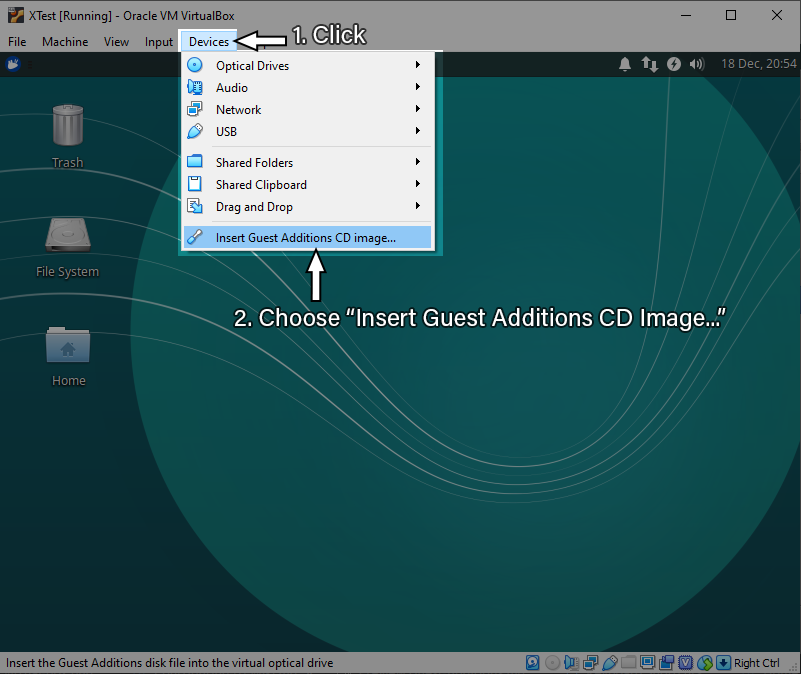
Once the Operating System has loaded, click Devices at the top of the screen and then select Insert Guest Additions CD Image... at the bottom of the dropdown menu.
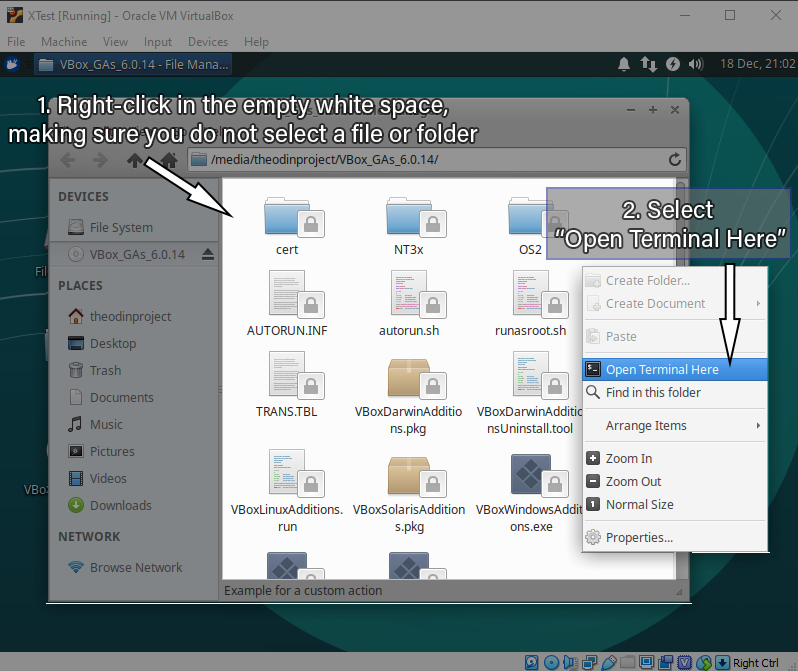
A folder should open automatically showing the files of the Guest Additions ISO.
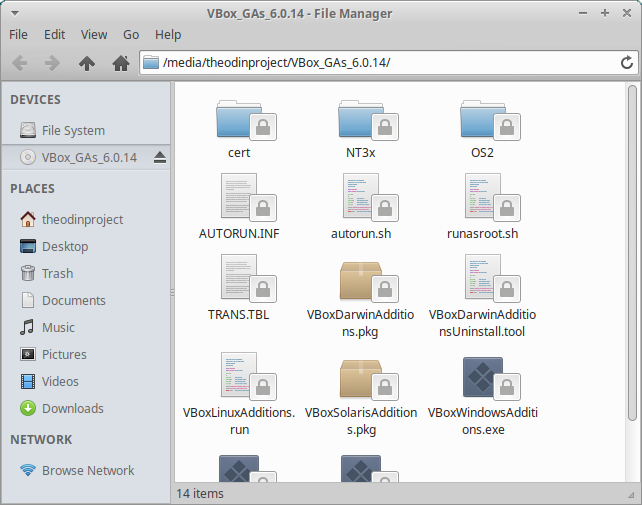
NOTE: If a folder did not automatically open to the Guest Additions ISO folder, navigate to it using the File Manager.
Right-click on an empty space in this folder to bring up a context menu, and then select Open Terminal Here.
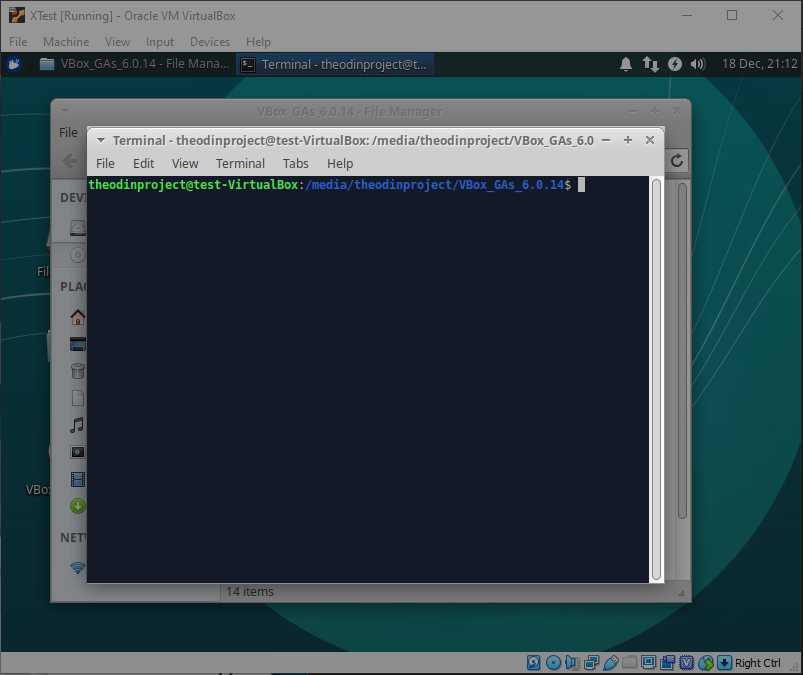
The Terminal will then look as follows when opened:
In the Terminal that has opened, run these commands one at a time, ensure that they are spelt exactly the same as written:
NOTE: You will most likely be prompted for your password when running these commands. It may not appear that the Terminal is accepting any input when typing in your password. This is a security precaution of linux. Please continue to type in your password and press Enter when done.
sudo apt update
sudo apt upgrade
sudo apt install gcc make perl
Once the commands above have finished, please run the following command in the Terminal that you previously opened. This will install Guest Additions to your Xubuntu OS:
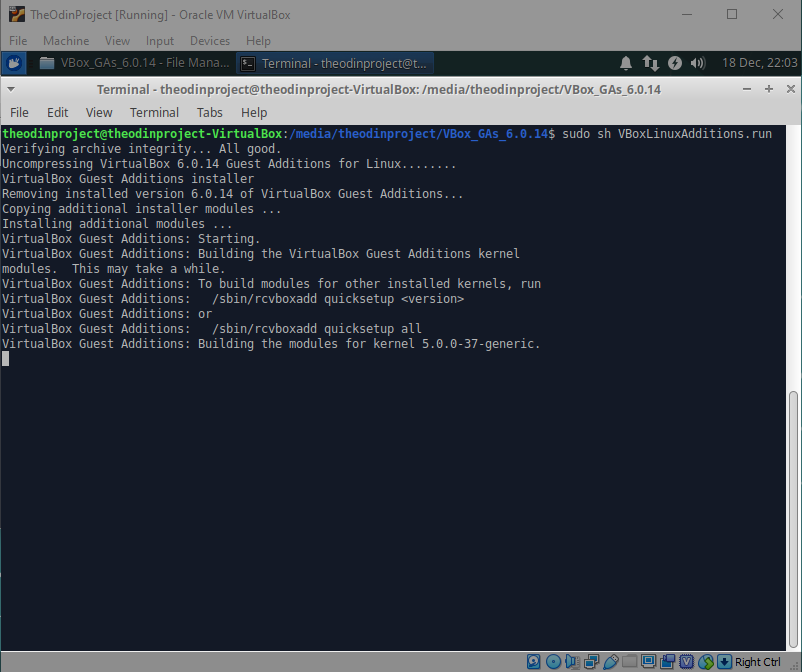
sudo sh VBoxLinuxAdditions.run
Your Terminal will look similar to the image below once it begins installing.
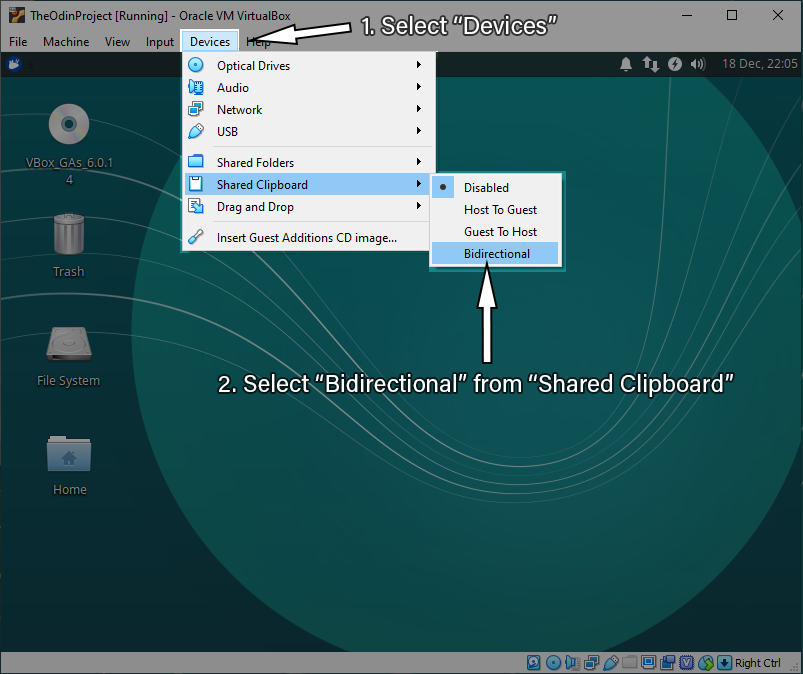
Once Guest Additions has finished installing, you can turn on Copy Pasting between your Host OS and the VM.
Select Devices from the Virtual Box title bar of your VM, navigate into Shared Clipboard and then select Bidirectional so that it becomes selected.
You are now free to reboot your VM. Once it has rebooted you are done with the Guest Additions installation procedure.