The Slack plug provides an interface to notify users through Slack, the instant messaging and collaboration service.
This is the source code used by the actual built-in Slack plug. Use it as a reference to build your own Notifier plug!
The executable is built from .NET Framework code using the provided src/slackplug.sln
solution file. You can use Visual Studio or MSBuild to compile it.
Note: We'll use ${DEVOPS_DIR} as alias for %PROGRAMFILES%\PlasticSCM5\server\devops
in Windows or /var/lib/plasticscm/devops in macOS or Linux.
If you just want to use the built-in Slack plug you don't need to do any of this. The Slack plug is available as a built-in plug in the DevOps section of the WebAdmin. Open it up and configure your own!
You'll notice some configuration files under /src/configuration. Here's what they do:
slackplug.log.conf: log4net configuration. The output log file is specified here. This file should be in the binaries output directory.notifier-slack.definition.conf: plug definition file. You'll need to place this file in the Plastic SCM DevOps directory to allow the system to discover your Slack plug.slackplug.config.template: mergebot configuration template. It describes the expected format of the Slack plug configuration. We recommend to keep it in the binaries output directoryslackplug.conf: an example of a valid Slack plug configuration. It's built according to theslackplug.config.templatespecification.
To allow Plastic SCM Server DevOps to discover your custom Slack plug, just drop
the notifier-slack.definition.conf file in ${DEVOPS_DIR}/config/plugs/available.
Make sure the command and template keys contain the appropriate values for
your deployment!
The Slack plug provides an API for mergebots to connect to Slack, the instant messaging and collaboration service, and send messages to developers with it.
There are several types of messages that a mergebot can send, each one according to a step in the DevOps cycle. For instance, it's useful to let developers know what went wrong after a build failed, or notify about merge conflicts that prevent the mergebot from continuing the task branch process.
When a mergebot requires a Notifier plug to work, you can select a Slack Plug Configuration.
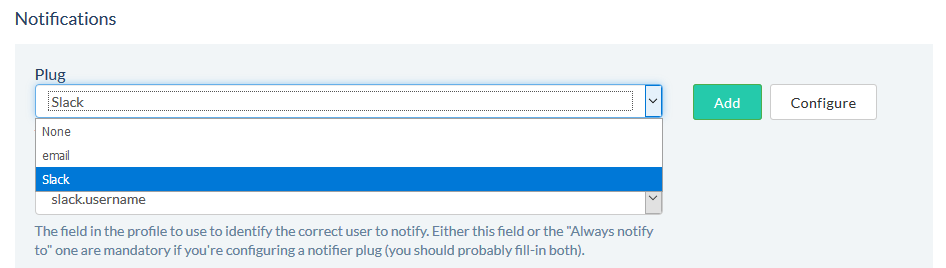
You can either select an existing configuration or create a new one.
When you create a new Slack Plug Configuration, you have to fill in the following values:
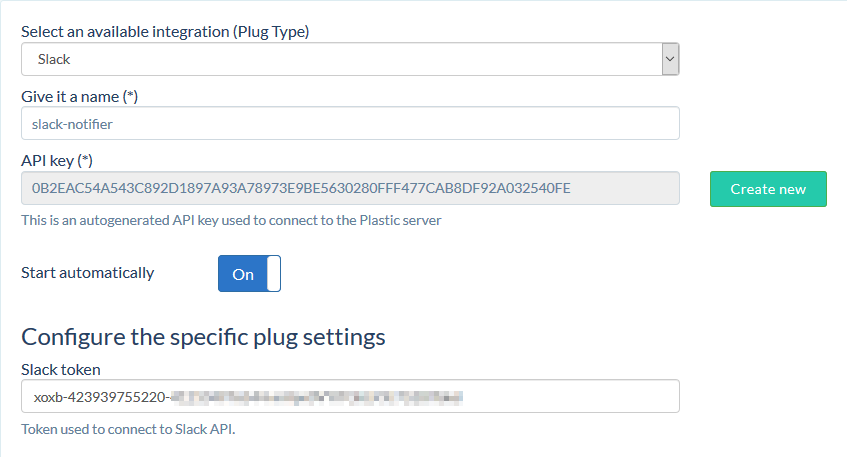
The Slack plug requires a single parameter: the Slack token. You'll need to create a bot user in Slack to get one. You can find out how at the Slack documentation here.
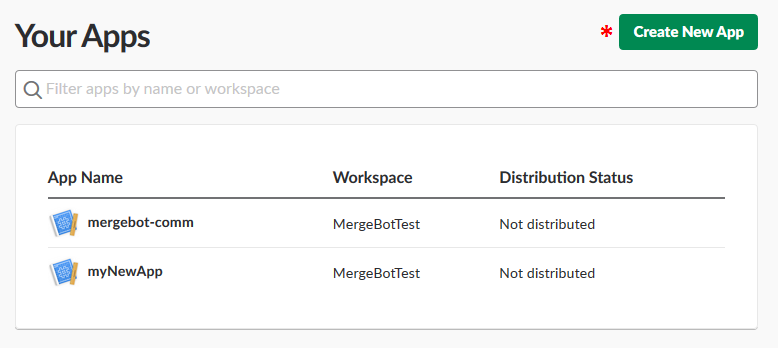
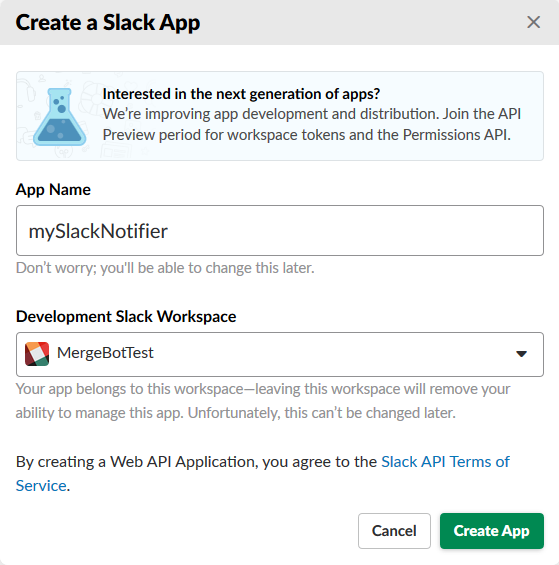
The first thing to do is to create a new Slack App in your Slack workspace.
Give the new app a name and choose the Slack Workspace where it will be stored.
Then, proceed to create a new bot user: you'll find the link under Slack App dashboard > Add features and functionality > Bots.
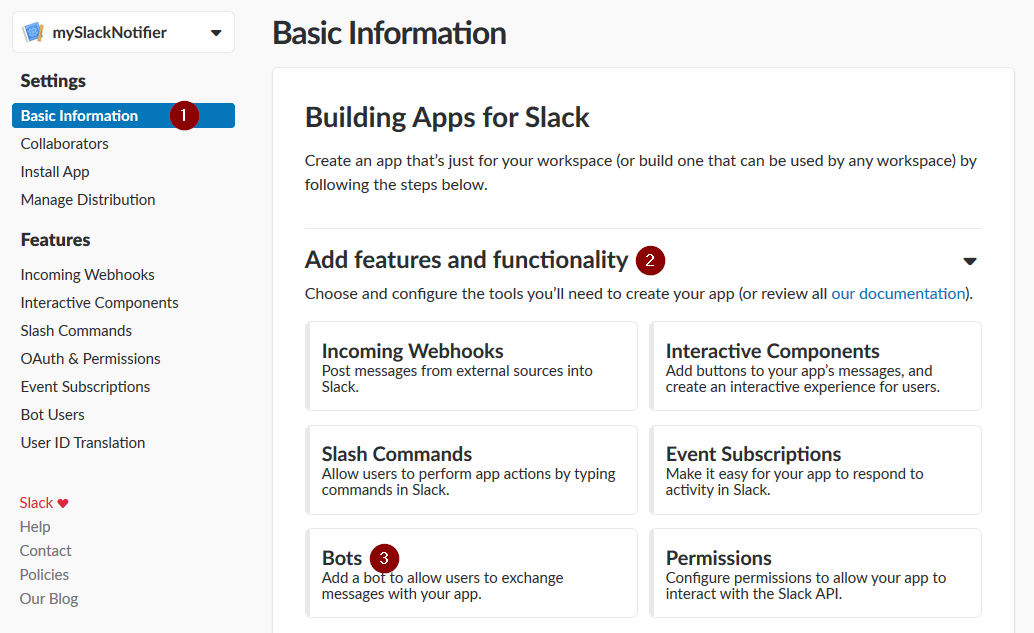
Click the "Add a Bot user" button in the new screen. You'll see the form below.
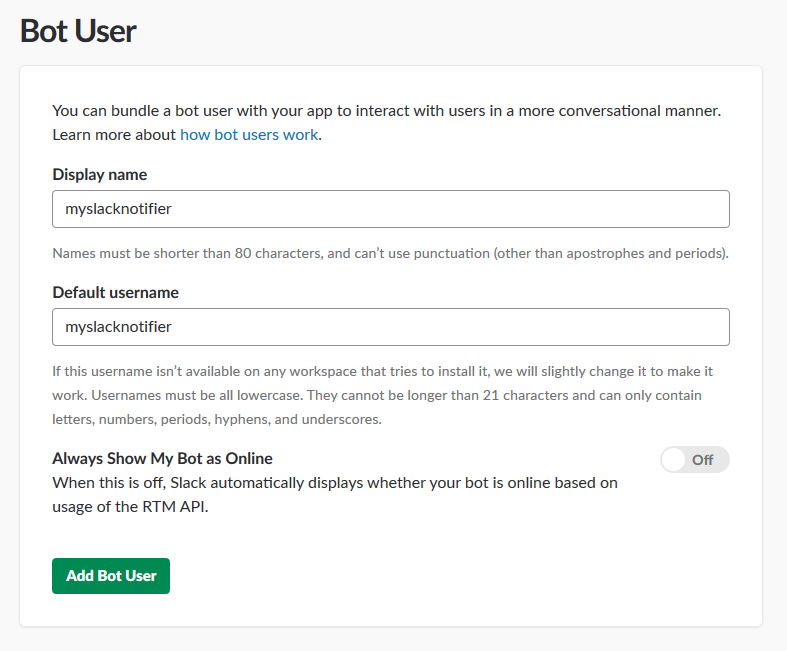
Fill in the fields and click "Add Bot User".
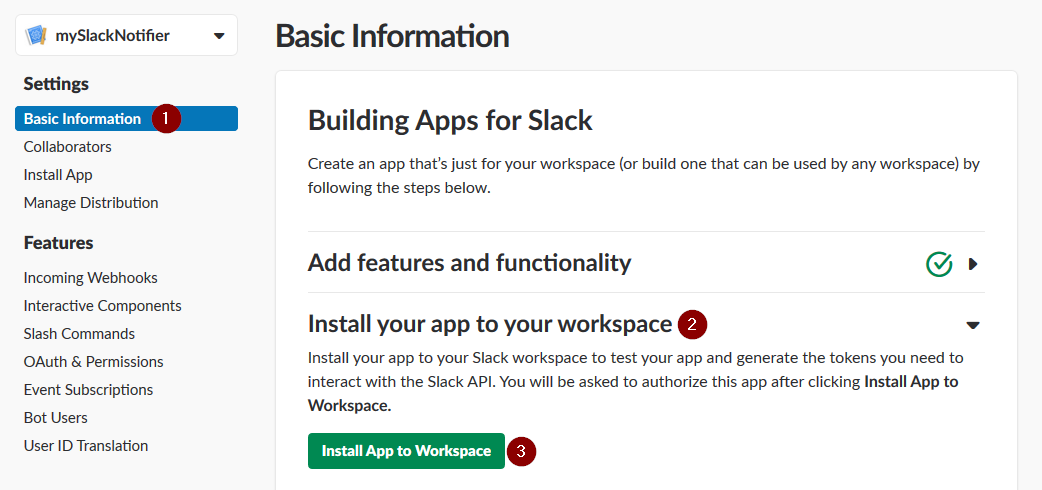
Go back to the Slack App dashboard (Settings > Basic Information) and click the "Install app to Workspace" button. Once you've authorized the operation, the App will be available in your workspace and it will enable the Bot user.
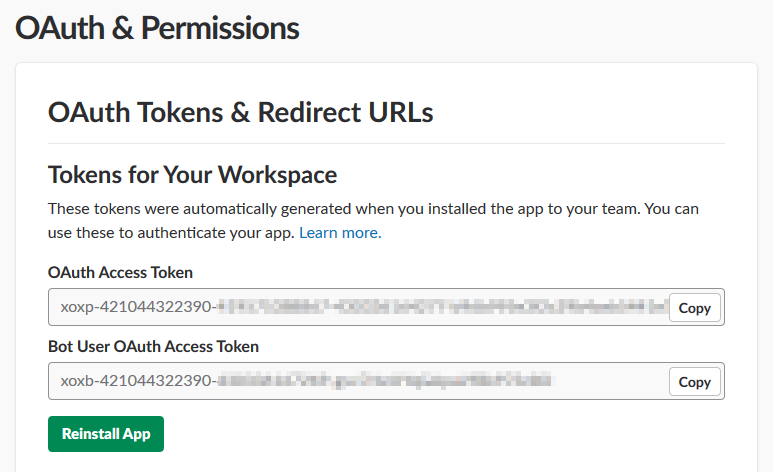
Finally, click on the Features > OAuth & permissions link. You'll see two different tokens: the one you need to copy and paste in the Slack plug configuration is labeled Bot User OAuth Access Token. You're done!
If you have any questions about this plug don't hesitate to contact us by email or in our forum!