In this project, an intelligent agent will be trained to use the Reacher environment.
In this environment, a double-jointed arm can move to target locations. A reward of +0.1 is provided for each step that the agent's hand is in the goal location. Thus, it is trained to maintain its position at the target location for as long as possible.
The state space has 33 dimensions and contains the agent's position, rotation, velocity, and angular velocities. The agent uses this information to select the next best action. Each action is a vector with four numbers, corresponding to torque applicable to two joints. Every entry in the action vector is a value between -1 and 1.
The task is episodic, and in order to solve the environment, the trained agent must get an average score of +30 over 100 consecutive episodes.
The following instructions should be completed prior to running the code:
- Ensure the following are already installed:
- Python 3.7 or higher
- numpy, matplotlib, unityagents, torch
- Anaconda
- Jupyter notebooks
- Git
-
Create (and activate) a new environment with Python 3.6.
- Linux or Mac:
conda create --name drlnd python=3.6 source activate drlnd- Windows:
conda create --name drlnd python=3.6
activate drlnd
-
If running in Windows, ensure you have the "Build Tools for Visual Studio 2019" installed from this site. This article may also be very helpful. This was confirmed to work in Windows 10 Home.
-
To install the base Gym library, use
pip install gym. Supports Python 3.7, 3.8, 3.9 and 3.10 on Linux and macOS. -
Clone the repository (if you haven't already!), and navigate to the
python/folder. Then, install several dependencies.git clone https://github.com/udacity/deep-reinforcement-learning.git cd deep-reinforcement-learning/python pip install .
-
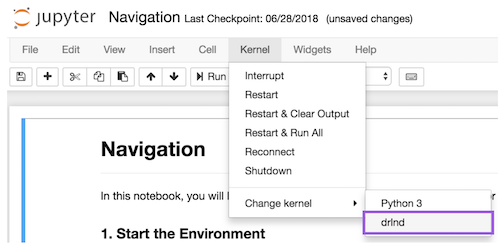
Create an IPython kernel for the
drlndenvironment.python -m ipykernel install --user --name drlnd --display-name "drlnd" -
Before running code in a notebook, change the kernel to match the
drlndenvironment by using the drop-downKernelmenu.
-
Download the environment from one of the links below. You need only select the environment that matches your operating system:
- Linux: click here
- Mac OSX: click here
- Windows (32-bit): click here
- Windows (64-bit): click here
(For Windows users) Check out this link if you need help with determining if your computer is running a 32-bit version or 64-bit version of the Windows operating system.
(For AWS) If you'd like to train the agent on AWS (and have not enabled a virtual screen), then please use this link (version 1) or this link (version 2) to obtain the "headless" version of the environment. You will not be able to watch the agent without enabling a virtual screen, but you will be able to train the agent. (To watch the agent, you should follow the instructions to enable a virtual screen, and then download the environment for the Linux operating system above.)
-
Place the file in the DRLND GitHub repository, in the
p2_continuous-control/folder, and unzip (or decompress) the file.
- network.py - defines neural network used to train the agent
- ddpg_agent.py - defines agent, with functions to act, learn and remember previous states in a replay buffer
- DDPG_Learning.py - sets up an agent in an environment, trains it, and displays results
- Arm_Simulation.py - sets hyperparameters and uses DDPG_Learning to train an agent in the Reacher environment
- Continuous_Control.ipynb - Jupyter notebook to run the training and simulation
- Arm_Simulating_weights.pth - output file containing saved weights of the trained model
The following instructions will run the environment simulation, train the agent and display results:
- Open Anaconda and navigate to the folder containing Navigation.ipynb. Run the following commands to open the notebook:
conda activate drlnd
jupyter notebook Continuous_Control.ipynb
- The usable code starts in block 7, and all other blocks can be ignored. The hyperparameters can be altered as the user sees fit.

