A comprehensive Content Security Policy (CSP) management package for Umbraco CMS that helps protect your website from XSS attacks and other code injection vulnerabilities. Manage CSP headers for both frontend and backend through an intuitive backoffice interface.
- 🛡️ Frontend & Backend CSP Management - Configure different Content Security Policies for your website frontend and Umbraco backoffice
- 🎛️ Intuitive Backoffice Interface - Easy-to-use management screens within the Umbraco backoffice
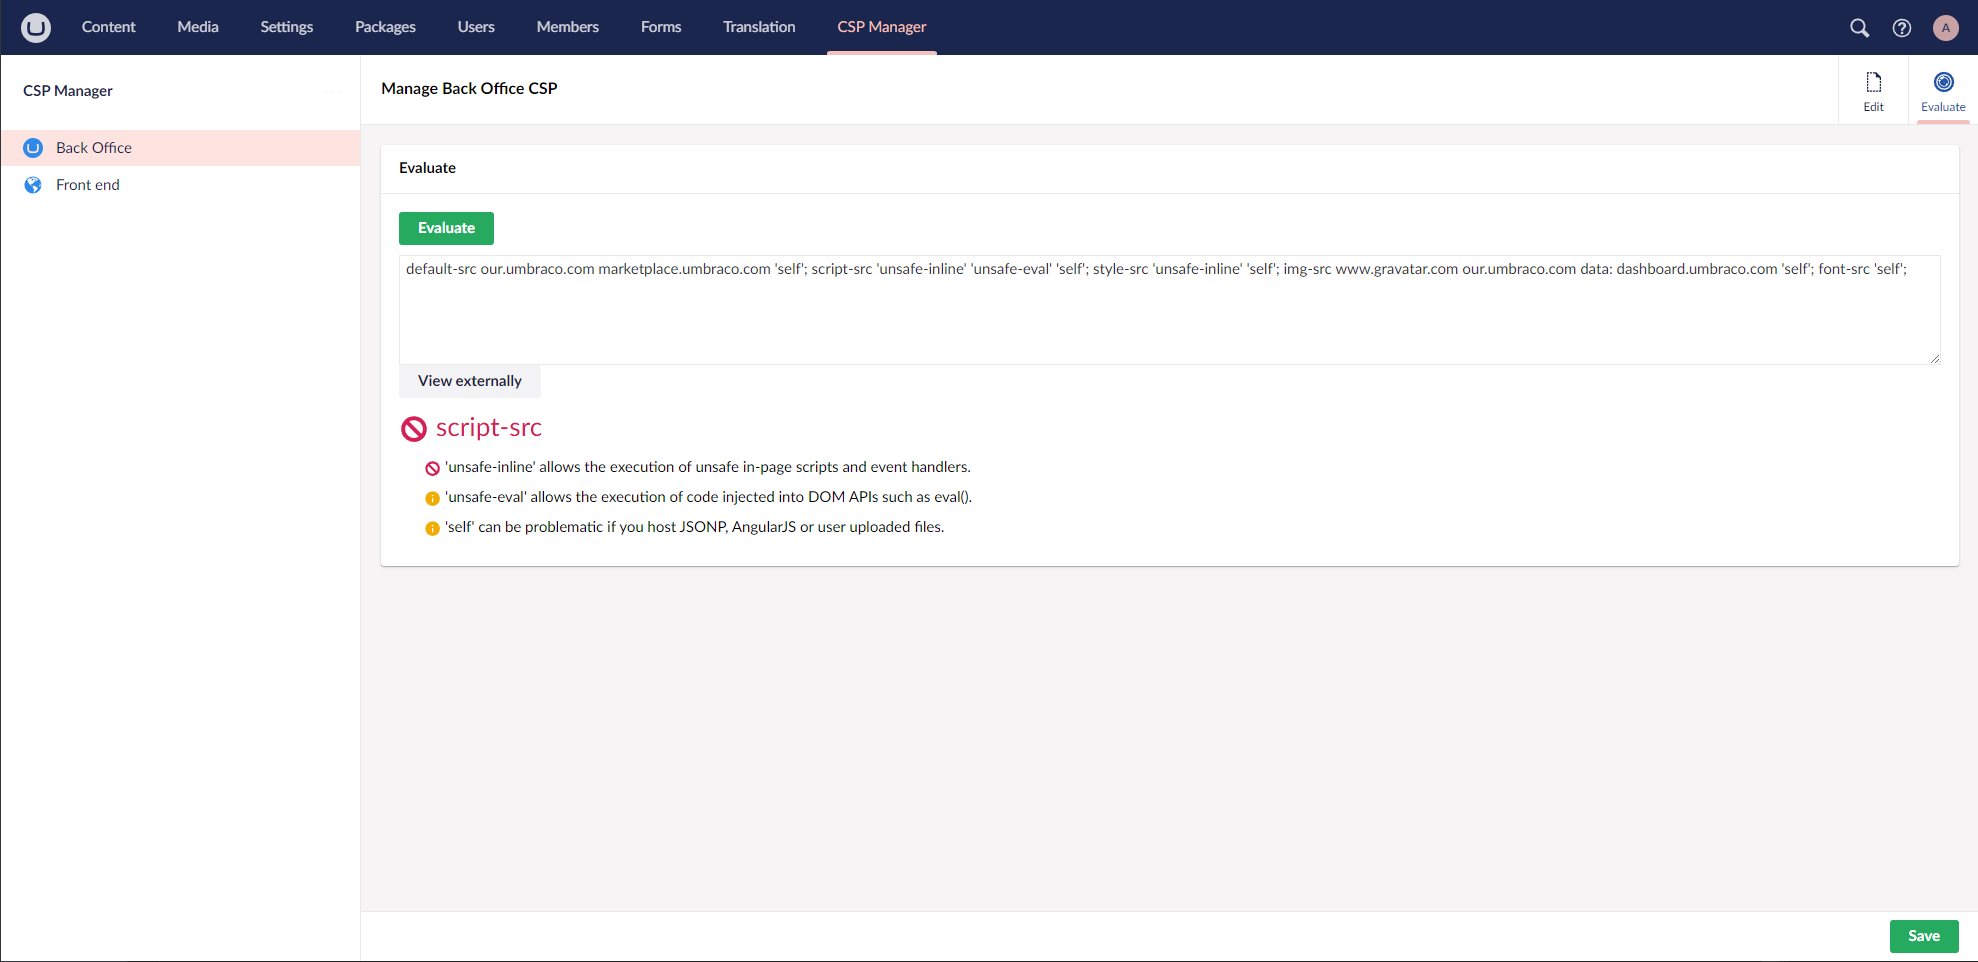
- 🔍 CSP Evaluation Tools - Test and validate your Content Security Policies before deployment
- 🏷️ Nonce Support - Built-in tag helpers for script and style nonces
- ⚙️ Flexible Configuration - Customize CSP directives to match your website's requirements
- 📊 Real-time Testing - Evaluate CSP effectiveness with built-in testing tools
- Requirements
- Installation
- Quick Start
- Policy Management
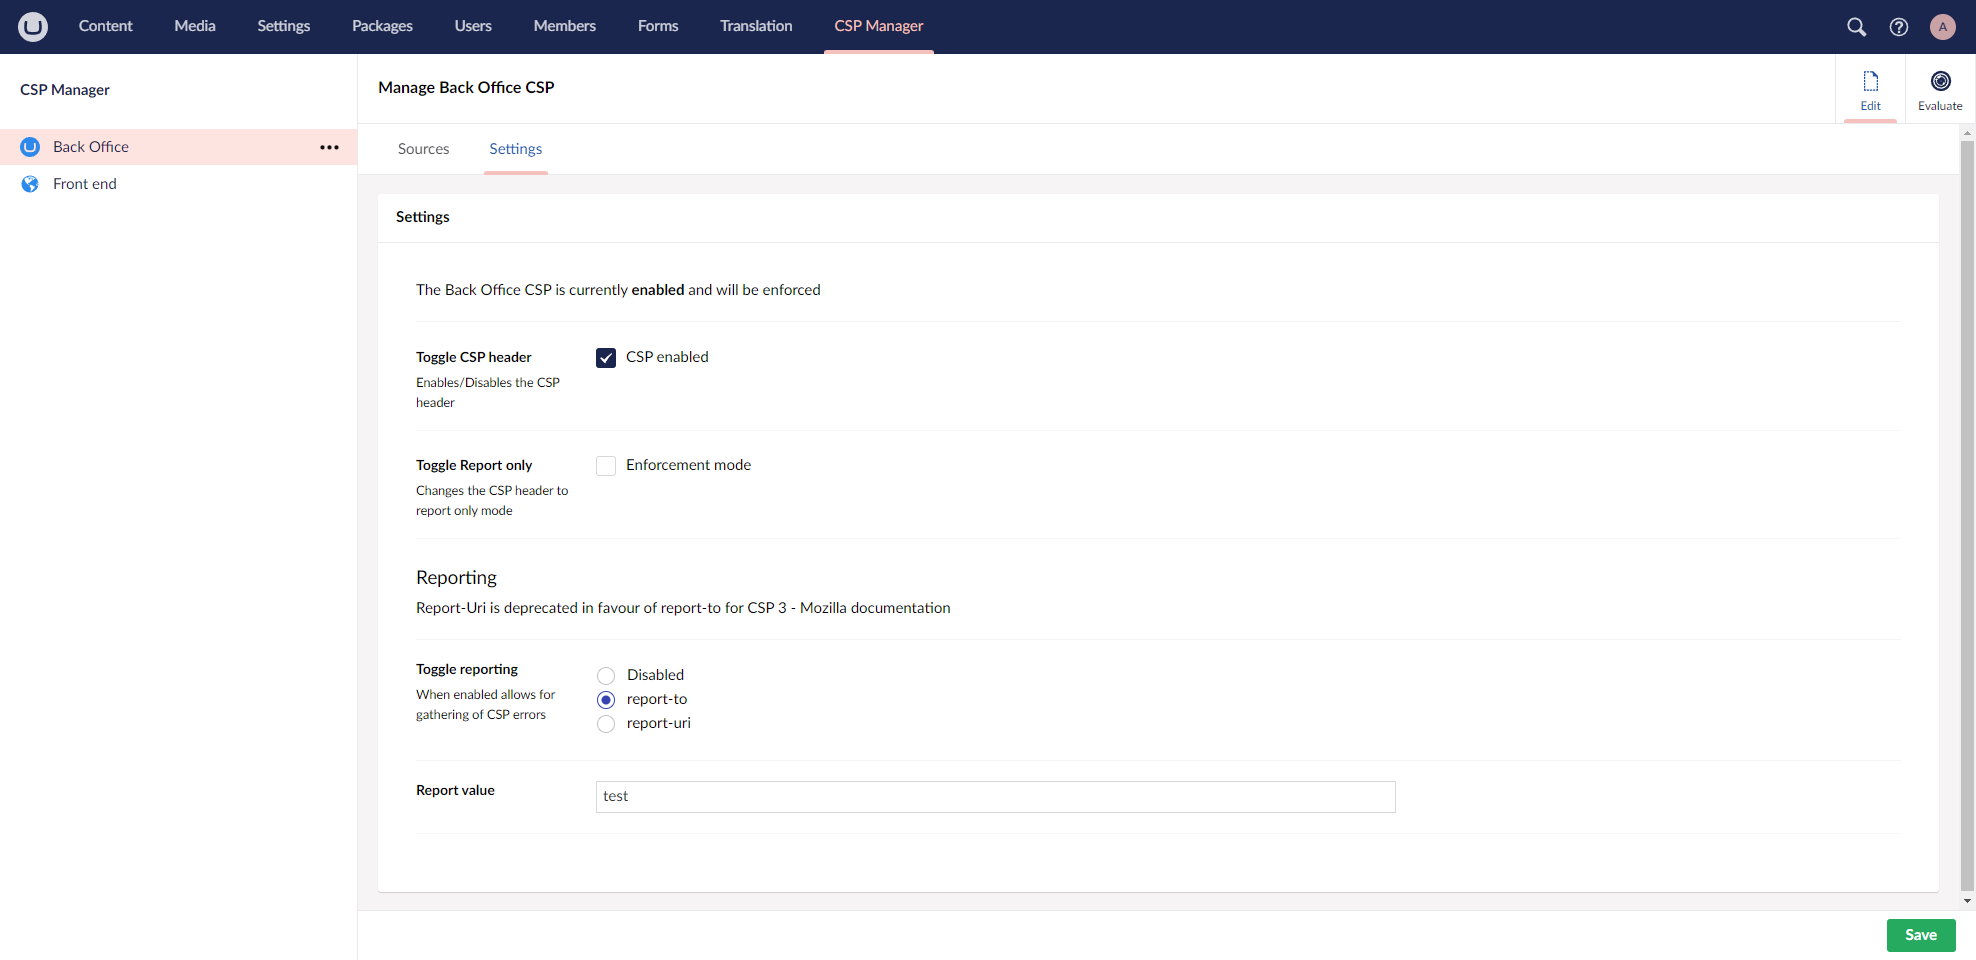
- Policy Settings
- Evaluation
- Configuration Options
- Nonce Tag Helper
- Advanced Usage
- Troubleshooting
- Contributing
dotnet add package Umbraco.Community.CSPManager- Install the package using the command above
- Build and run your Umbraco application
- Navigate to the CSP Management section in the Umbraco backoffice
- Configure your Content Security Policies for frontend and/or backend
- Test your configuration using the evaluation tools
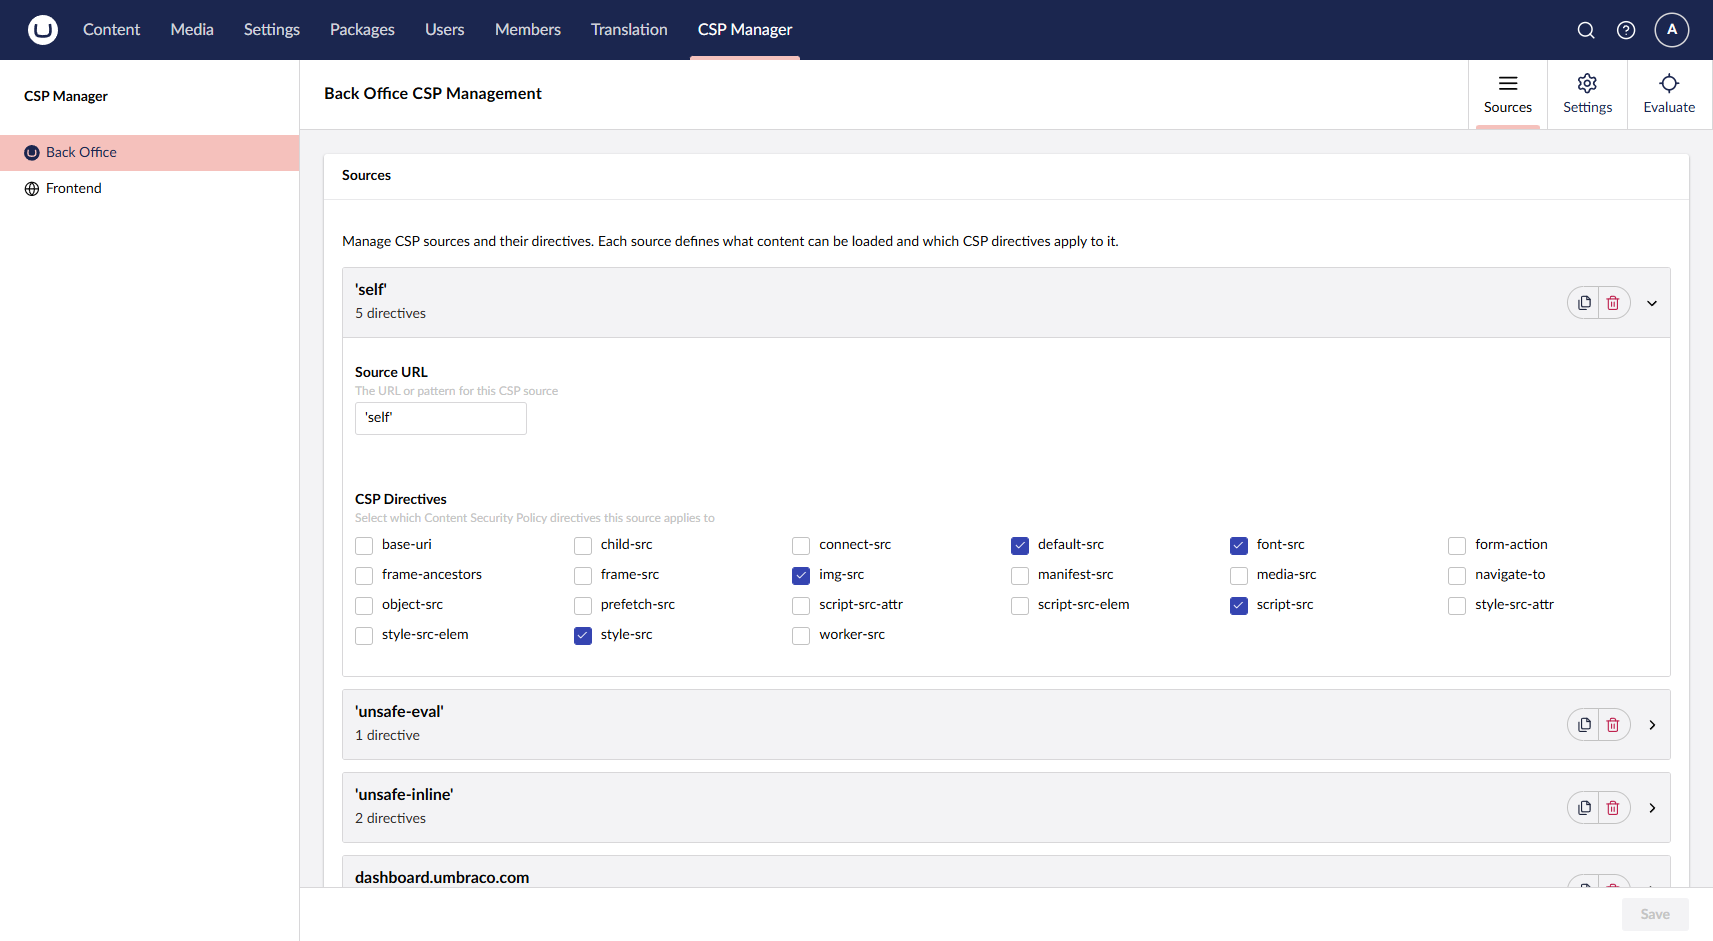
The CSP Manager provides an intuitive interface for managing Content Security Policy directives. The UI groups configuration by source first, then allows you to select which directives apply to each source.
This approach allows for flexible CSP configuration where the same source can be applied to multiple directives, or different sources can be used for the same directive.
To add 'strict-dynamic' to your CSP:
- Navigate to the Policy Management section
- Add a new source entry with the value
'strict-dynamic' - Select the directive(s) you want to apply it to (typically
script-src) - Save your configuration
You can configure CSP Manager behavior in your appsettings.json:
{
  "CspManager": {
    "DisableBackOfficeHeader": false
  }
}
DisableBackOfficeHeader - Emergency kill switch to disable CSP headers for the backoffice if needed (default: false)
To use CSP nonce you can make use of the Tag Helper. To find out more about nonce see see nonce Guide.
First you will need to include the namespace in the ViewImports.cshtml
@addTagHelper *, Umbraco.Community.CSPManagerTo use the nonce add csp-manager-add-nonce="true" to your <script> or <style> tags.
The nonce values shown are for demo purposes only.
<script csp-manager-add-nonce="true"></script>
<style csp-manager-add-nonce="true"></style>

<!-- Output (nonce values are auto-generated): -->
<script nonce="scriptRAnd0m">
  doWhatever();
</script>
<style nonce="styleRAnd0m">
  .alert {
    color: red;
  }
</style>
When this is added it will include the nonce in the CSP header and output in the page.
If you need to access the nonce within a data attribute you can use csp-manager-add-nonce-data-attribute="true"
<script csp-manager-add-nonce-data-attribute="true"></script>
<style csp-manager-add-nonce-data-attribute="true"></style>

<!-- Output (nonce values are auto-generated): -->
<script data-nonce="scriptRAnd0m">
  doWhatever();
</script>
<style data-nonce="styleRAnd0m">
  .alert {
    color: red;
  }
</style>The CSP Manager provides notification events that allow you to extend functionality and integrate with your application logic.
Triggered when building a CSP definition for an HTTP request. Use this to dynamically modify Content Security Policies based on request context.
using Umbraco.Cms.Core.Events;
using Umbraco.Community.CSPManager.Notifications;

public class CustomCspWritingHandler : INotificationHandler<CspWritingNotification>
{
    public void Handle(CspWritingNotification notification)
    {
        // Modify CSP definition based on request context
        if (notification.HttpContext.Request.Path.StartsWithSegments("/api"))
        {
            // Apply different CSP for API endpoints
            notification.CspDefinition?.Directives.Add("connect-src", "'self' api.example.com");
        }
    }
}Triggered when a CSP definition is saved through the backoffice. Use this for cache invalidation, logging, or integration with external systems.
public class CustomCspSavedHandler : INotificationHandler<CspSavedNotification>
{
    public void Handle(CspSavedNotification notification)
    {
        // Log CSP changes
        var csp = notification.CspDefinition;
        Logger.Information("CSP policy updated for {Area}",
            csp.IsBackOffice ? "BackOffice" : "Frontend");

        // Integrate with external monitoring
        // NotifySecurityTeam(csp);
    }
}Register your custom handlers in your Startup.cs or Program.cs:
services.AddNotificationHandler<CspWritingNotification, CustomCspWritingHandler>();
services.AddNotificationHandler<CspSavedNotification, CustomCspSavedHandler>();If you encounter issues not covered here:
- Check the GitHub Issues page
- Review the full documentation (link below)
- Create a new issue with detailed information about your problem
Contributions are welcome! Please read our Contributing Guidelines and feel free to submit issues and pull requests.
This project is optimized for development with AI coding assistants. We provide instruction files for popular AI tools to help maintain consistency with our established patterns and testing standards.
The project includes rulesync configuration files that can automatically generate instruction files for 19+ AI development tools. Generate configuration files for your preferred AI tools:
# Generate only for Claude Code
npx rulesync generate --claudecode

# Generate only for Cursor
npx rulesync generate --cursor

# Generate only for Vs Code Copilot
npx rulesync generate --copilotThis project is licensed under the MIT License - see the LICENSE file for details.


