- Developed by: Stability AI
- Model Type: Diffusion-based text-to-image generative model
- License: CreativeML Open RAIL++-M License
- Overview: This innovative model allows users to generate and modify stunning images based on descriptive text prompts. It is a Latent Diffusion Model that leverages two fixed, pretrained text encoders: OpenCLIP-ViT/G and CLIP-ViT/L.
- Further Resources: For more information, explore our GitHub Repository and the SDXL report available on arXiv.
For research purposes, we highly recommend our generative-models GitHub repository, which implements the most popular diffusion frameworks for both training and inference. New functionalities, such as distillation, will be added over time. Additionally, Clipdrop provides free SDXL inference.
- Repository: Generative Models Repository
- Demo: Clipdrop Demo
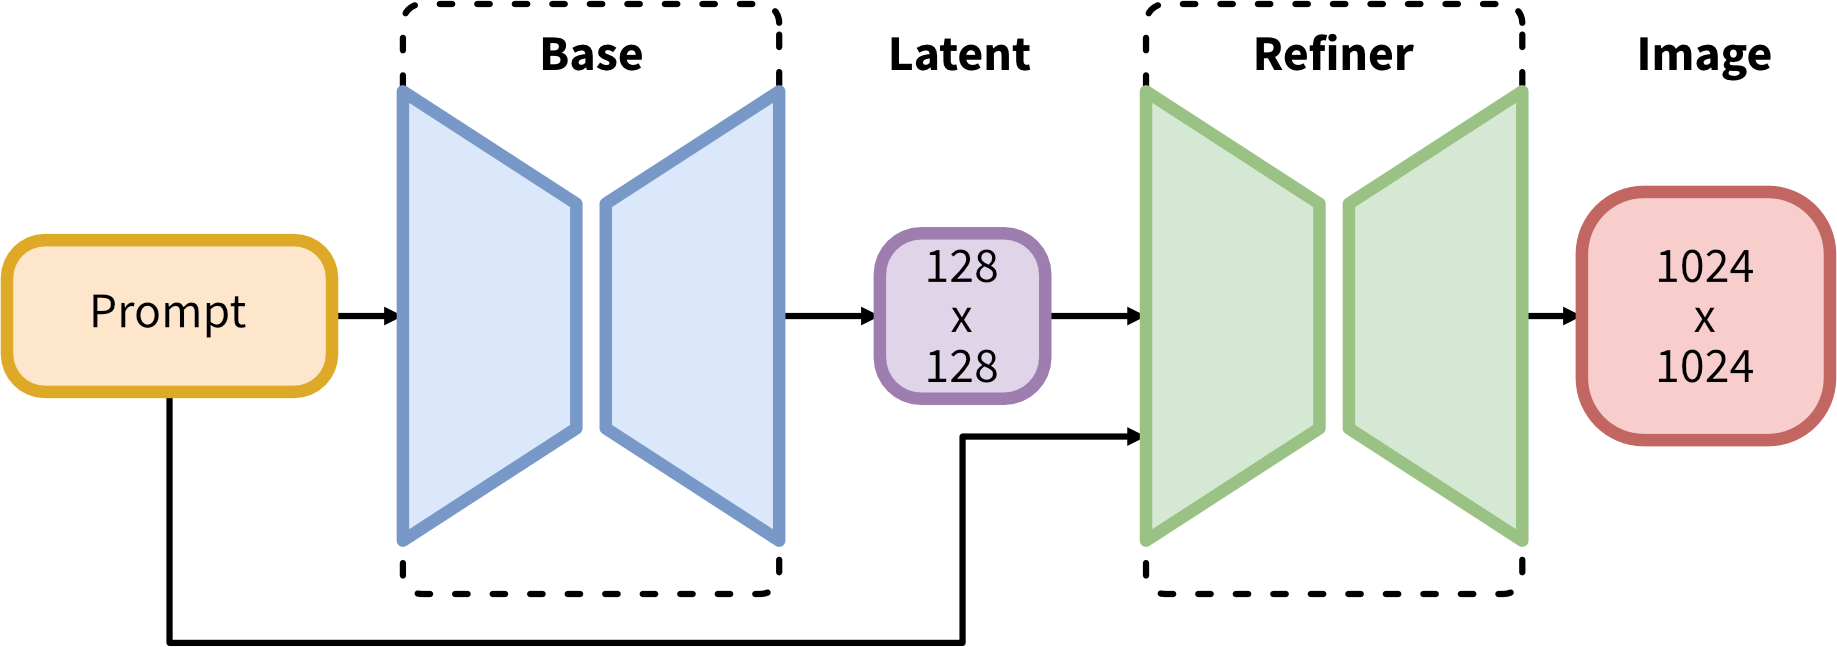
SDXL utilizes an ensemble of expert pipelines for latent diffusion. Initially, the base model generates (noisy) latents, which are then refined using a specialized model (available here) designed for final denoising steps. The base model can also function as a standalone module.
Alternatively, a two-stage pipeline can be employed: First, the base model generates latents of the desired output size. In the second step, a specialized high-resolution model applies a technique called SDEdit (also known as "img2img") to the latents generated in the first step, using the same prompt. This technique is slightly slower, as it requires more function evaluations.
Source code is available at Source Code GitHub.
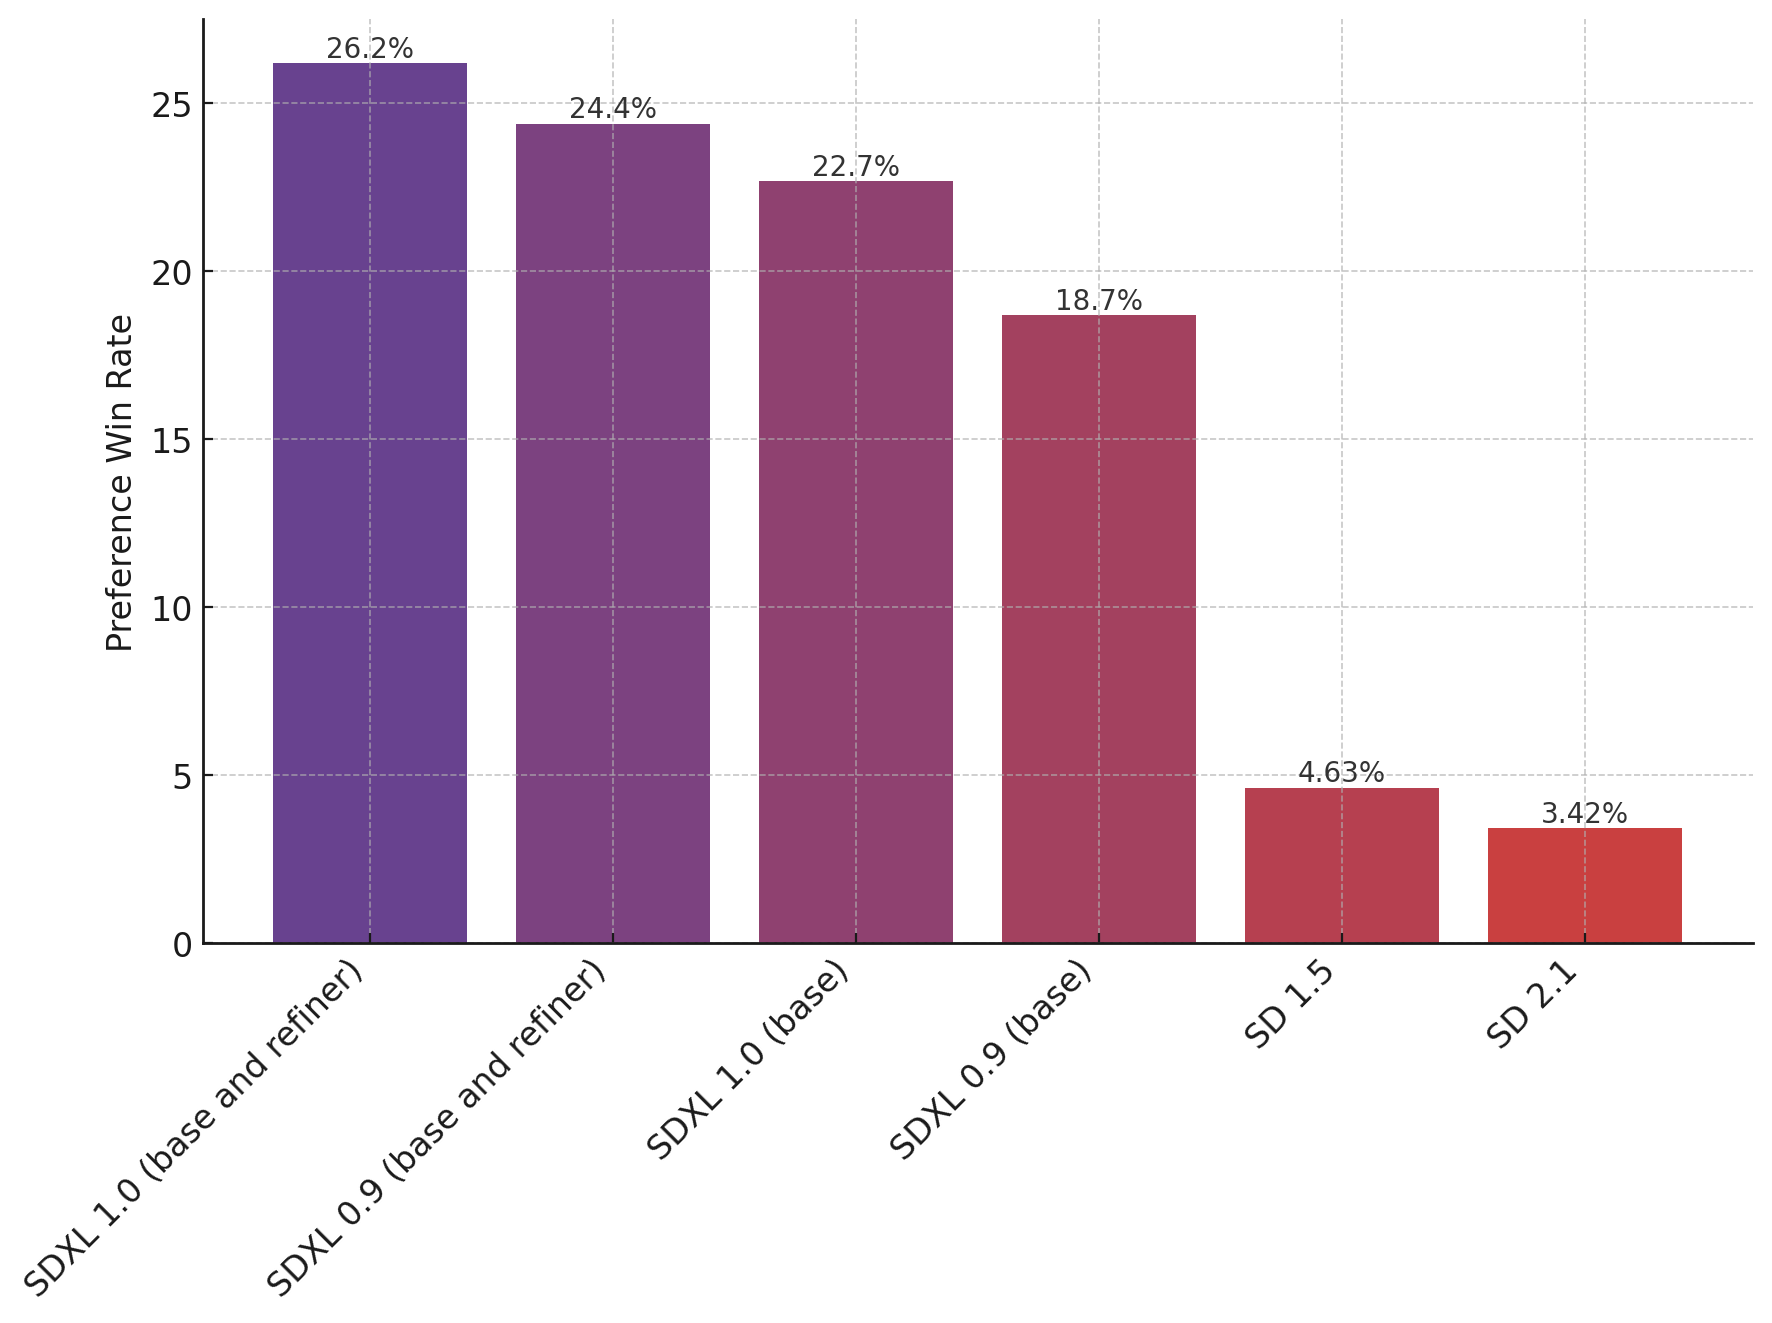
The chart above illustrates user preferences for SDXL (with and without refinement) compared to SDXL 0.9 and Stable Diffusion versions 1.5 and 2.1. The SDXL base model significantly outperforms previous variants, and when combined with the refinement module, it achieves the best overall performance.
This guide will help you set up the project's environment seamlessly.
1. Install Python 🐍
If you haven't installed Python yet, visit the official download page: Python Download Guide and follow the instructions for your operating system (Windows, macOS, or Linux).
2. Create a Virtual Environment
-
Creating a virtual environment:
- In the terminal, run this command:
python -m venv venv
-
Activate the virtual environment:
- To activate the virtual environment, use:
.\venv\Scripts\activate
3. Clone the Repository 📥
- Open your Git client or terminal.
- Navigate to the directory where you want to clone the repository.
- Run the following command, replacing
<repository_url>with the actual URL of the project's repository:
git clone <repository_url>3. Install required Dependencies 📦
- Open terminal/cmd.
- Navigate to repo directory
- Run the following command to install dependencies from requirements.txt:
pip install -r requirements.txt4. Add the Together.ai API KEY 📦
- Create a .env file.
- add a env variable "TOGETHER_API_KEY" in the .env file.
Example of a sample API KEY
TOGETHER_API_KEY = "<API_KEY>"4. Host the project Locally 🌐
- After installing the required dependencies, run the following command to start the project locally:
streamlit run ./src/server.py