Contributions to translations are always welcome!
There are two ways to translate Extension Manager, via Weblate or manually, choose your favorite.
Tip
Use Weblate if you don't know which one to choose.
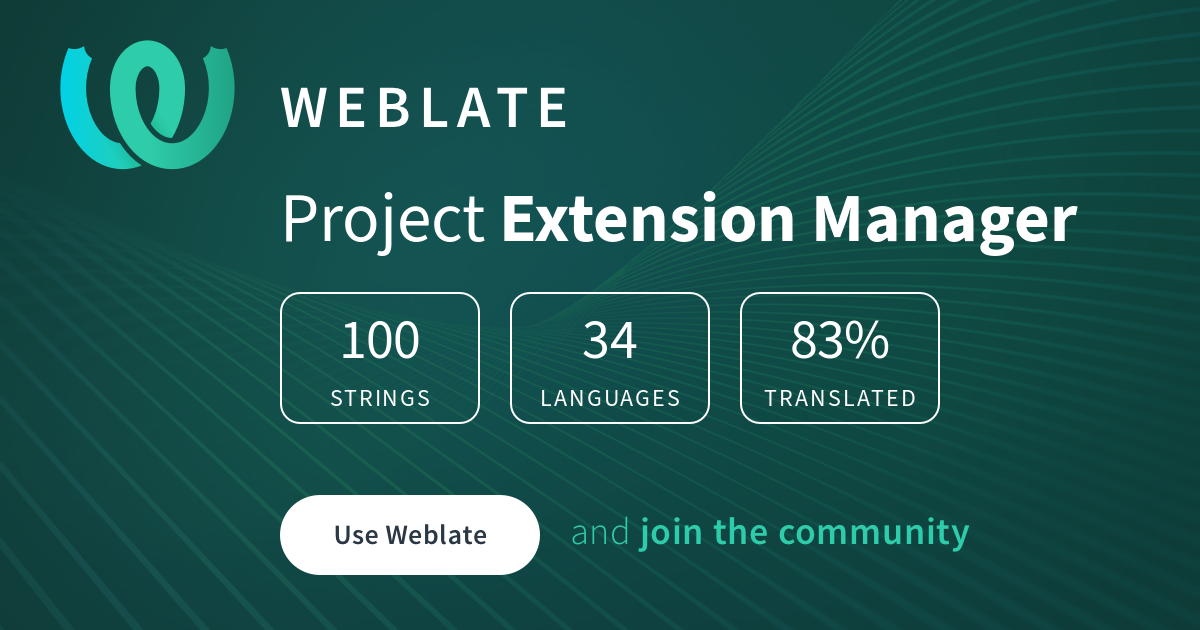
We use Weblate - an open source continuous localisation tool - for translation management. Access to Hosted Weblate is kindly provided free of charge to the Extension Manager project.
If you are totally new to GTK software translation (or software development in general), fear not! The entire process is explained below in as much detail as possible. If you have any trouble, please get in touch.
If you already have experience with translating GTK applications, remember that Extension Manager is written in C. You will need to rebuild it every time you make a change to the po files.
- You need software to translate Extension Manager (in this case, we will use POEdit) and GNOME Builder to build and test your translation.
- Clone Extension Manager repository to your device.
- Using git:
git clone [email protected]:mjakeman/extension-manager.git- Using Github:
- Click green button
Code.

- In opened menu click
Download ZIP.

- Save it in your
~/home folder. - Unpack archive with archive manager of your choice.
- Rename folder that will be unpacked from archive to
extension-manager.
- Using GNOME Builder:
- Run GNOME Builder.
- Click
Clone Repositorybutton at the bottom.
- In
Repository URLpaste:https://github.com/mjakeman/extension-manager - Set
Locationto~/ - Click
Clone Repositoryand wait until it's done.


You can leave GNOME Builder open as we will use it again later.
- You need the
potfile that lies inside./pofolder. Make sure that the pot file is up-to-date before proceeding. - Open it with POEditor.
- Click on button at the bottom of window
Create a new translation.

- Select your desired language.

- Press
Ctrl+SorFile>Saveto save new file, place it inside./pofolder with filename that POEdit gave you. - Open
./po/LINGUASfile with any text editor, and add there locale code of your language. For example, if you want to add Ukrainian translation, POEdit will suggest you filenameuk.po, so inLINGUASfile, you need to adduk. And, please, keep locale codes in alphabetical order.
But sometimes, you might want to specify a variant for your language. For example, for Russian in Russia Federation, you need to set locale to ru_RU, instead of just ru.
You can learn more about locales here.
- Translate Extension Manager!
- Test your translation.
After you have finished your translation, you will want to test it. The easiest way to do so is to use GNOME Builder.
If you chose to clone the repository using GNOME Builder in How to add new translation and have not closed the GNOME Builder window, skip to step 4.
- If you haven't already install GNOME Builder, install it now.
- Open GNOME Builder.
- Click on button at the bottom of window
Select a Folder...and pick folder with Extension Manager source that we cloned before.

- In top-center, click on button with
triangle pointing down.

- In opened menu pick
Rebuild.

- Wait until you get
Build succeededin upper-center text box.

- Click on button with
triangle pointing downin upper-center.

- In opened menu pick
Install.

- Open
New Runtime Terminal.
With Ctrl+Alt+T shortcut or click + button in top-left corner and pick New Runtime Terminal.


- In opened terminal, you need to force locale that you want to test. Usually, it will match locale name of your
pofile or it might require to specify your regional code. For example, to force application in Ukrainian language, you need to type:
LC_ALL=uk_UA.UTF-8Where you need to replace uk_UA with your desired locale.
You can learn more about locales here.

- Run
extension-managerto run Extension Manager, which would use locale that you want to test.

Once you have finished your changes, you need to refresh the application so it will apply changes to translation. To do so:
- Stop current running Extension Manager with
Ctrl+Cin terminal or simply close Extension Manager window. - Then click on button on
top-centerwithtriangle pointing downin GNOME Builder.

- In opened menu pick
Rebuild.

- Wait until GNOME Builder rebuild Extension Manager.

- Now close this terminal with:
exitOr just click cross symbol on tab with this terminal.

- After that, repeat instructions from How to test translation section, starting from step 7.
Do this every time, when you do some changes to
pofile to see them in Extension Manager.
If you want to update the translation that someone else already did:
- Try to contact original translator. You might find their contact info in top of
pofile of translation that you want to update (if you will open it via any text editor) or intranslator-creditsand ask them about changes in translation. - If you can't contact them for some reasons or they don't respond, then just translate on your own.
- Re-generate pot file.
- Open
pofile that you want to update with POEditor. - In top menu click
Translation.

- In opened menu pick
Update from POT file…, and then pickpotfile that you re-generated earlier.

- If you wish, don't forget to add yourself to
translator-credits(DON'T REMOVE PREVIOUS TRANSLATORS THERE, just add your credit on newline) and in top ofpofile via text editor. - Send pull request.
Try to be consistent with choices that previous translator did, unless they contradict other GTK/GNOME applications translated terms or you think that your translation will suit better.
If you think that you done with translating, it's time to send your translation as pull request to developers of Extension Manager!
This part might be tricky to someone who not familiar with software development and Github, so if you don't understand something, you can contact community/developers here, where you will get help!
-
Make sure, that you have account on Github. And if not, create one.
-
Also make sure, that you know some basics about how to make pull requests: How to make pull request from fork and How to create fork.
-
Upload changes that you make in your local copy of repository to your Github fork.
If you already know how to use git, this can be done like this:
cd extension-manager
git commit -m "I translated Extension Manager!"
git push
If not, you could use Github interface to do so:
- Open your fork on Github, navigate to
./pofolder. - Click
Add filethenUpload filesand pick your translatedpofile andLINGUAS(in case if you added new translation. For updates to existing translation you don't need to sendLINGUAS). - Make sure that everything is correct, there are no typos in translation, mistakes, you didn't upload wrong files by accident, etc.
- Open pull request to Extension Manager repository against your fork.
- Try to be consistent in your translation with other GTK/GNOME applications.
Pick same terms, use same accelerators, etc.
-
Always test your translation before opening pull request.
-
Open your
pofile with any text editor, not with POEdit, and in top most of file you will find some placeholder info for your translation. Please, fill it, if you can. Take as exampleuk.pofile. -
translator-creditsis optional and if you are not comfortable with sharing your alias, email or link, then leave it as-is. Also, if there are credits for other translators, please, don't remove them. Just add your credit info on newline.
If you want to put email, do this:
your_alias <[email protected]>
And if you want to place link:
your_alias https://example.com
You can check if you input everything correctly in About dialog of Extension Manager.
If you want to regenerate the pot file (i.e. when it hasn't been updated in
a while), there are a few steps that need to be followed:
- Using GNOME Builder:
- Open GNOME builder.
- Open
New Runtime TerminalwithCtrl+Alt+Tor clickplus buttonin top-left corner and pickNew Runtime Terminal


- And replace contents of
POTFILESwith output ofprint-source-files.sh.
cd extension-manager/po
./print-source-files.sh > ./POTFILES
- Go to the build directory (typically
_build, but whichever you specified when running meson) and initialize it.
Like this:
cd
cd extension-manager
mkdir ./_build
cd ./_build
meson
- Now meson is initialized and you can re-generate
potfile.
Like this:
meson compile extension-manager-pot
- Now close this terminal with:
exitOr just click cross symbol on tab with this terminal.

- Without GNOME Builder:
- Make sure that you have
mesonandgettextutilities installed on your system. Refer to your distribution package manager. - Go to
podirectory and runprint-source-files.sh.
cd extension-manager/po
./print-source-files.sh > ./POTFILES- Go to the build directory (typically
_build, but whichever you specified when running meson) and initialize it.
Like this:
cd extension-manager
mkdir ./_build
cd ./_build
meson- Now meson is initialized and you can re-generate
potfile.
Like this:
meson compile extension-manager-pot