![]()

Home Assistant integration for Vektiva SMARWI window opener (actuator).
It uses a local MQTT broker, no “cloud” service is required.
- Ensure that HACS is installed.
- Go to HACS > Integrations.
- Click on the hamburger menu in the top right corner, select Custom repositories, and fill in:
- Repository:
https://github.com/jirutka/hass-smarwi/ - Category: Integration
- Repository:
- Click on the ⊕ Explore & download repositories button in the bottom right corner, then search for and select SMARWI.
- Click on the Download button in the bottom right corner.
- Restart Home Assistant.
TIP: You can skip steps 2–4 by opening:

- Download
smarwi.zipfrom the latest release. - Unpack
smarwi.zipand copy thecustom_components/smarwidirectory into thecustom_componentsdirectory of your Home Assistant installation. - Restart Home Assistant.
- Set up your MQTT broker, if you don’t already have one (see Choose an MQTT broker if you’re unsure).
- Add the MQTT integration to your Home Assistant instance (see [mqtt-integration][documentation]).
For each SMARWI device:
- Connect to your SMARWI device and open its web interface in the browser (see section 6.1.2 in the SMARWI manual).
- Go to Settings > Advanced, fill domain name or IP address of your local MQTT broker (see above), and click Save.
- Go to Basic and fill in the following:
- Device name – this will be used in Home Assistant to identify each SMARWI device;
- Remote ID – choose any name (no registration needed), but the same for all your SMARWI devices, it will be used as a prefix for MQTT topics (
ion/<remote-id>/%<device-id>/+); - Remote Key – leave empty;
- Wifi Mode – change to
Client; - Select Wifi network – select SSID of your Wi-Fi network;
- Wifi Password – password for your Wi-Fi network (max 32 characters).
- Click on Save.
SMARWI should be connected to your Wi-Fi network and MQTT broker now.
- Browse to your Home Assistant instance.
- Go to Settings > Devices & Services.
- In the bottom right corner, select the ⊕ Add Integration button.
- From the list, select SMARWI.
- Fill in the Remote ID that you choose for your SMARWI devices (see above).
The integration should now automatically detect all your SMARWI devices.
TIP: You can skip steps 1–4 by opening:

The integration will create the following entities for each discovered SMARWI device.
| Name | Platform | Category | Description |
|---|---|---|---|
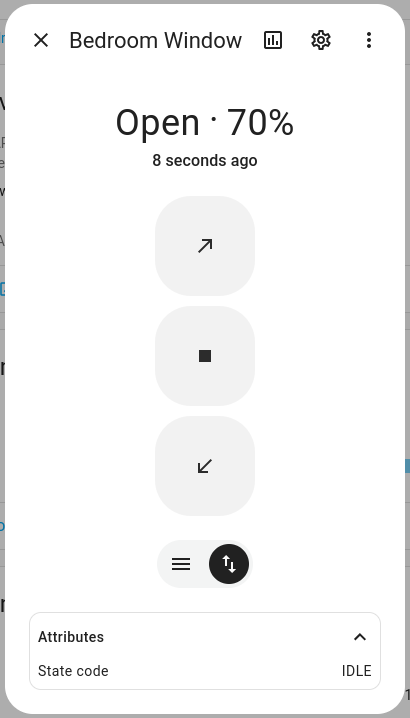
| cover | cover | Control the window tilt position (open, close, stop, set position). | |
| ridge_fix | switch | Fix or release the ridge (can be used only if the motor is currently not | |
| ridge_inside | binary_sensor | diagnostic | Shows if the ridge is inside the device (i.e. it’s operational). |
| rssi | sensor | diagnostic | Monitor WiFi signal strength (disabled by default). |
| calibrated_distance | number | config | Set calibrated distance (finetune setting, disabled by default). |
| closed_hold_power | number | config | Set closed holding power (finetune setting). |
| closed_position | number | config | Set window closed position finetune (finetune setting). |
| frame_power | number | config | Set near frame power (finetune setting). |
| frame_speed | number | config | Set near frame speed (finetune setting). |
| lock_err_trigger | number | config | Set window locked error trigger (finetune setting). |
| max_open_position | number | config | Set maximum open position (finetune setting). |
| move_power | number | config | Set movement power (finetune setting). |
| move_speed | number | config | Set movement speed (finetune setting). |
| opened_hold_power | number | config | Set opened holding power (finetune setting). |


This project is licensed under the MIT License.