Watch a video to explain what we are going to do in part 3:
Before we start the Pipeline, you may want open Rancher UI in a browser window.
Cluster Explorer view for cluster devsecops > Pods > Jenkins Namespace.
Here you will see the container creation, status and termination as things progress.
-
Open Jenkins in new browser window and login.
-
Click
Create Job

a) Enter a name first
b) Choose Pipeline and click OK.

c) Navigate to the Pipeline section on the Configure Pipeline page.
d) Click on try sample Pipeline dropdown menu and choose Declarative (Kubernetes)

e) Click Save button
- On the left menu, click
Build Nowto trigger the first jenkins pipeline.
With the first Jenkins job we are building an simple container with Ubuntu Image & deploying on Kubernetes Cluster devsecops. Once the job is completed the container will terminate.
- To view the job and it's status, click on
Statusinside the job within Jenkins UI.
Left hand bottom of UI, under Build History you will find #1 which indicates our first build job and green check mark indicates that the job has completed successfully.

- Toggle to Rancher UI Window to see the progress of Jenkins jobs.
Sample Screenshot


- Similar to your first pipeline, create the
secondpipeline. This time chooseMaven (Kubernetes)fromtry sample Pipelinepulldown menu.

- Click
Build Nowto trigger the second Jenkins pipeline.
With our 2nd job, we are building a simple Maven container.
Sample Screenshot of Jenkins Console Output & Rancher UI as reference.


You now have 2 pipelines created in Jenkins

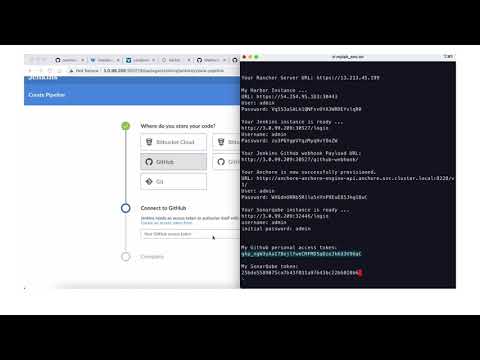
a) Click on Open Blue Ocean in the left menu
b) Click New Pipeline button
c) Choose Github, enter your Github personal access token and click Connect
d) Choose your github organization.
e) Choose your forked project spring-petclinic and click Create Pipeline to continue.
f) Click Build Now to run this pipeline.
Pipeline will take about 20+ minutes to finish.
You can view the progress in the BlueOcean Plug-in/Jenkins UI and Rancher.
Sample screenshot for reference.
Below are two screenshot for the pipeline progression where spring-petclinic app is been build using Maven and you can see the container in Rancher UI.


While the pipeline is in progress, let's move to the Part 4 - Rancher Continuous Delivery. We will come back to revisit the pipeline later.