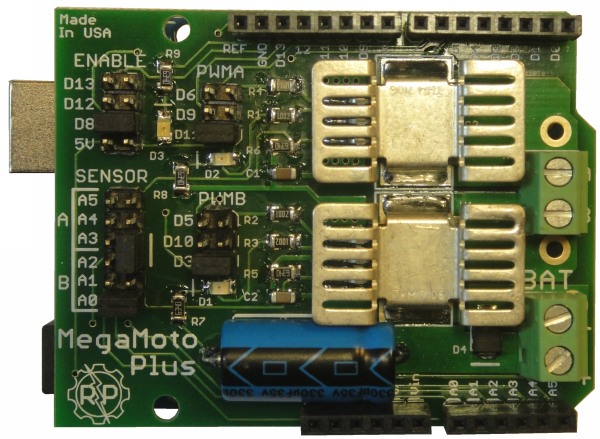
An Arduino library for interfacing with the MegaMoto family of motor controllers by Robot Power. The "MegaMogo" name is trademark of Robot Power. You can find and purchase their hardware by visiting their website: www.robotpower.com. I have been granted written permission by Robot Power to use the "MegaMoto" name in the library and associated code as long as I point people to their company name and website. I encourage you to go check out their stuff!
This is a library to (hopefully) simplify the interface with Robot Power's "MegaMoto" platform(s).
NOTE: I have currently only have access to an Arduino UNO and the MegaMoto PLUS so testing has only been performed with that setup. I cannot garuntee anything working for another configuration, although, by what I read in their documentation, it should be similar enough to be just fine. You have been warned. :-)
- Easy pin configuration. If you decided to change which pins you use for the PWM inputs or Enable control pin, simply change a few numbers when you instantiate a MegaMoto object and you're done! The library will take care of the rest for you.
- No pin hogging. Won't touch any pins it doesn't have to. (Example: You chose to set the MegaMoto Enable to a constant 5V, if you use the correct class constructor, the code won't attempt to use the Enable pin.
- Motor friendly. Can "ramp" the motor speed instead of abruptly changing from, say, forward to reverse. This is much nicer to the motor you are controlling and (tries) to avoide unneeded wear and tear on your hardware.
- Industrial motor ready. I've been testing this with an industrial-grade motor roller (sometimes called a "moller").
- Understands your hardware config. While it may not be completely developed just yet, I have tried to lay down the foundations for the library to handle your specific hardware wiring. Whether it be the I/O pin configuration on the Arduino side, or the H-bridge vs. half-bridge motor/device wiring hookup on the MegaMoto output pins, the library allows you to tell it what you've got and it (should) be able to act accordingly. (Take this "feature" with a grain of salt. Like I said, things are still under development.)
[X] = Working feature. I've tested it with my hardware setup and it seems to work great.
[ ] = Planned feature. I might have a few lines in the code relating to this concept, but it's either not working yet or I don't have a way of testing it.
[X] Configurable PWMA / PWMB pin assignments
[X] Configurable Enable pin assignment (If no Enable pin is provided, it won't attempt to use Enable at all!)
[X] Handles the H-bridge hardware configuration
[ ] Handles the half-bridge hardware configuration
[X] Ramps motor up/down from current speed to the new speed
[X] Immediate stop/off. If there is some safety-crtical setting, you can shut down your device immediatly without ramping down first.
[ ] Current sense reporting. Reads the voltage from the current sense output on the MegaMoto and converts it to milliamps (mA) and returns the milliamp value as an integer.
[ ] Synchronous current sensor measurement for RMS and peak current readings
[ ] Current limiting via PWM compression
It is assumed that you have already read or understand the options provided by the MegaMoto hardware. You should know how you want to physically configure the controller and wire up your device. I don't want to repeat any of their documentation. It was very well written. So, if you have not yet read the MegaMoto User Guide, please do so. Links are provided in the "Useful Links" section at the bottom of this page.
- Download this library and unzip in your Arduino/libraries folder.
- Download the latest .ZIP file
- See these instructions to add the library to your Arduino IDE installation
- Choose the appropariate class to use
- H-bridge wiring on MegaMoto output =
#include <MegaMotoHB.h> - Half-bridge wiring on output =
#include <MegaMotoHalfB.h>
- H-bridge wiring on MegaMoto output =
- Delcare a motor object and specify the PWM A and PWM B pins you chose to use.
- Call one of the motion functions, like
::Fwd(),::Rev()to start up your device
ATTN: The /examples folder has been created for a reason! It might be a lot easier to see how to get started by checking out the example projects.
For more information about how to use this library, plese visit the /doc folder of this repository (or your downloaded .ZIP file.
- Robot Power website: http://www.robotpower.com/
- MegaMoto info page: http://www.robotpower.com/products/MegaMoto_info.html
- MegaMoto Plus info page: http://www.robotpower.com/products/MegaMotoPlus_info.html
- MegaMoto and MegaMoto Plus User's guide: http://www.robotpower.com/downloads/MegaMoto-user-manual.pdf
- MegaMoto and MegaMoto Plus schematic: http://www.robotpower.com/downloads/MegaMoto-v1.5-schematic.pdf
