-
Notifications
You must be signed in to change notification settings - Fork 14
Admin & Data Management
Susan Paykin edited this page Jun 14, 2022
·
2 revisions
A guide to updating and managing the OEPS Data Warehouse & Explorer App.
- Make sure to install Github or Git, and Nodejs
- After installing node, install yarn using
npm i -g yarn - Clone this repository to your computer using git clone https://github.com/GeoDaCenter/opioid-policy-scan.git
- In your terminal from this directory, run
yarn. This will install the packages needed to use this repository - Again in your terminal, run yarn dev to begin development. Your terminal will give you a local website URL to view the development version of the site. Usually, this is
localhost:3000. Enter this in your browser to see the site. - Open your code editor of choice like Visual Studio Code and begin making changes.
- When you are happy with your edits, commit and push your changes to Github. This will trigger the deploy process and your changes should go live momentarily.
- If you’re adding a new dataset or updating an existing database, follow the instructions and data standards outlined in the OEPS Wiki for open source contributions.
- If someone else has added data, review their pull request contribution for accuracy and consistency. When it’s ready, merge in their changes, and go to the next step.
- Update the main Data Overview table in the README file with the new dataset/variable information, following the existing table and variable construct format.
- Check, comment, or close any issues related to that dataset.
Make sure you’re working in the explorer branch of the repo to make edits or updates to the OEPS Explorer Site.
- Copy and add the new data csv files to the
public/csvfolder - Save your changes.
- In the
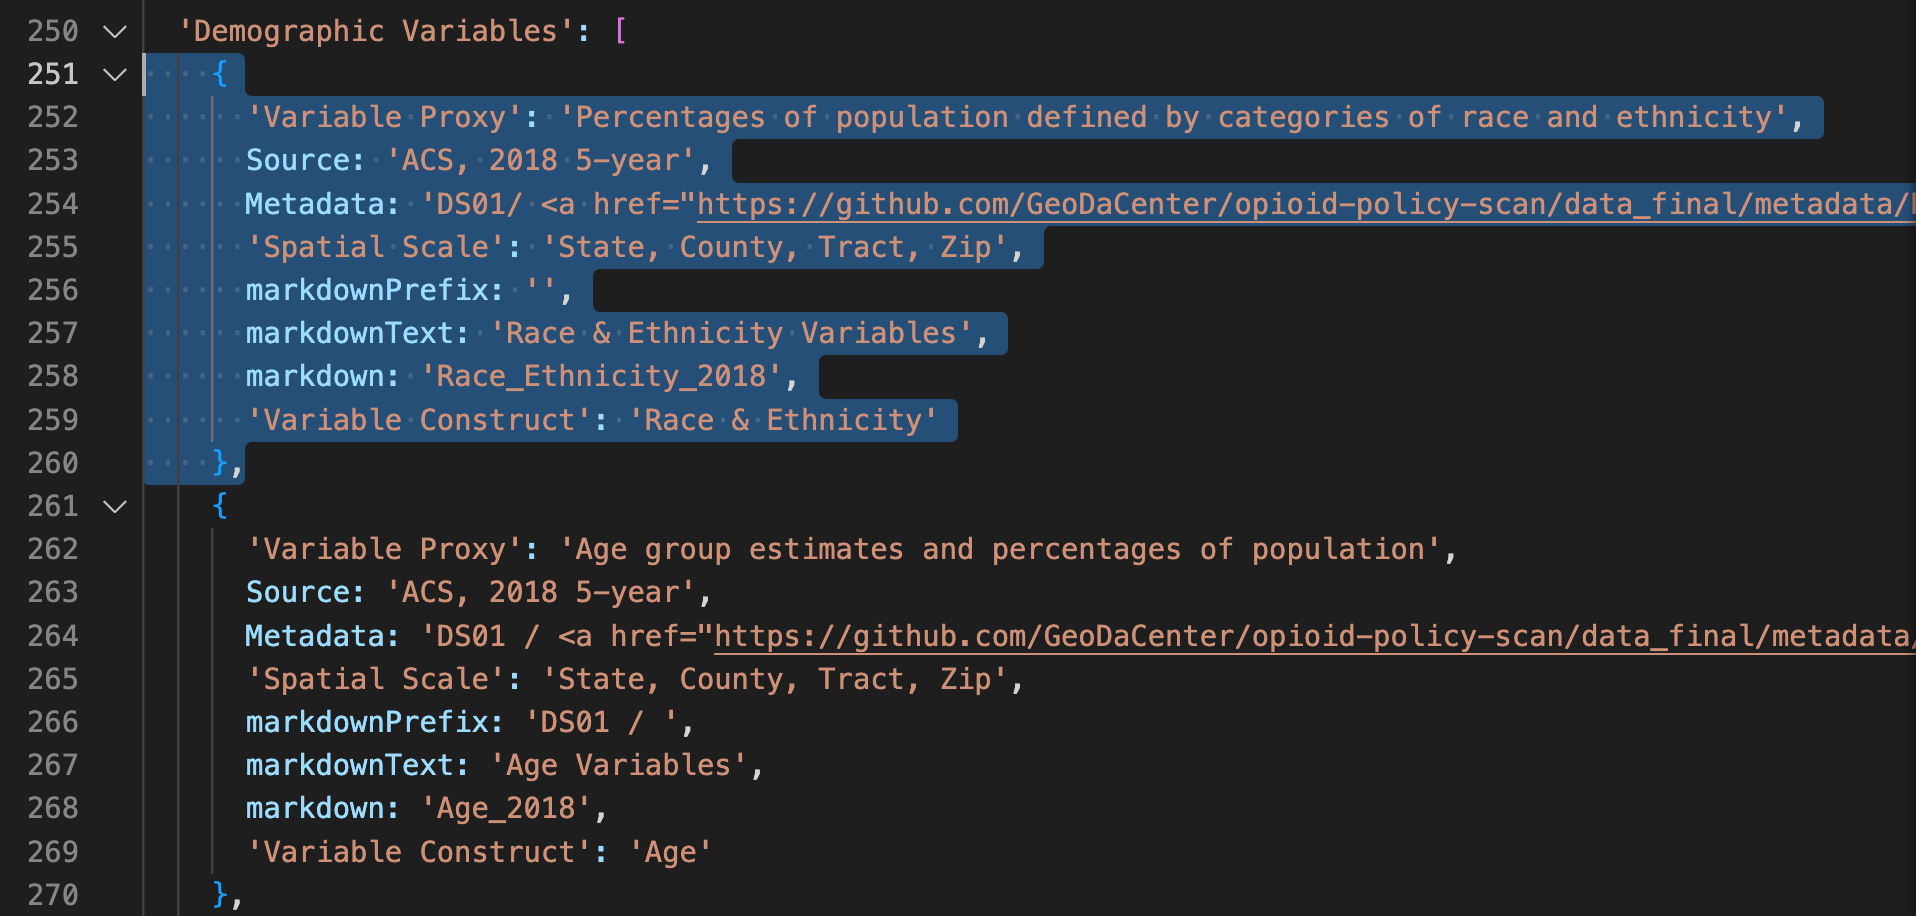
explorerbranch, open the filemeta/variables.js - Navigate to the correct theme, such as Policy Variables, Demographic Variables, etc.
- Copy the 10-line code chunk template:

- Paste it below in the order you want it to appear in the Docs page. Delete the previously populated information and fill in the new information for your new dataset (i.e. Variable Proxy, Source, Metadata, markdownText, etc.
- Save your changes.
- In the
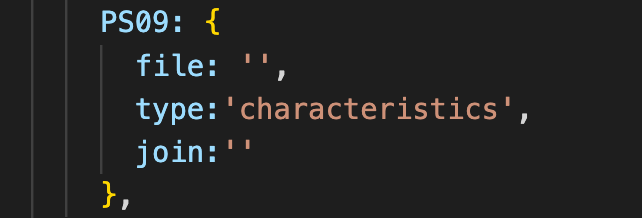
explorerbranch, open the filemap-config.js - Add your data to the corresponding geography, starting at line 6:
const data = [.

- The options are
‘US States’,‘US Counties’,‘US Zip Codes’, and ‘US Tracts’. Add your data to the correct geographies. For example, if you have PS09_S.csv and PS09_C.csv, you will addPS09: { }to the US states and US counties geographies section. - Fill in
file: ‘’ , type: ‘characteristics’,andjoin: ‘’. - Make sure you are using the correct join variable (states = STATEFP, counties = COUNTYFP, zip codes = ZCTA, tracts = GEOID). Make sure this is also labeled correctly in your csv data file. This facilitates the merge with spatial geometries for mapping.
-
Next, open the file
config/variables.csvwith your preferred text editor, such as Excel, Numbers, or Visual Studio Code. -
Edit this csv file to add new variables to the map:
- Variable name
- Theme
- Subtheme (optional)
- data table
- data column (variable name in .csv)
- categorical (optional; TRUE or FALSE; default = FALSE)
- fixed binning scale (optional; set fixed binning, default = FALSE)
- Binning strategy (naturalBreaks, quantileBreaks, custom)
- Number of bins
- Color scale (colorbrewer)
- Reverse color scale (optional; default = FALSE)
- Save your changes.