Computer Vision library for FTC based on OpenCV, featuring beacon color and position detection, as well as an easy-to-use VisionOpMode format and many additional detection features planned in the future.
- Clone FTCVision into a clean directory (outside your robot controller app) using the following command:
git clone --depth=1 https://github.com/lasarobotics/ftcvision. - Navigate to the FTCVision directory that you just cloned and copy the
ftc-visionlibandopencv-javafolders into your existing robot controller app. - Open your robot controller app in Android Studio. Make sure you have the
Projectmode selected in the project browser window (so you can see all of the files in your project). - Find your
settings.gradlefile and append the following two lines:
include ':opencv-java'
include ':ftc-visionlib'
- Find the
AndroidManifest.xmlfile in your app'sFTCRobotController/src/mainfolder. - Insert the following
uses-permissiontag inAndroidManifest.xmljust below the<mainfest ...>tag and just before theapplicationtag:
<uses-permission android:name="android.permission.CAMERA" android:required="true" />
- Find the
FTCRobotController/build.release.gradleANDTeamCode/build.release.gradlefiles and insert the following lines underdependenciesinto both files:
compile project(':ftc-visionlib')
compile project(':opencv-java')
- Update Gradle configuration by pressing the green "Sync Project with Gradle Files" button in the header (this may take a minute)
- Copy in Vision opmodes (those that end in
VisionSample.java, located in[vision-root]/ftc-robotcontroller/src/main/java/com/qualcomm/ftcrobotcontroller/opmodes) from the FTCVision directory into a folder within theTeamCodedirectory (where your place any other opmode). - Before running the app for the first time, install the "OpenCV Manager" from the Google Play Store to enable Vision processing.
- Run and test the code! Let us know if you encounter any difficulties. Note: depending on your version of the FIRST app, you may need to modify the OpModes slightly (such as adding
@Autonomous) in order to get them to work for your version of the SDK. - You can now write your custom
VisionOpMode! - (Optional) Add Vision testing app (see pictures of it below!) by copying all files from
ftc-cameratestinto the root of your project. Then, addinclude ':ftc-cameratest'to yoursettings.gradlein the root of your project. To run the camera test app, click the green "Sync Project with Gradle Files" button to update your project, then selectftc-cameratestfrom the dropdown next to the run button.
When installing via Git submodule, every person cloning your repo will need to run git submodule init and git subomodule update for every new clone. However, you also get the advantage of not copying all the files yourself and you can update the project to the latest version easily by navigating inside the ftc-vision folder then running git pull.
- Inside the root of your project directory, run
git submodule init
git submodule add https://github.com/lasarobotics/ftcvision ftc-vision
- Follow the guide "Installing into Existing Project" starting from the third bullet point. Please note that since everything will be in the
ftc-visionfolder and thus directories will need to be modified. Once you get to the step that modifiessettings.gradle, add the following lines:
project(':opencv-java').projectDir = new File('ftc-vision/opencv-java')
project(':ftc-visionlib').projectDir = new File('ftc-vision/ftc-visionlib')
project(':ftc-cameratest').projectDir = new File('ftc-vision/ftc-cameratest') <- only if you want to enable the camera testing app
- You can now write your custom
VisionOpMode!
- Clone FTCVision into a clean directory (outside your robot controller app) using the following command:
git clone --depth=1 https://github.com/lasarobotics/ftcvision. - Open the FTCVision project using Android Studio
- Copy your OpModes from your robot controller directory into the appropriate directory within
ftc-robotcontroller. Then, modify theFtcOpModeRegisterappropriately to add your custom OpModes. - Before running the app for the first time, install the "OpenCV Manager" from the Google Play Store to enable Vision processing.
- Run and test the code! Let us know if you encounter any difficulties.
- You can now write your own
VisionOpMode!
This library is complete as of World Championship 2016. If you have any questions or would like to help, send a note to smo-key (contact info on profile) or open an issue. Thank you!
Documentation for the stable library is available at http://ftcvision.lasarobotics.org.
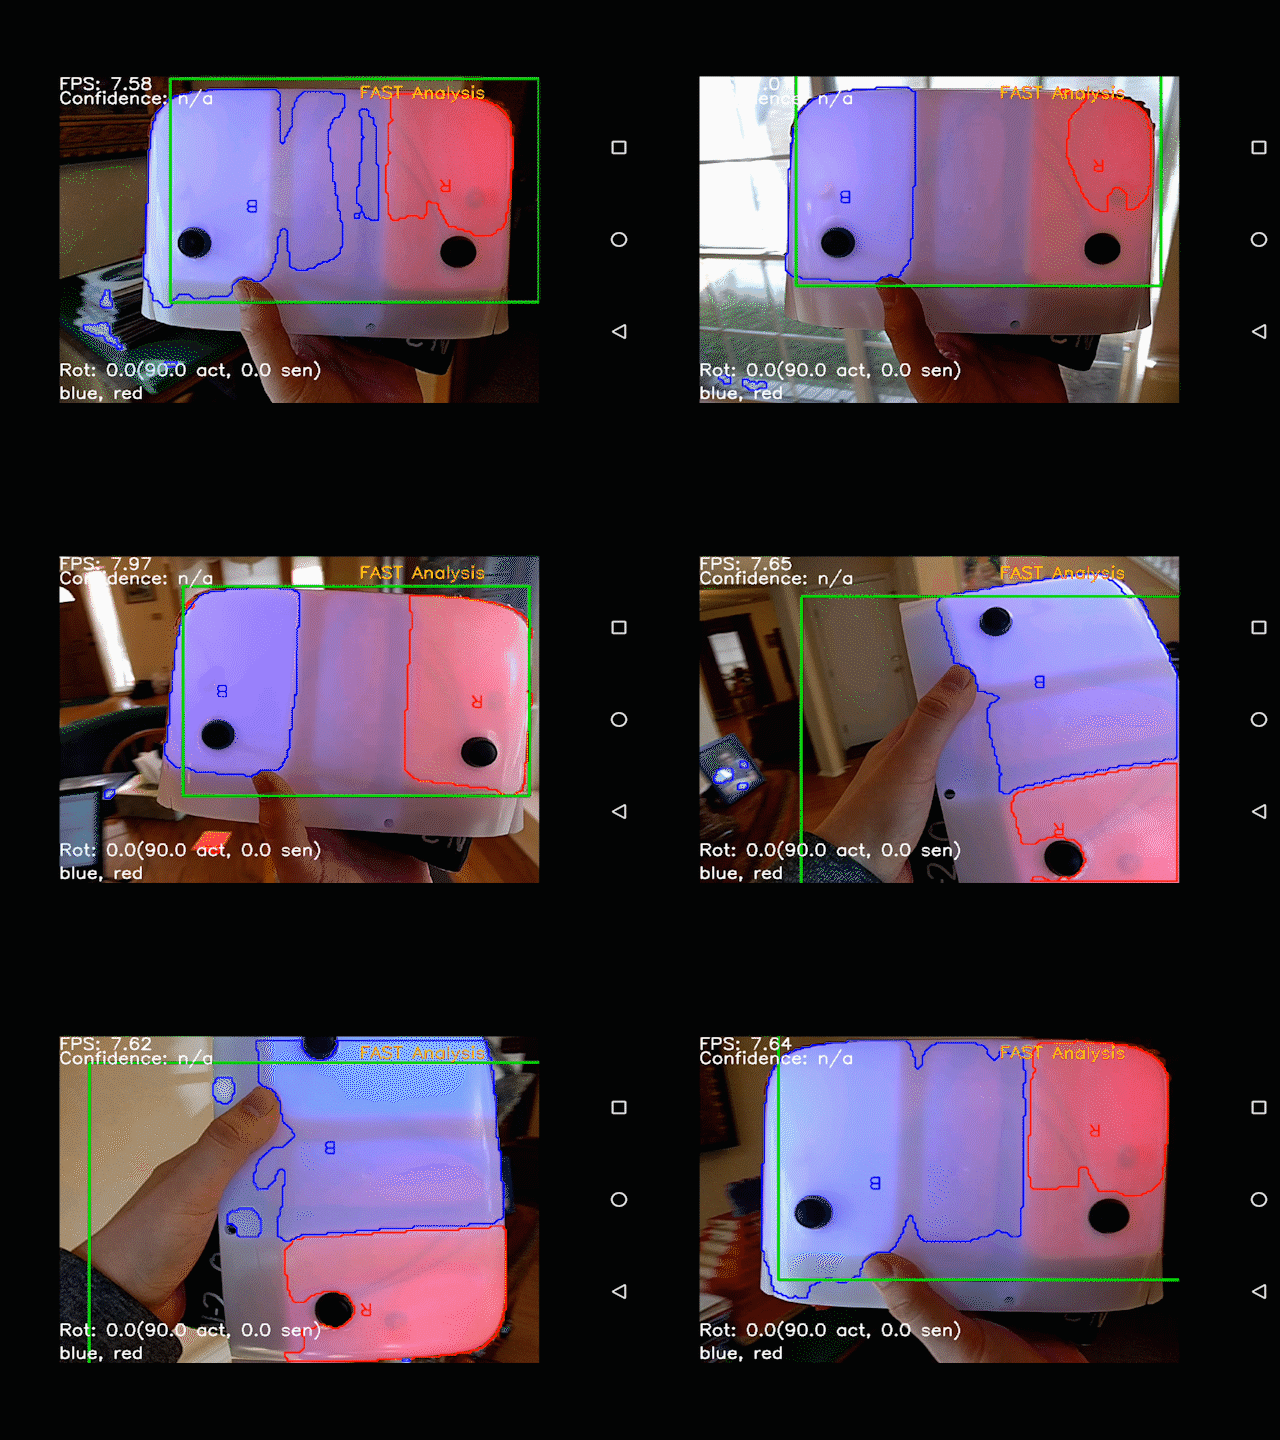
Yes! FTCVision can detect a beacon 0.5-4 feet away with 90% accuracy in 0.2 seconds. Here are some pictures. 😃
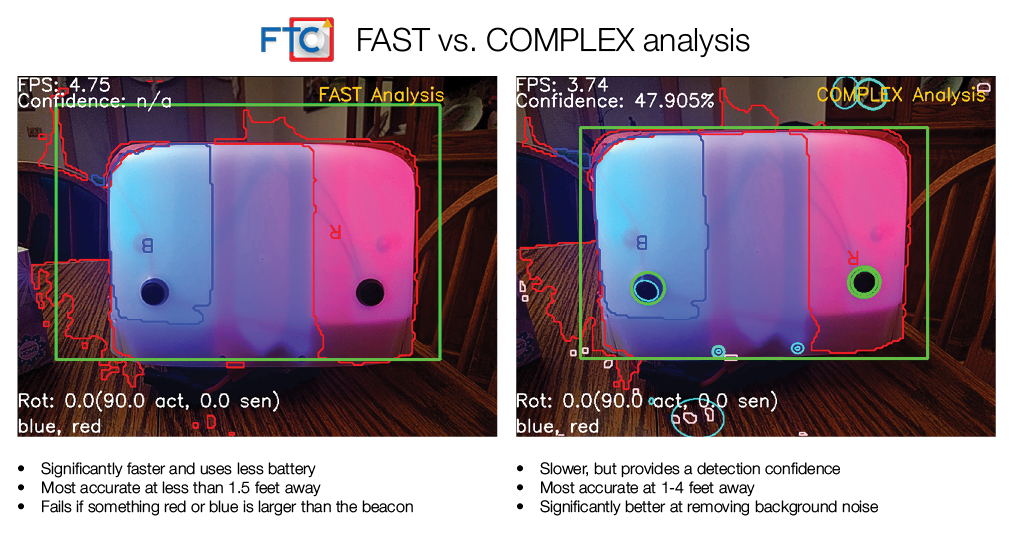
- The FAST method analyzes frames at around 5 FPS. It looks for the primary colors in the image and correlates these to locate a beacon.
- The COMPLEX method analyzes frames at around 2-4 FPS. It uses statistical analysis to determine the beacon's location.
- Additionally, a REALTIME method exists that retrieves frames and analyzes them as fast as possible (up to 15 FPS).
- To make it easy for teams to use the power of OpenCV on the Android platform
- Locate the lit target (the thing with two buttons) within the camera viewfield
- Move the robot to the lit target, while identifying the color status of the target
- Locate the button of the target color and activate it
- Beacon located successfully with automated environmental and orientation tuning.
- A competition-proof
OpModescheme created so that the robot controller does not need to be modified to use the app. - Now supports nearly every phone since Android 4.2, including both the ZTE Speed and Moto G.

-blue.svg)


